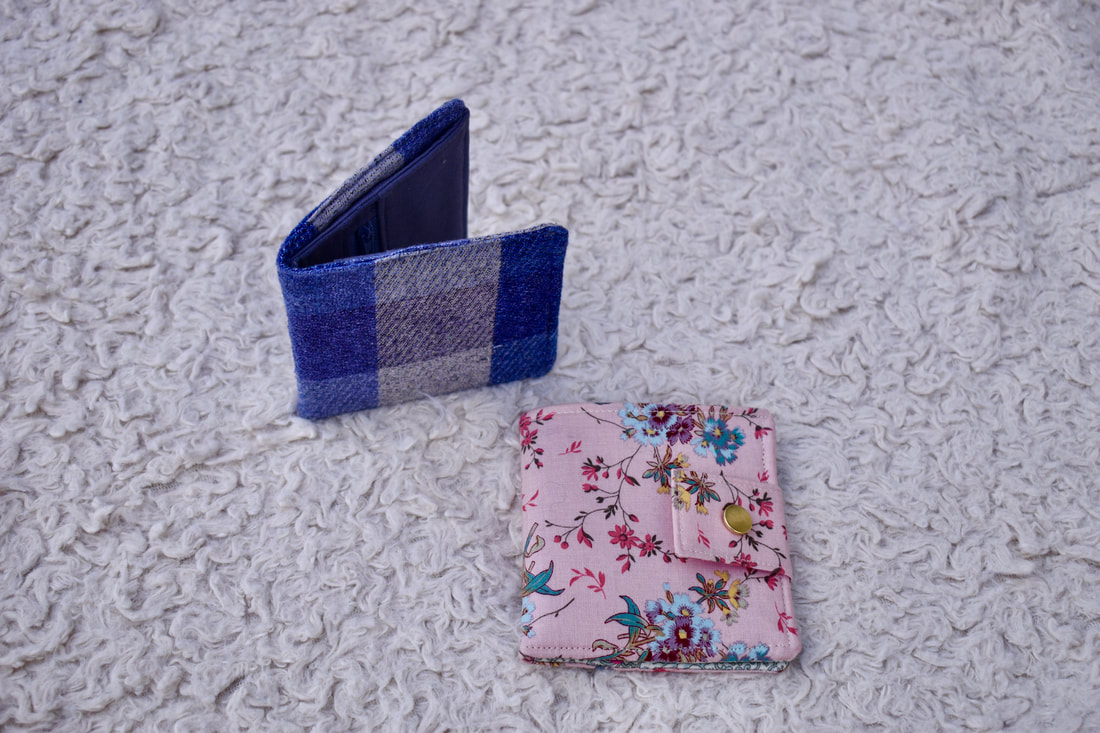
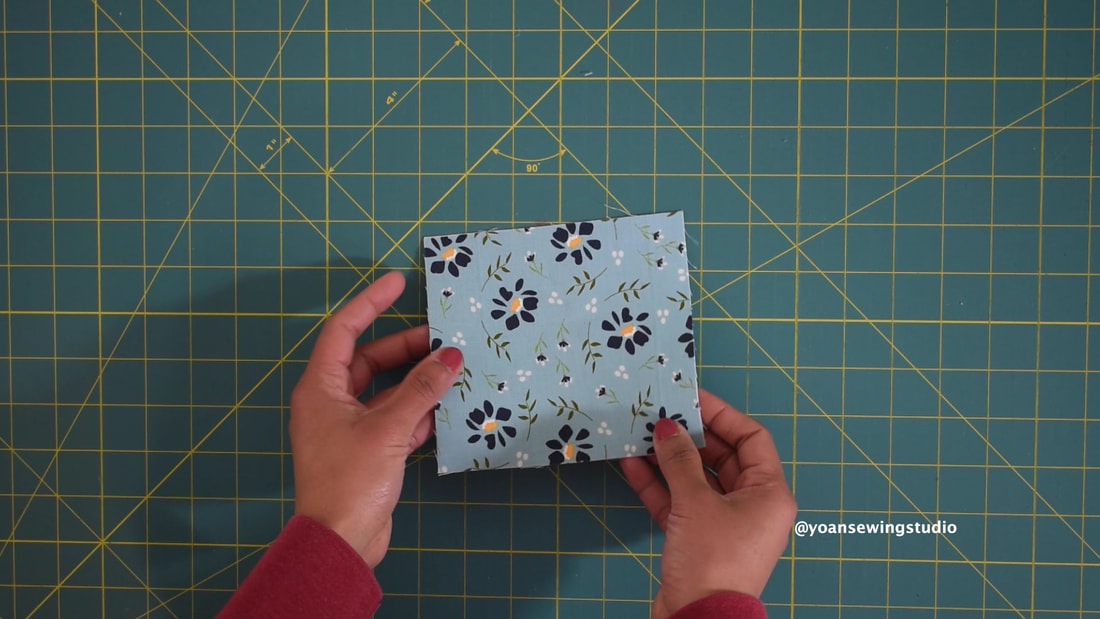
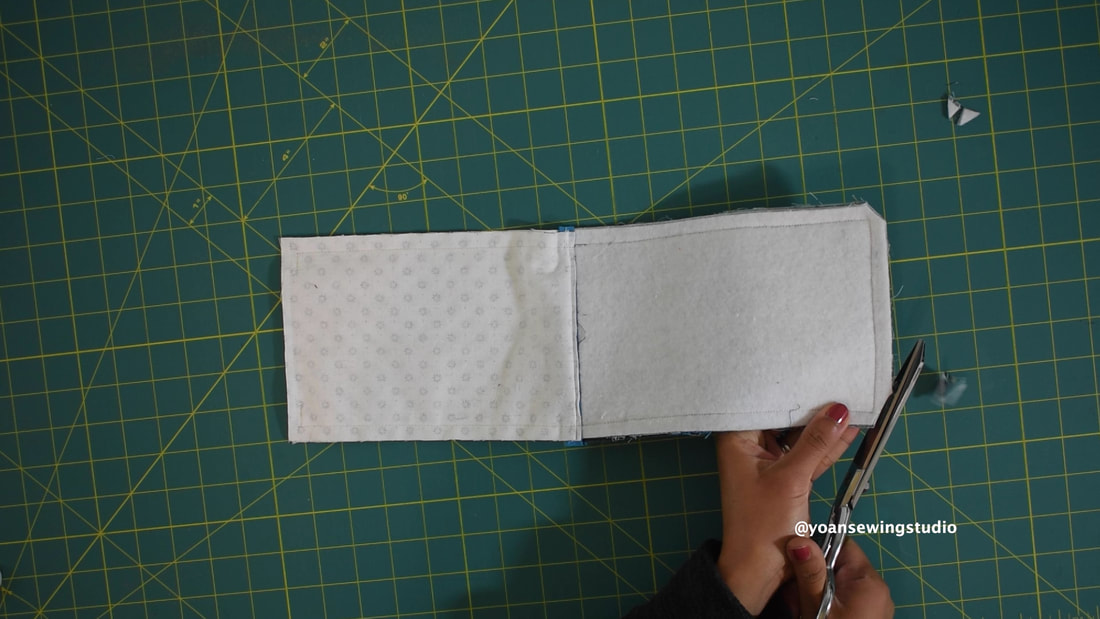
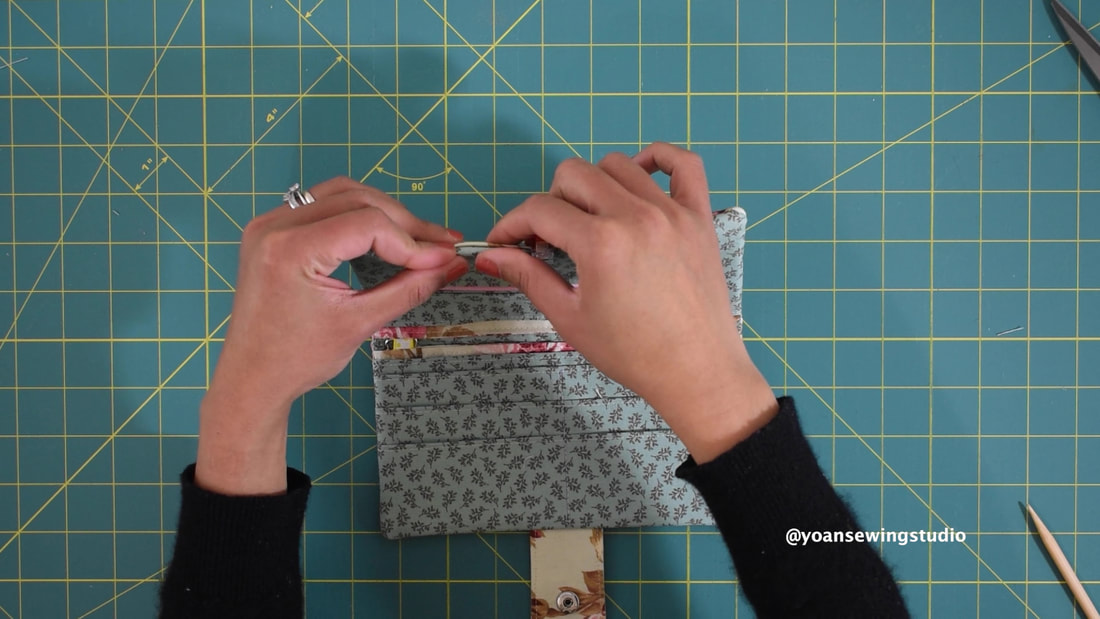
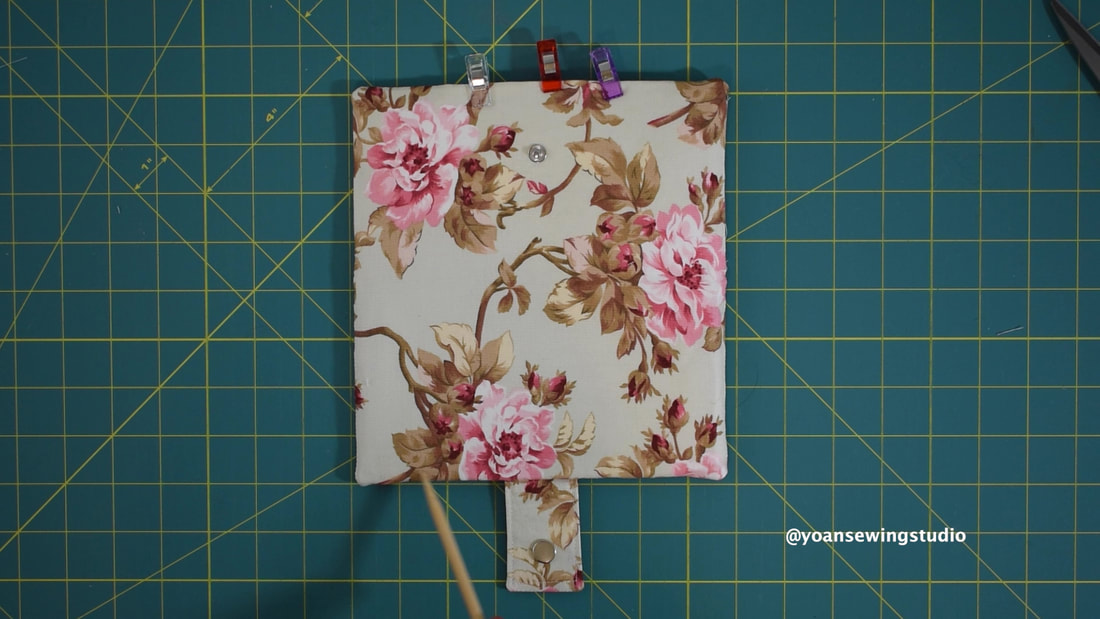
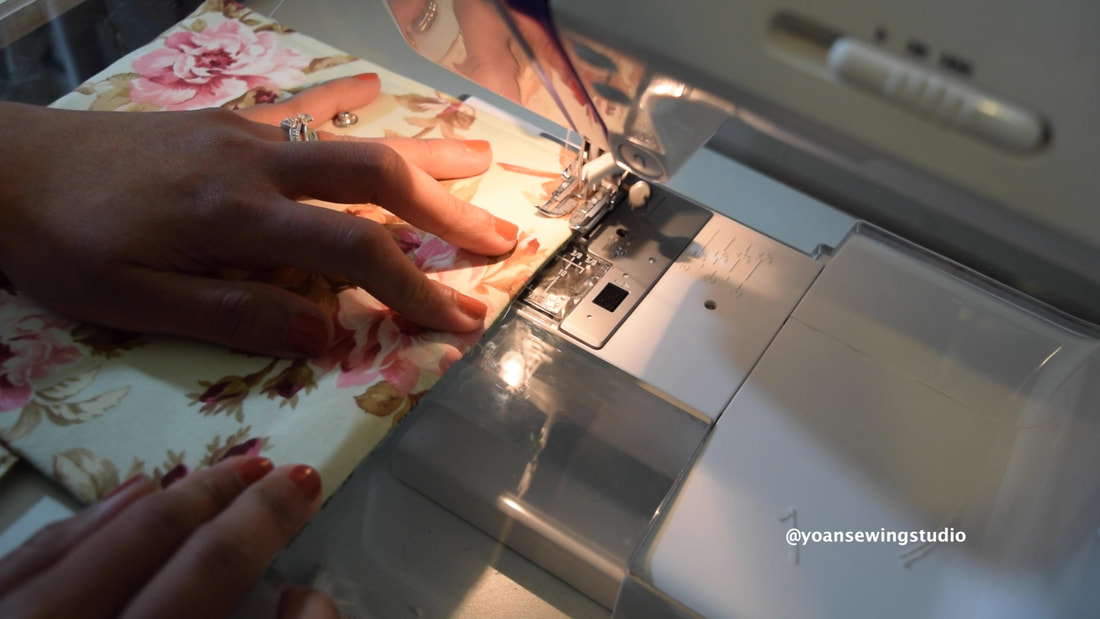
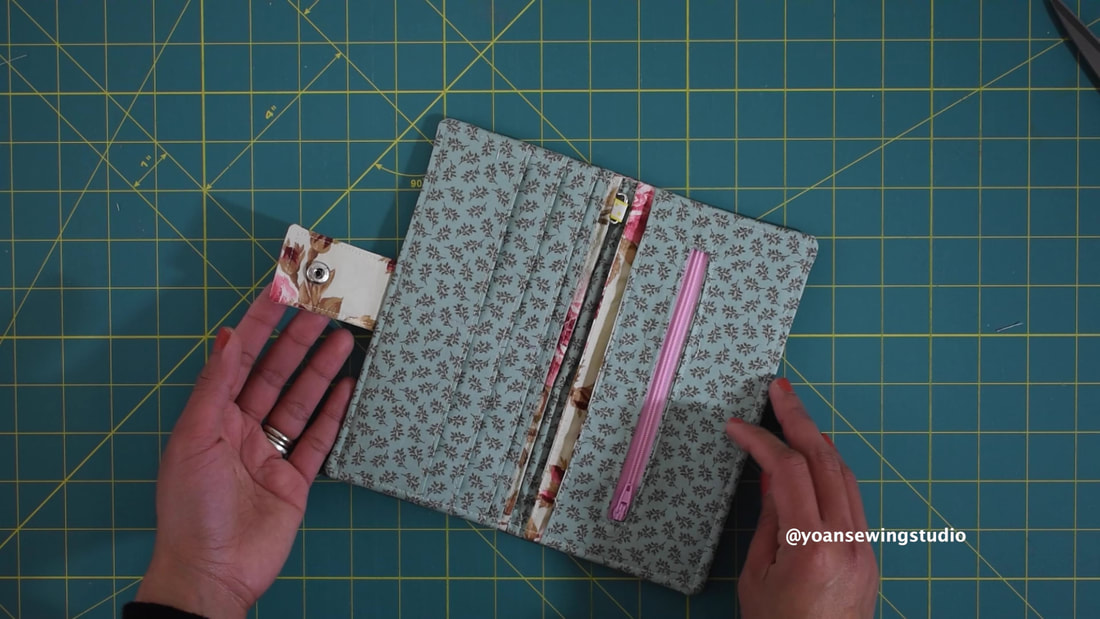
 Small bifold wallet project by Yoan Sewing Studio Here's a lovely little wallet project for you to sew. This small bifold wallet, is a basic, minimalistic wallet, yet very functional with enough compartments to keep your cash, cards, some coins, parking ticket, etc. I created men's version and women's version for the fun of it. The constructions are literally the same, only differences are the fabric choice, and the additional button flap closure for the women's version. Although both designs are quite unisex, so choose as you please :). Finished wallet measurements 4" x 4" (10.2 x 10.2 cm) Features : 3 card slots 1 zipper Pocket 1 cash slot 2 additional compartments Button flap closure (if opt one) Hope you enjoy this project. Happy Sewing!
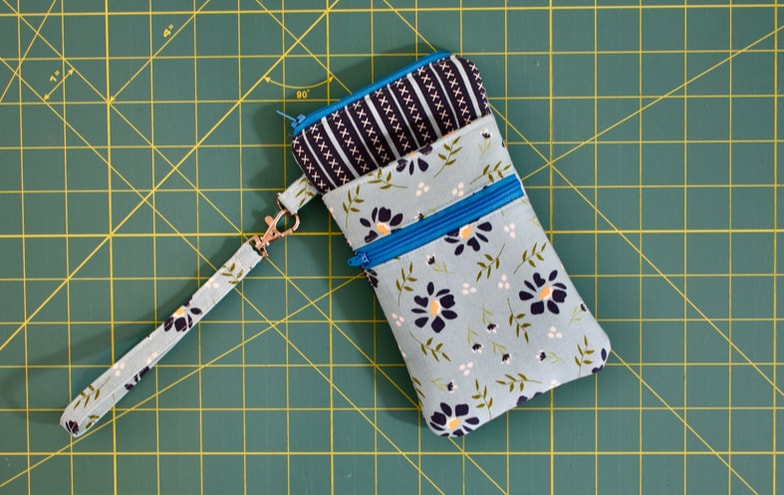
Cellphone wristlet with pockets by Yoan Sewing Studio
This cellphone wristlet is a cute yet functional little pouch for you to make. Great to take with you for errands, out for a walk, coffee date, pretty much anywhere you wish to go without having to take an entire purse with you.
Features : Zipper Closure Front zipper pocket Front Slip Pocket Wristlet Strap The finished measurements of this pouch are approximately 4.5" x 8" , the zipper closure opening measures 4" wide, I can fit my iPhone XR (with chunky casing that makes the phone bigger) with a little extra room. This pouch should fit most smartphones (except of the super large ones) - if needed, you can increase the width measurement to suit yours.
You may watch the full video tutorial on my Youtube channel.
Let's Get Started!
Supplies
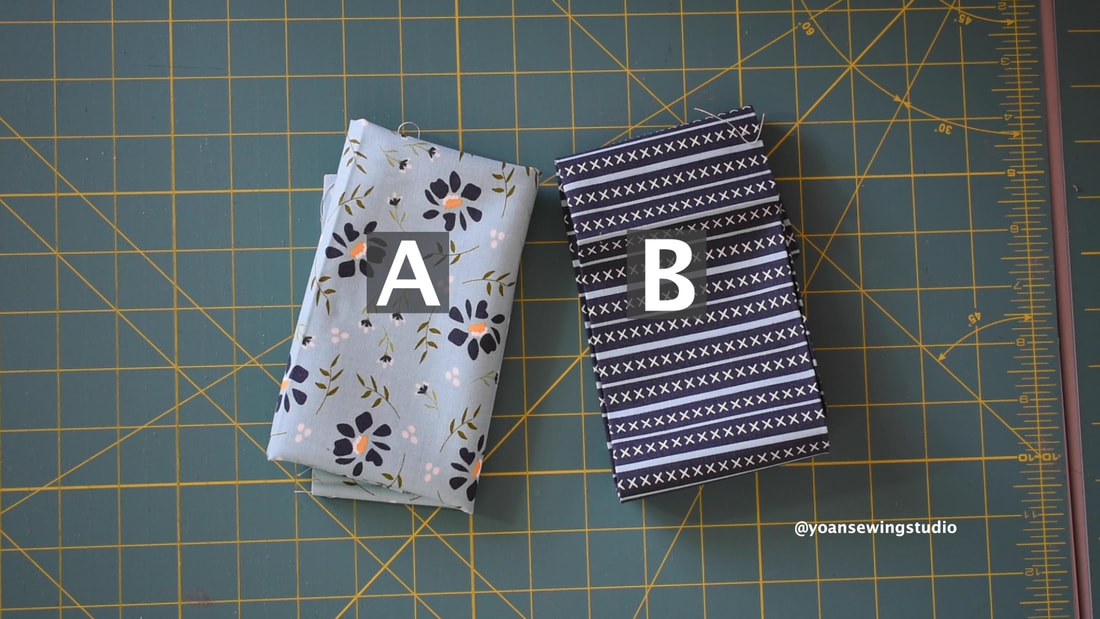
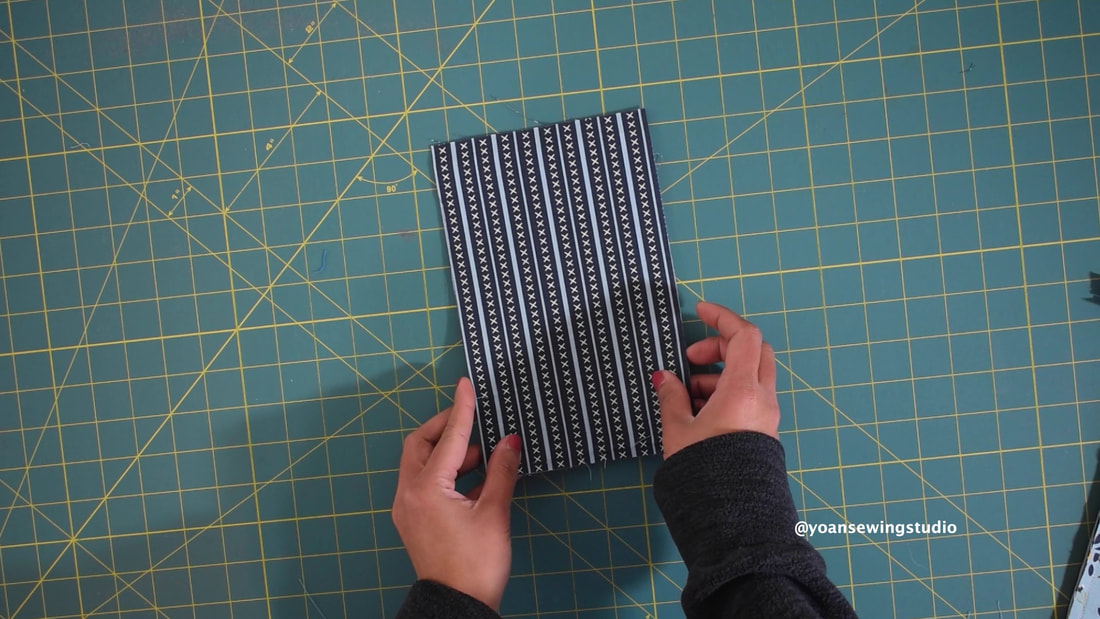
2x Fat eight, or use any fabric that you might have in your stash (Fabric A,B)
Fusible fleece (thermolam) 16" x 5.5"
Fusible woven interfacing 5" x 19" Lining fabric 5.5" x 17" 2x all purpose zipper 1" wide (at least 6" long) 1/2" d-ring 1/2" swivel hook Basic sewing notions Disclaimer: This post contains Amazon affiliate links. Thank you for your support! cutting
~Front and back exterior~
From Fabric B : 5.5" x 8.5" (cut 2x) From Fusible Fleece : 5.5" x 8" (cut 2x)
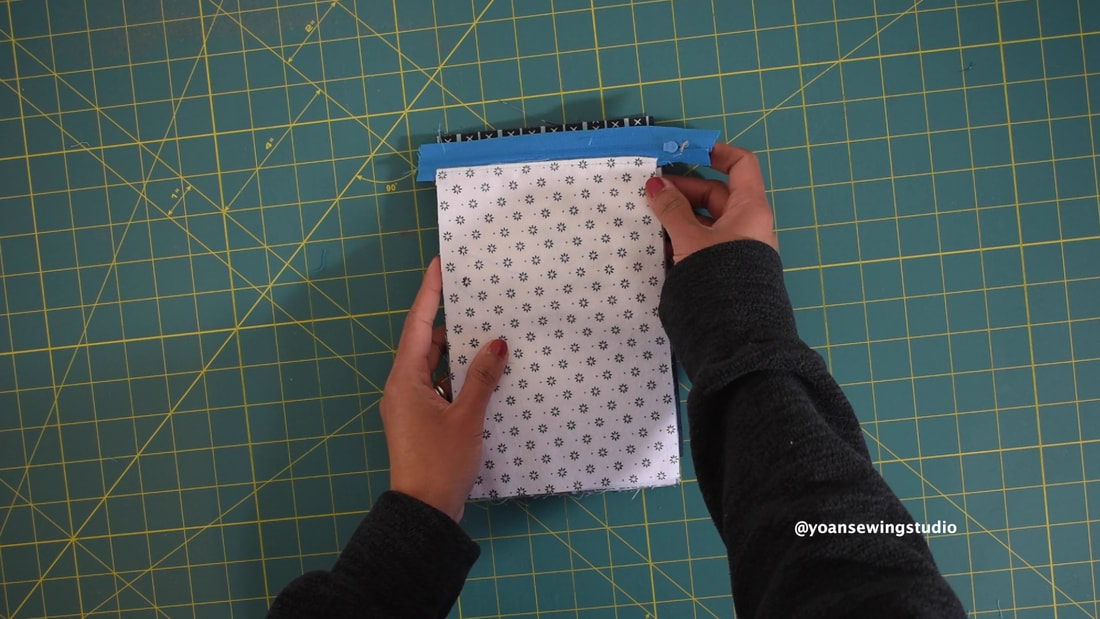
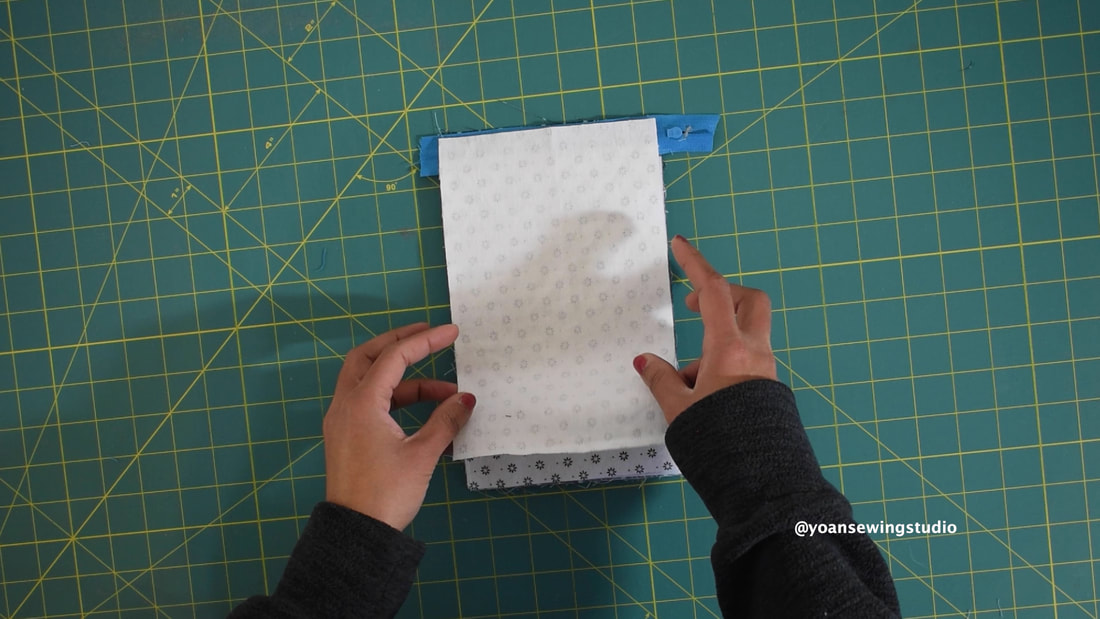
~Front Zipper & Slip Pockets~
Cut From Fabric A Panel 1 : 5.5" x 2" (cut 1x) Panel 2 & 3 : 5.5" x 5" (cut 1x each) Panel 4 & 5 : 5.5" x 7" (cut 1x each) 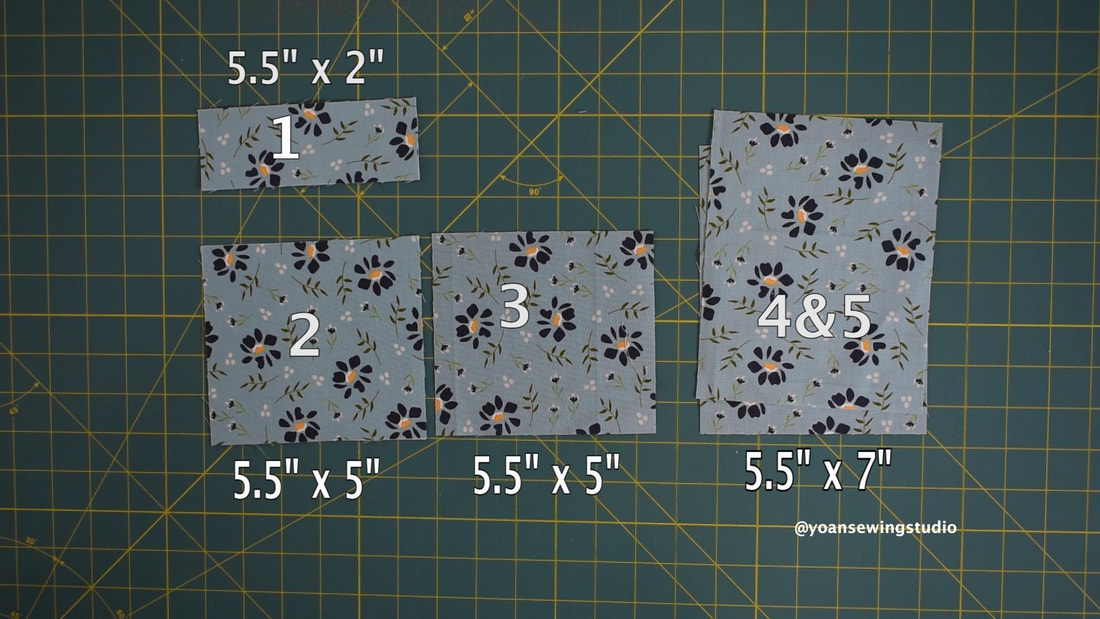
From Fusible woven interfacing
For Panel 1 : 5.5" x 2" For Panel 2 : 5.5" x 5" ~Lining~ From lining fabric 5.5" x 8.5" (cut 2x) ~Strap anchor tab~ From fabric A : 2.5" x 2" (cut 1x) ~Wristlet strap~ From fabric A : 13" x 2" (cut 1x) From fusible woven interfacing : 12" x 1" (cut 1x) directions
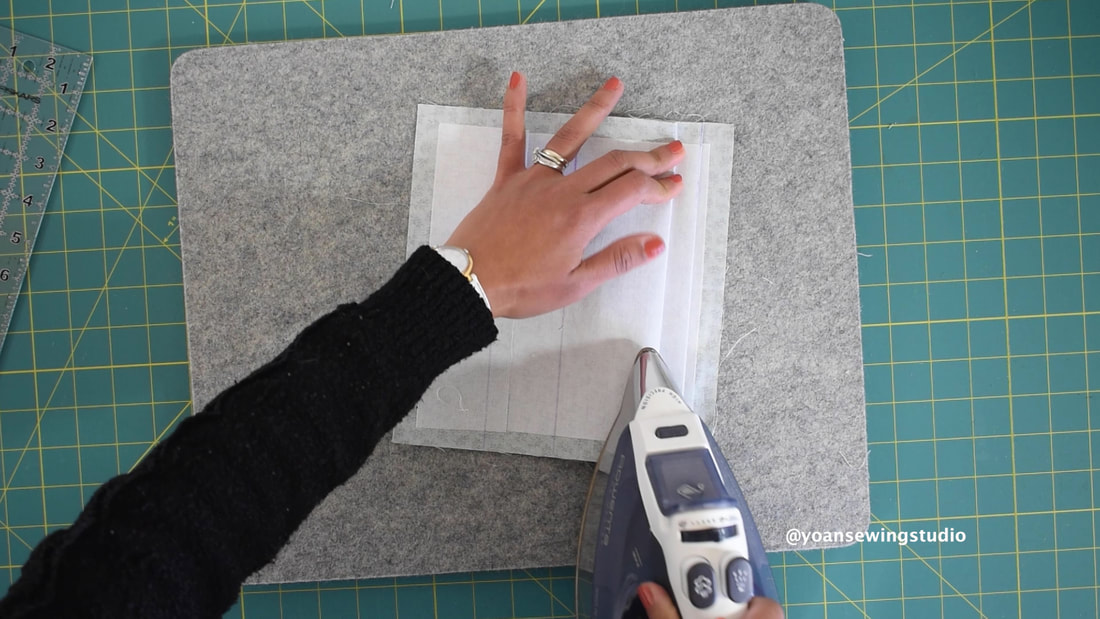
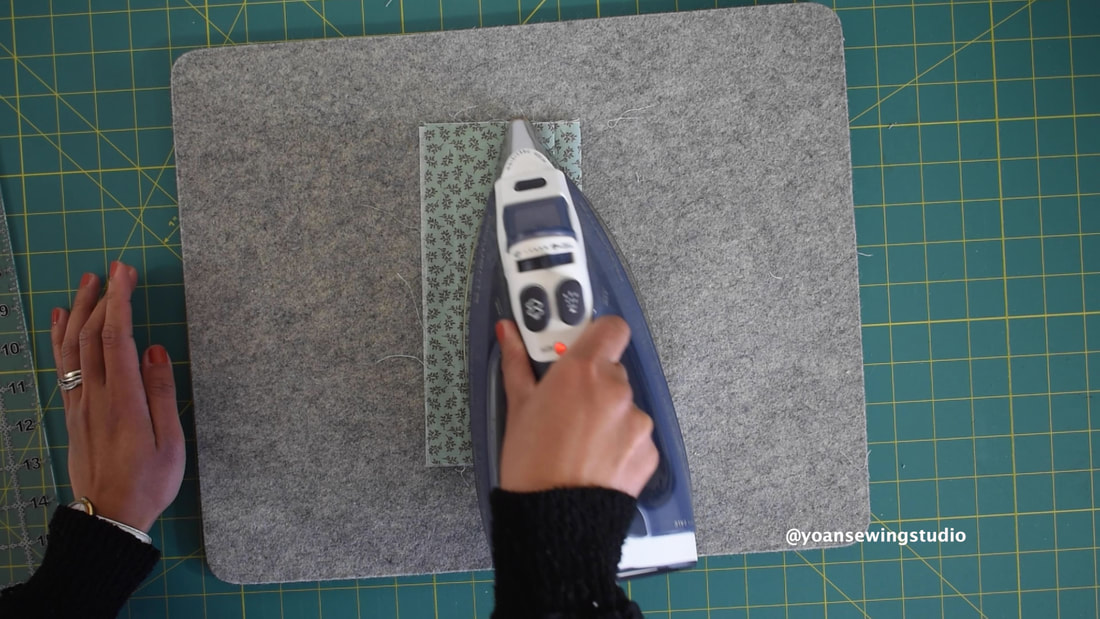
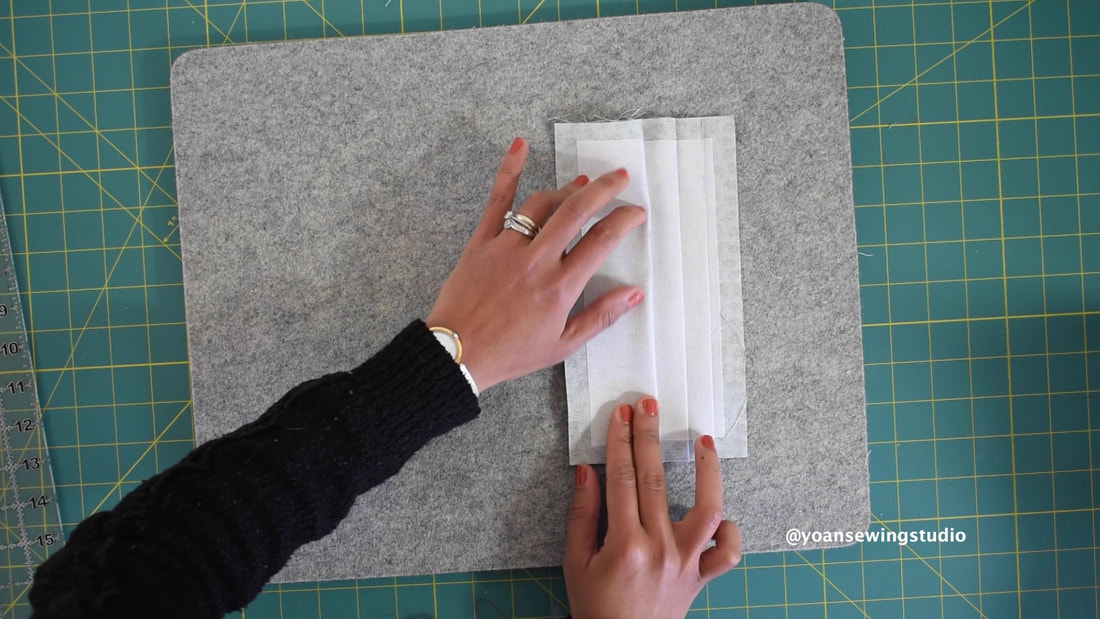
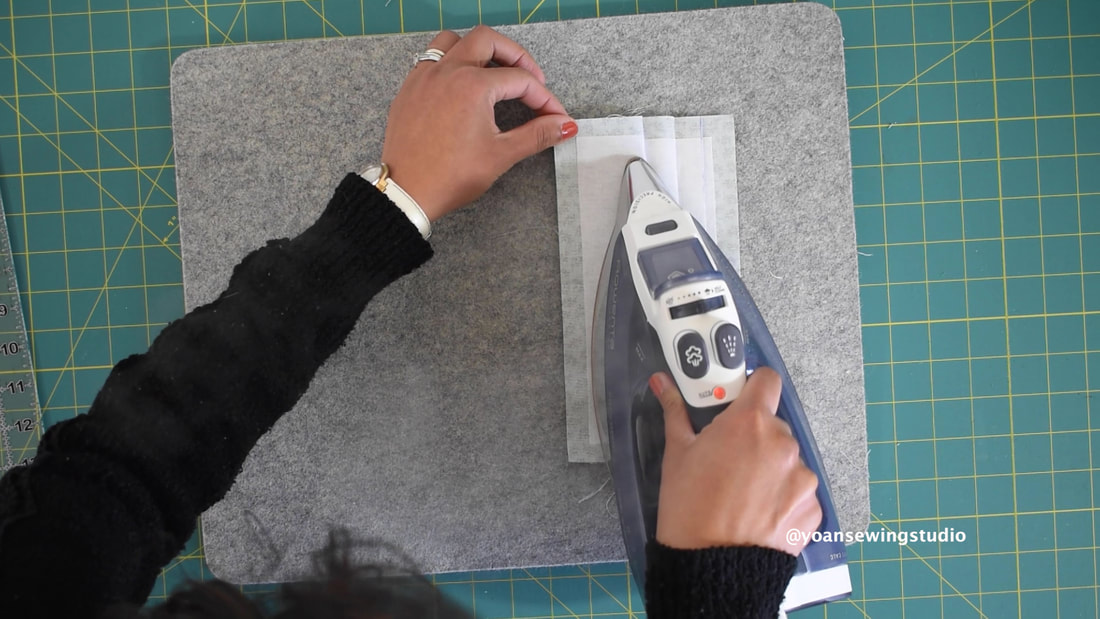
1. Apply Fusible Fleece on the wrong side of the exterior pieces.
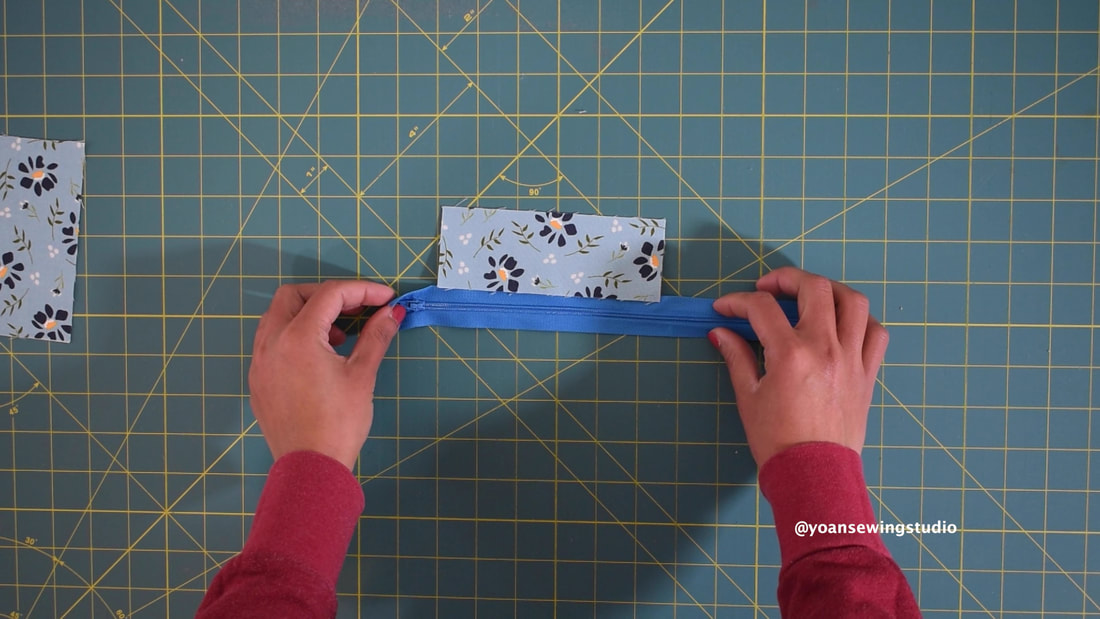
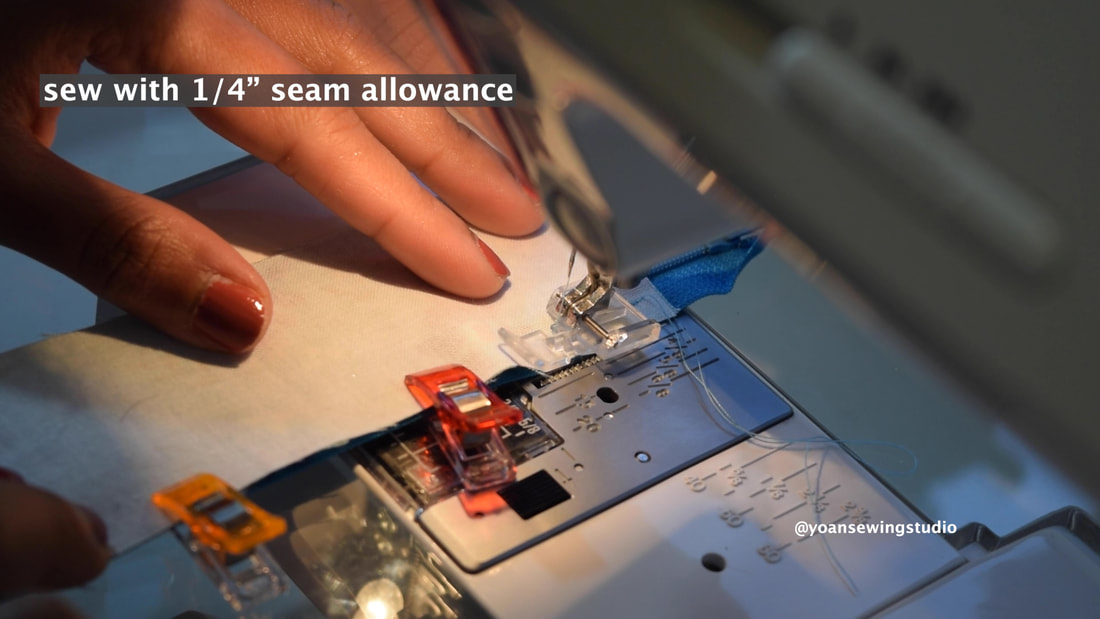
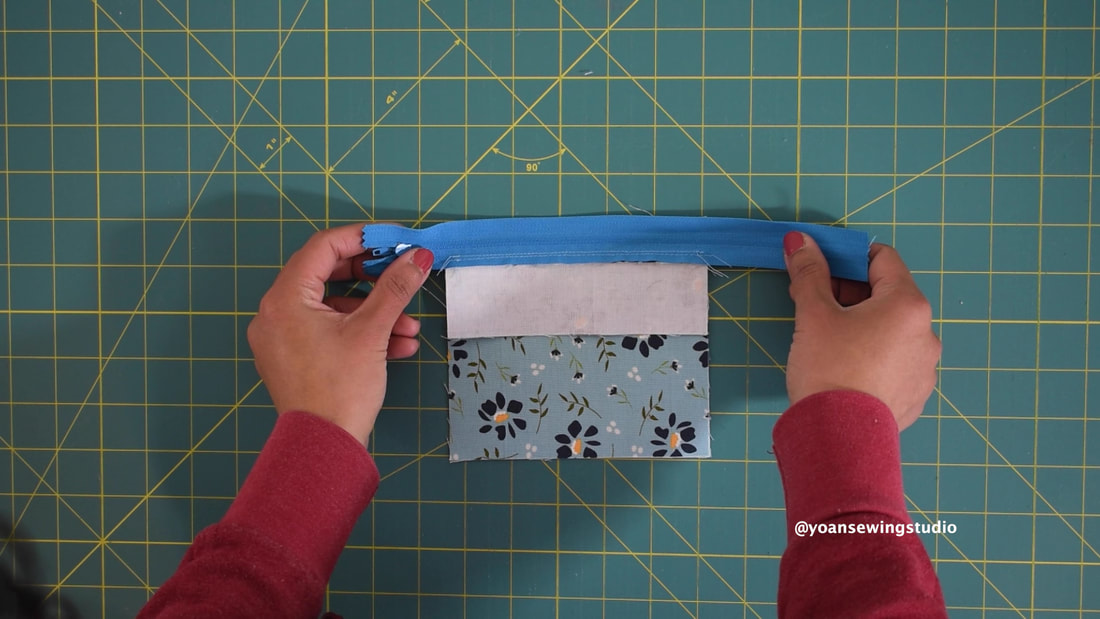
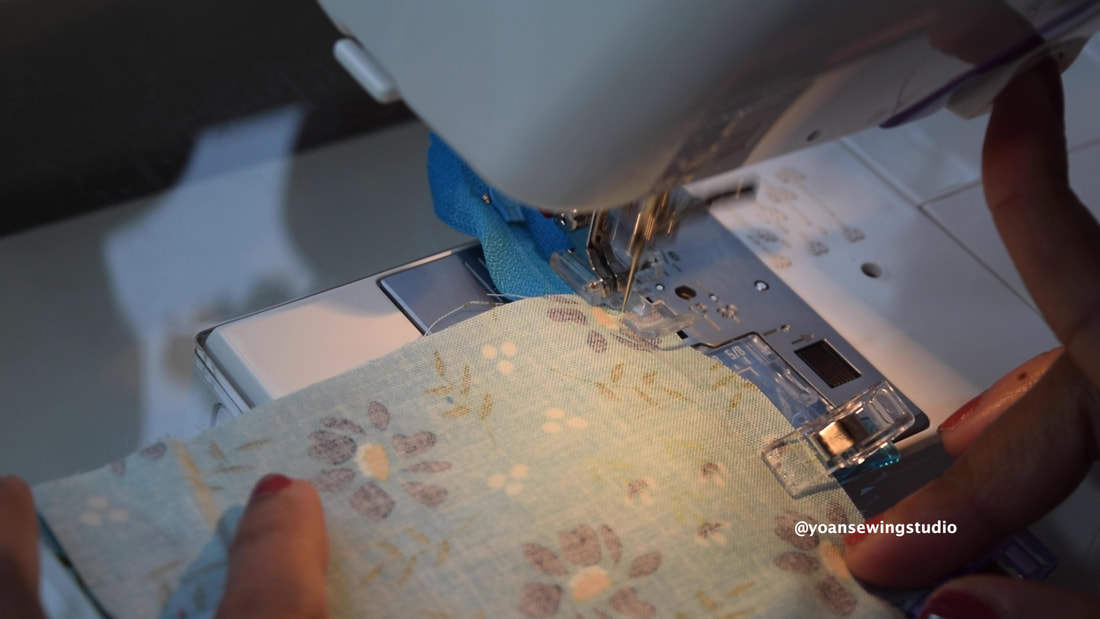
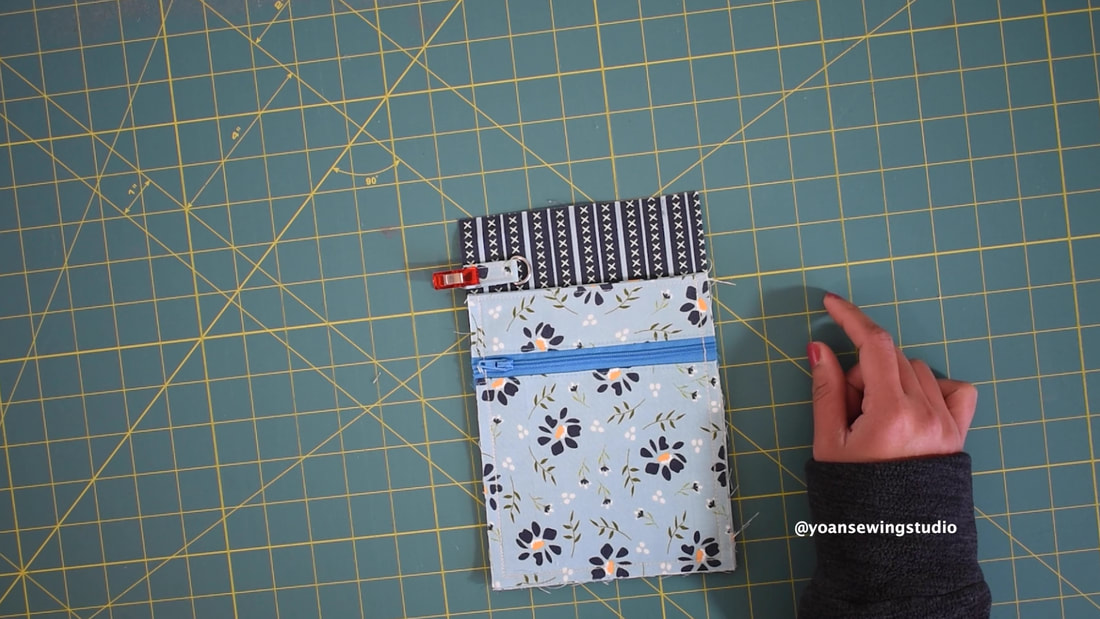
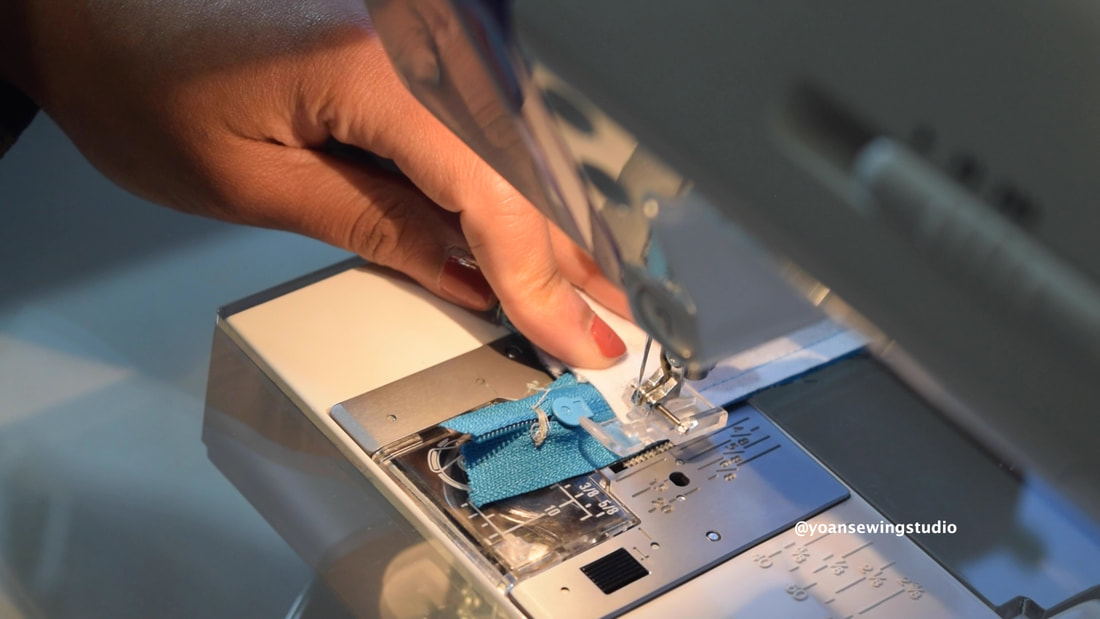
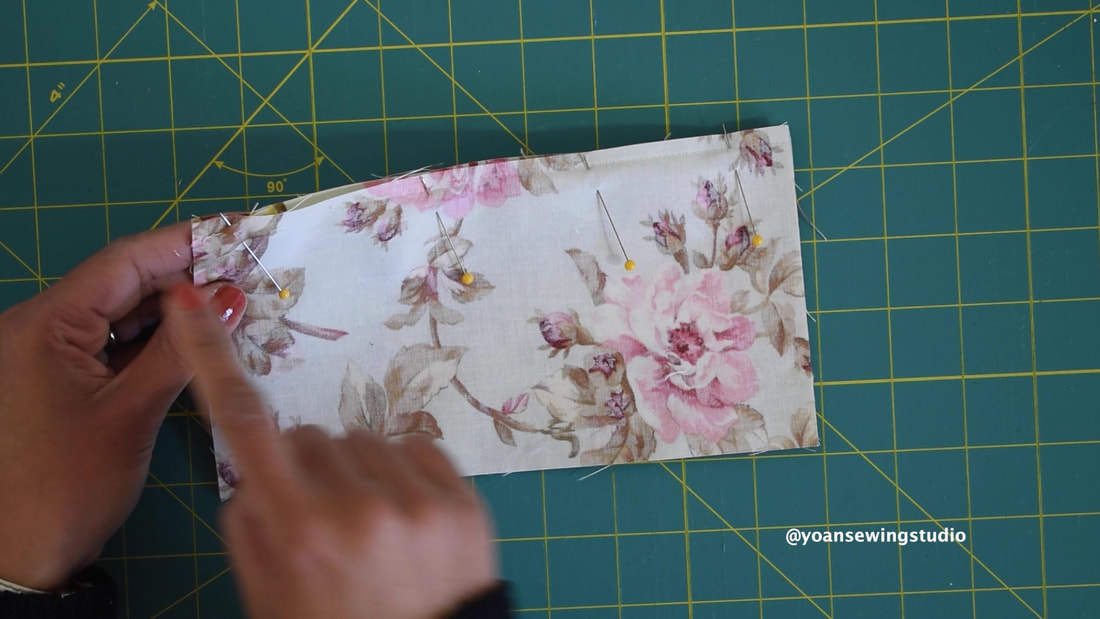
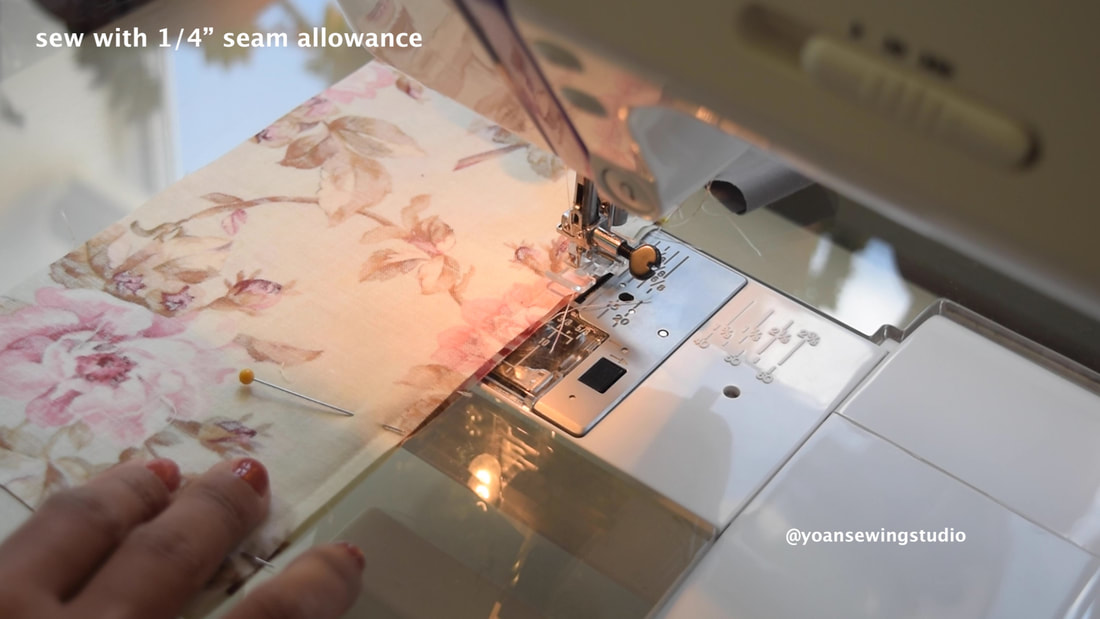
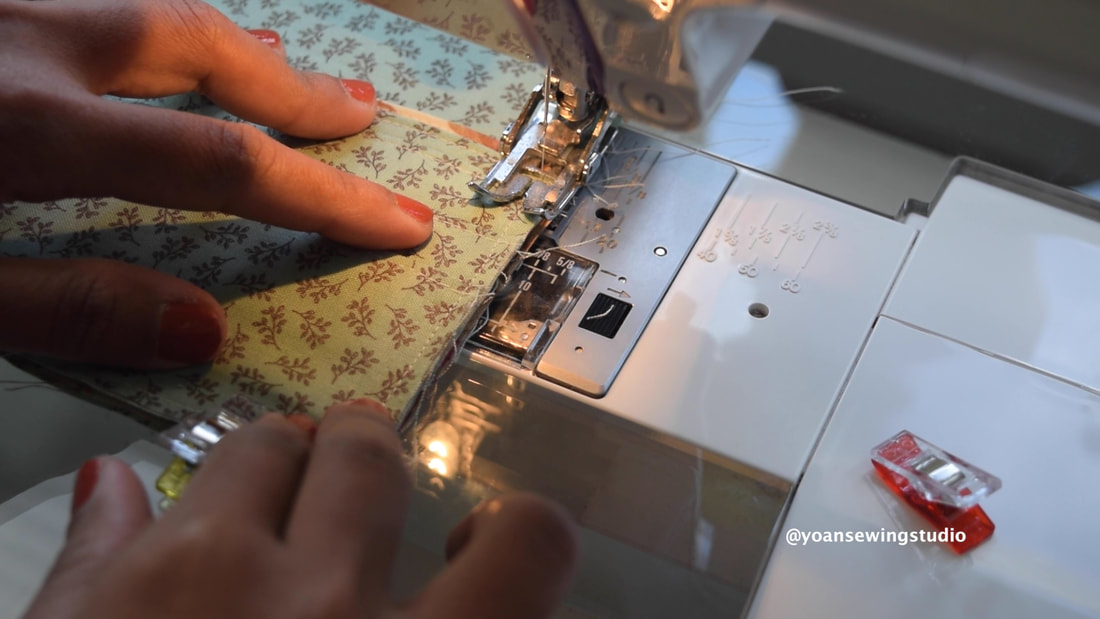
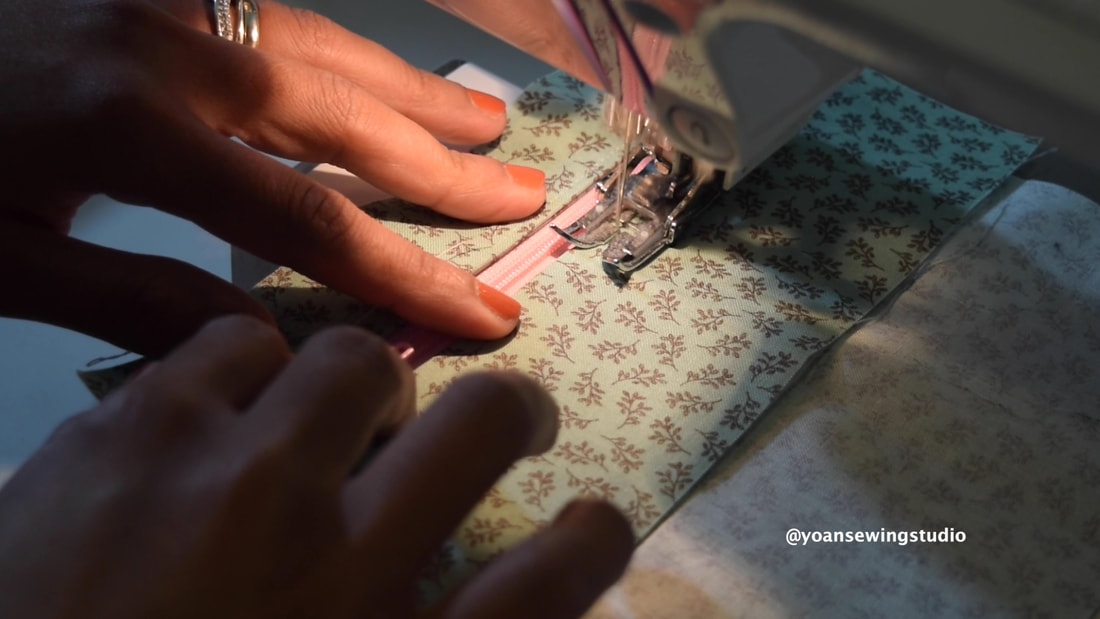
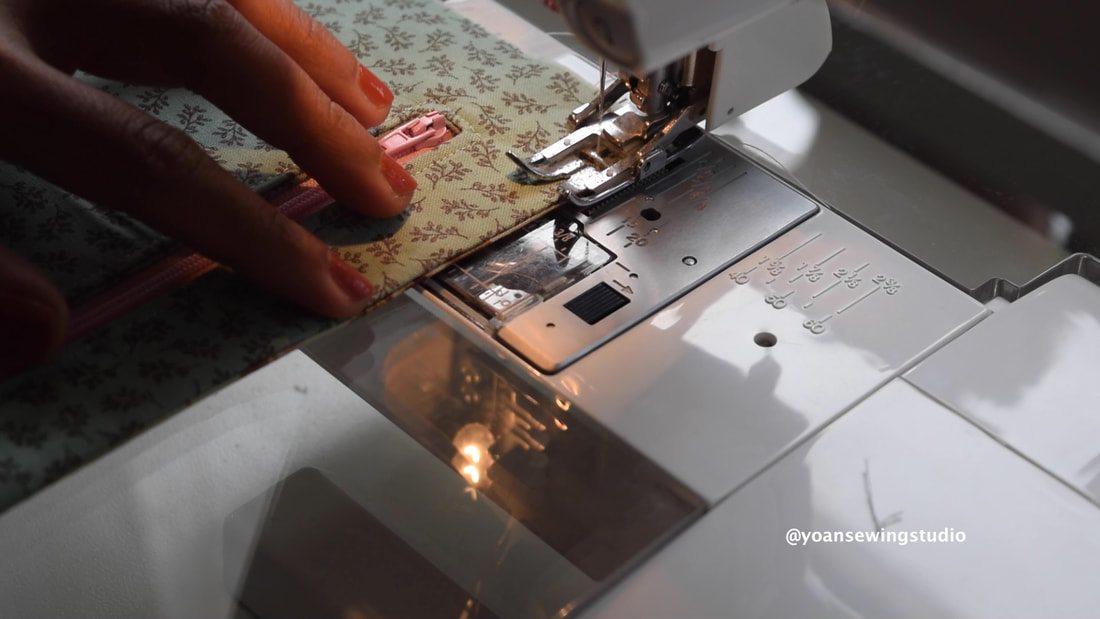
2. Apply fusible woven interfacing on zipper pocket panel 1&2. 3. Lay the zipper right side up, lay panel 1 right side down, aligning the upper edges of the zipper tape with the lower edges of panel 1. Secure with some sewing clips/pin, then sew with 1/4" seam allowance.
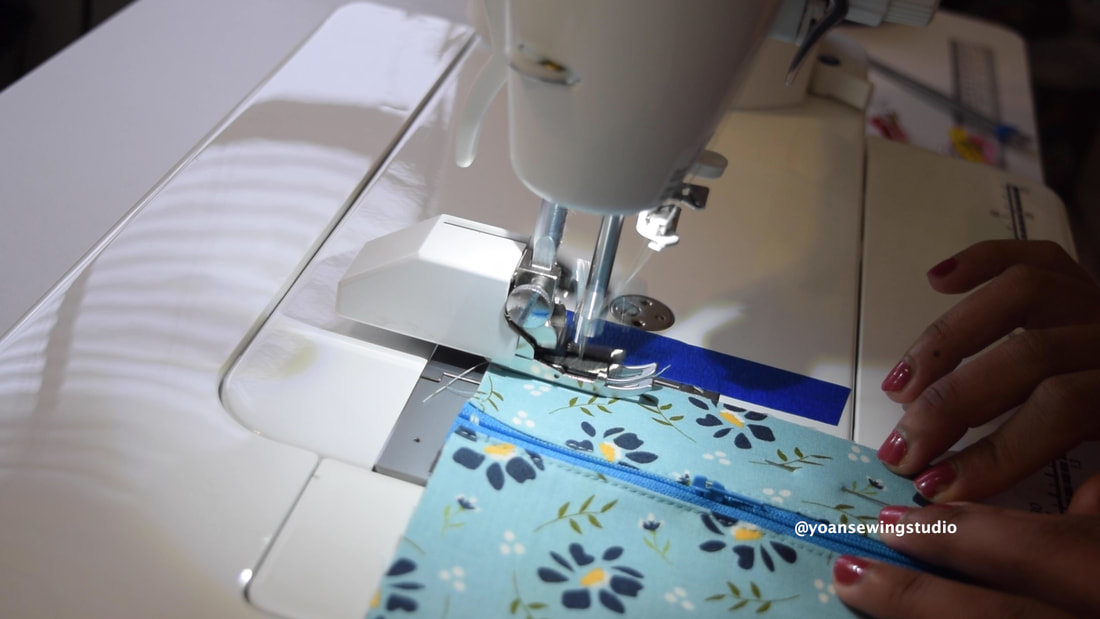
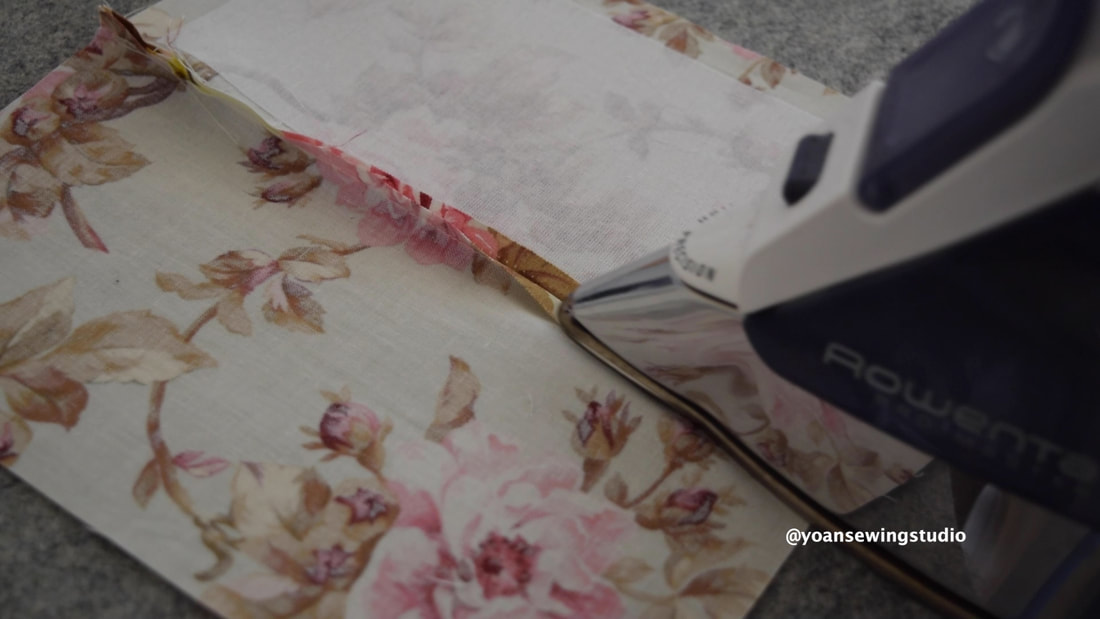
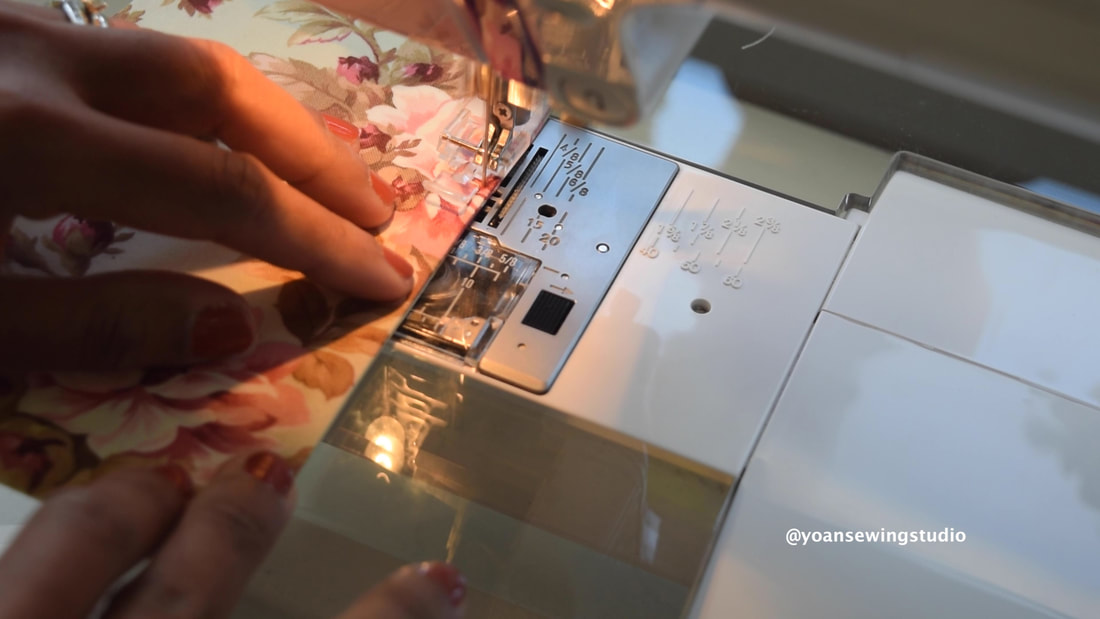
4. Press the seams, then top stitch.
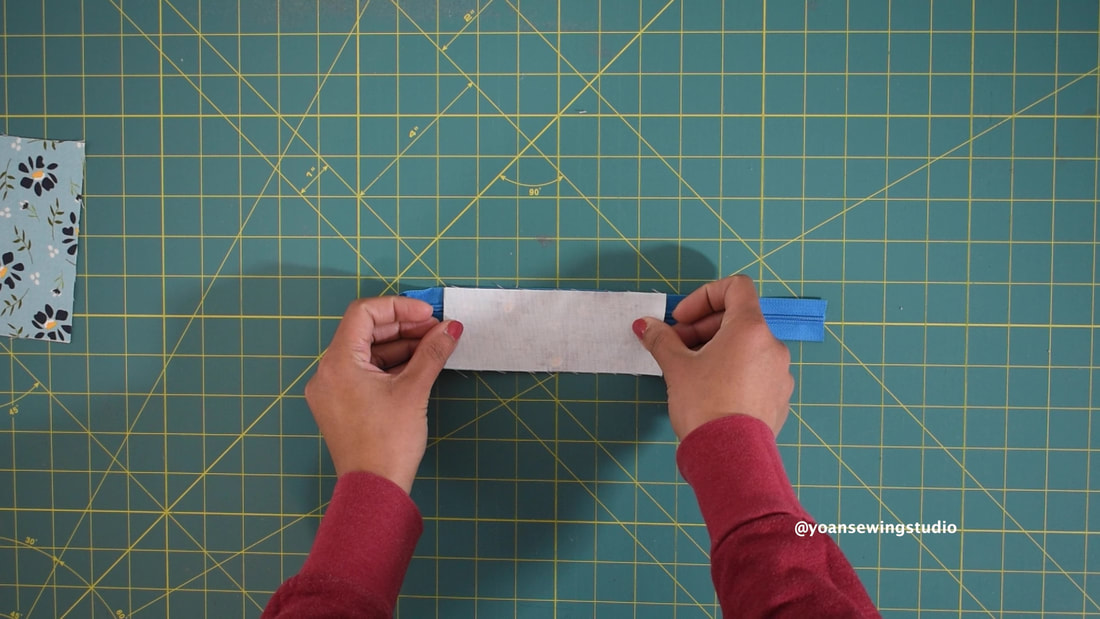
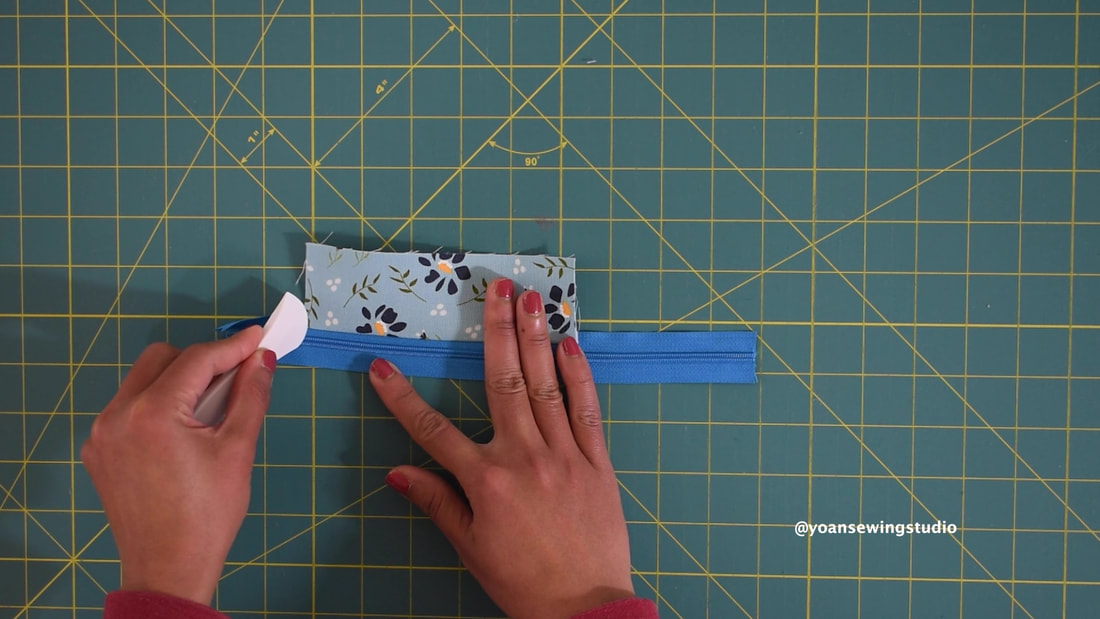
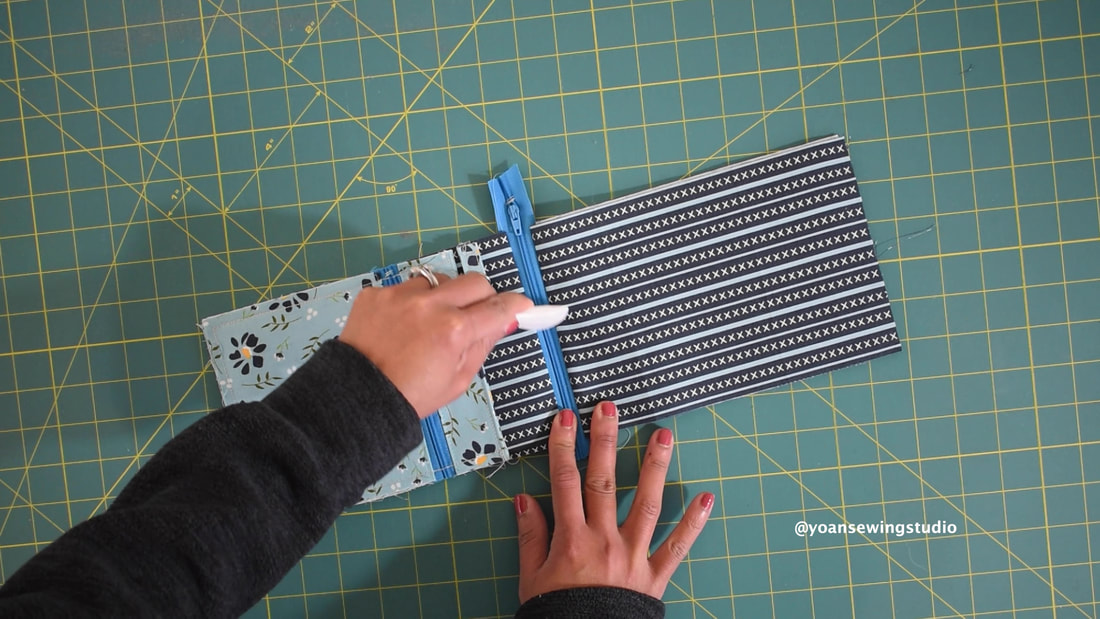
5. Lay panel 2 right side up, lay the zipper right side down, then lay panel 3 right side down, aligning the top and side edges off all the fabrics, secure them in place with some sewing clips then sew with 1/4" seam allowance.
6. Press the seams (both the front and the back) , then topstitch.
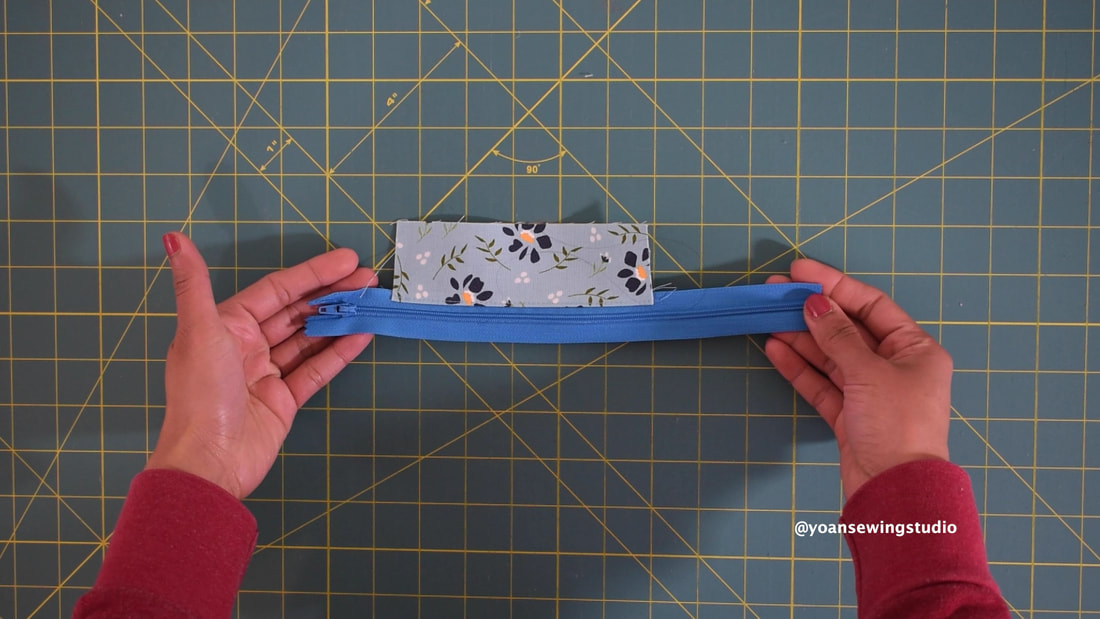
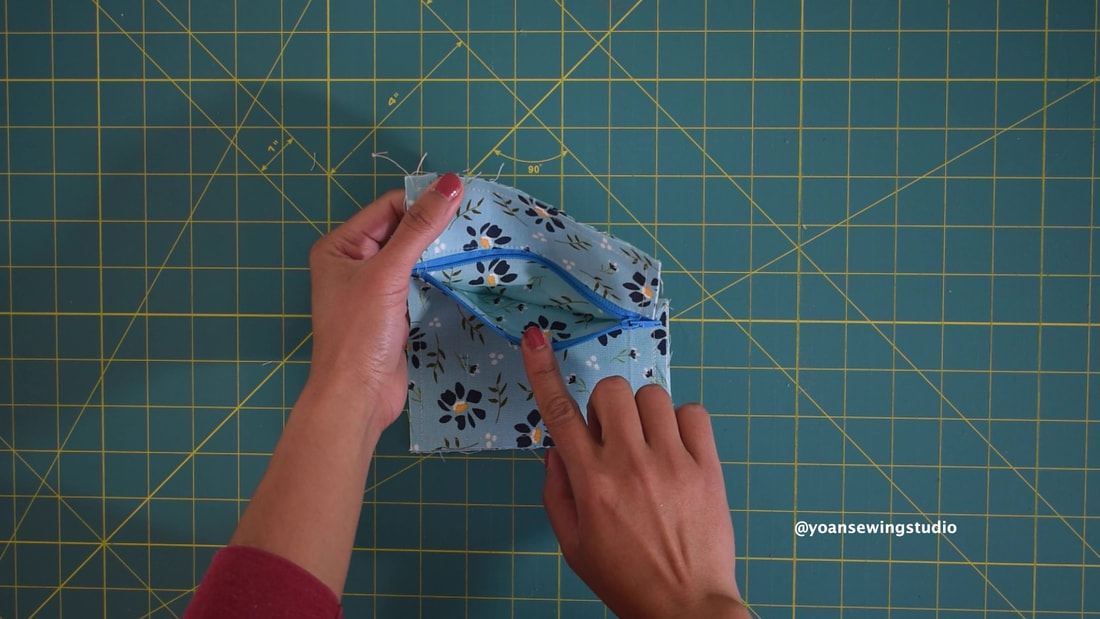
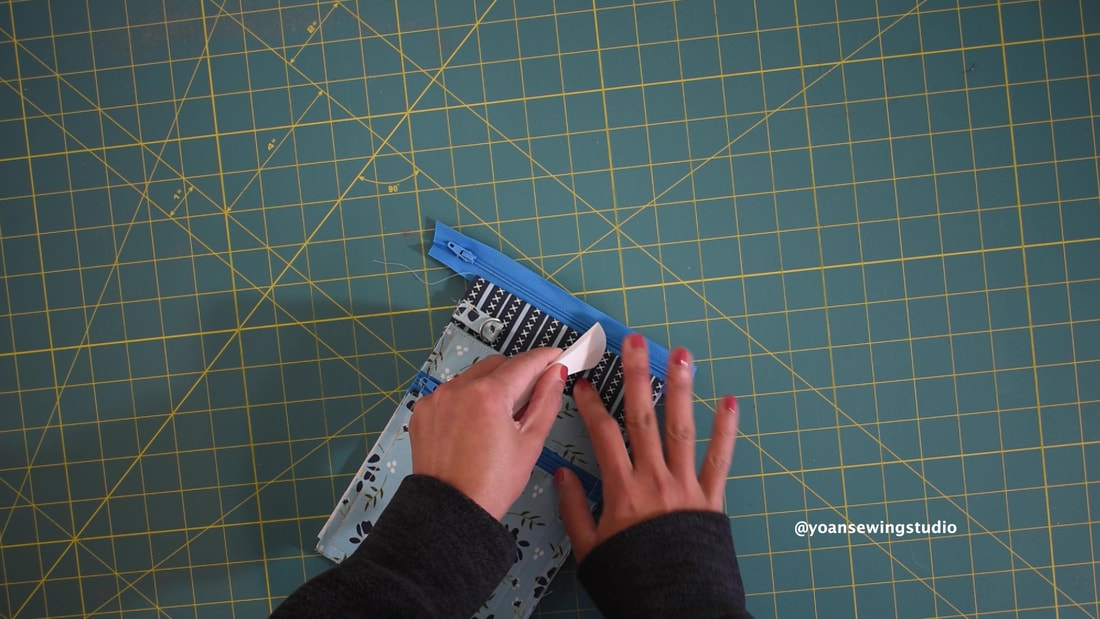
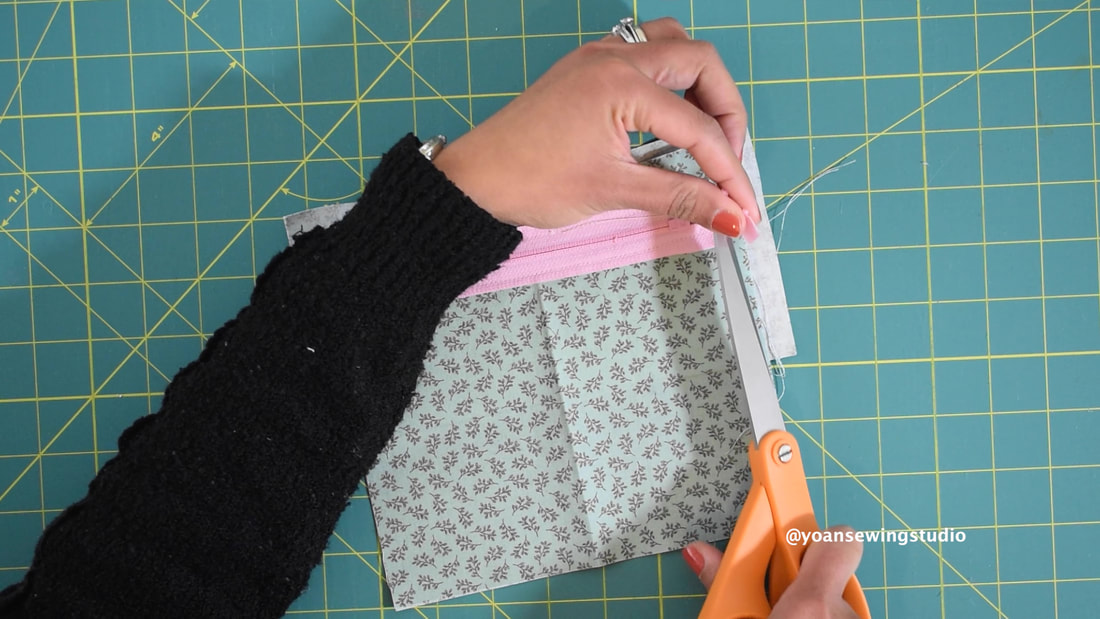
7. Trim excess zipper.
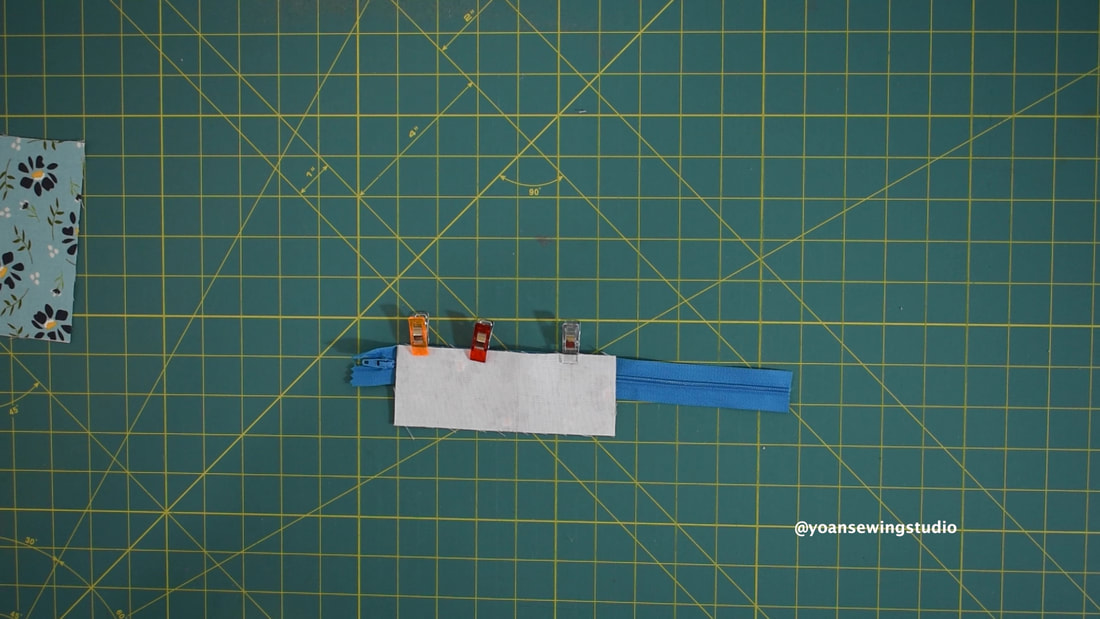
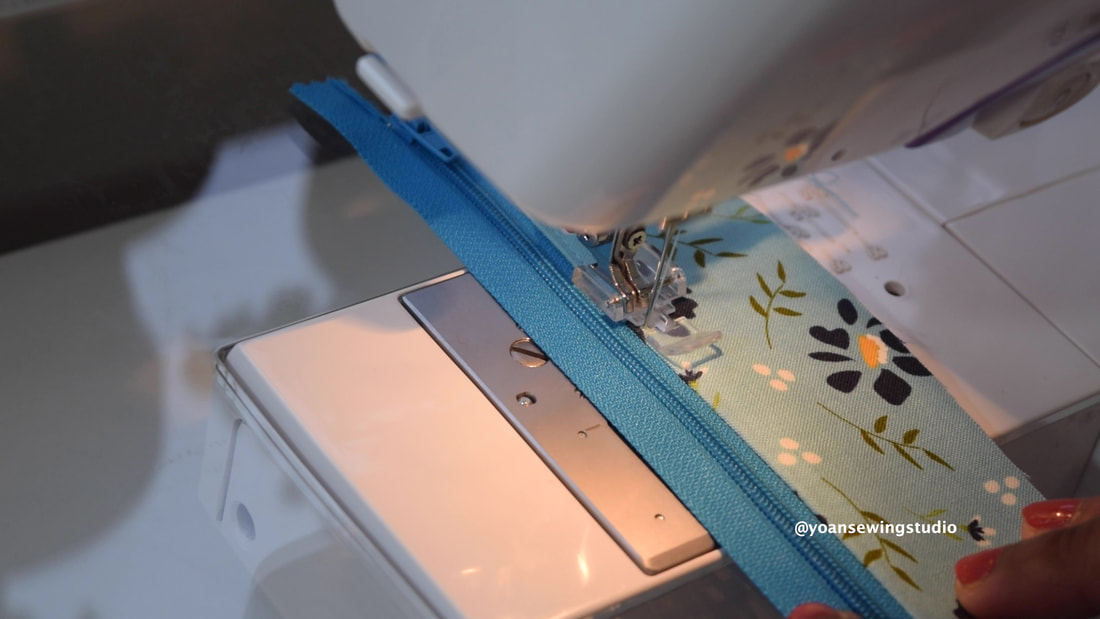
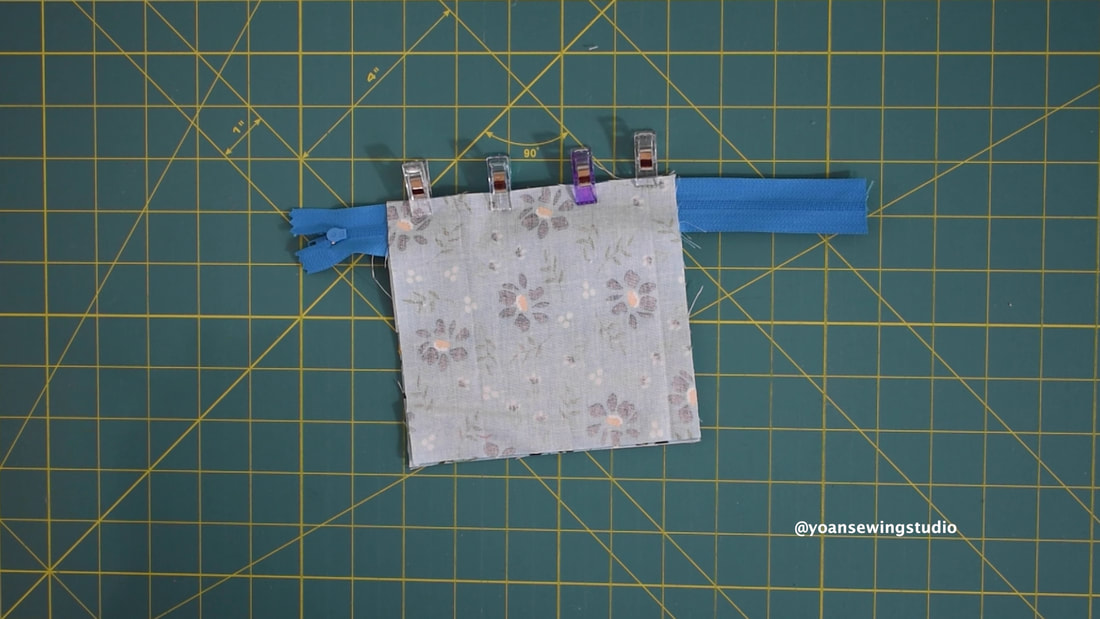
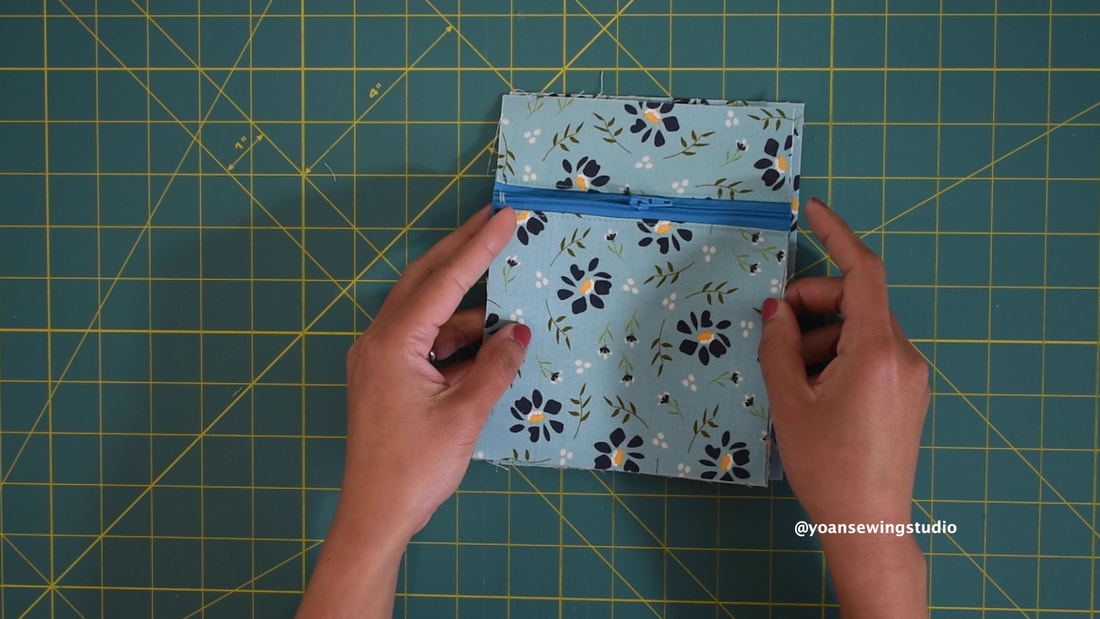
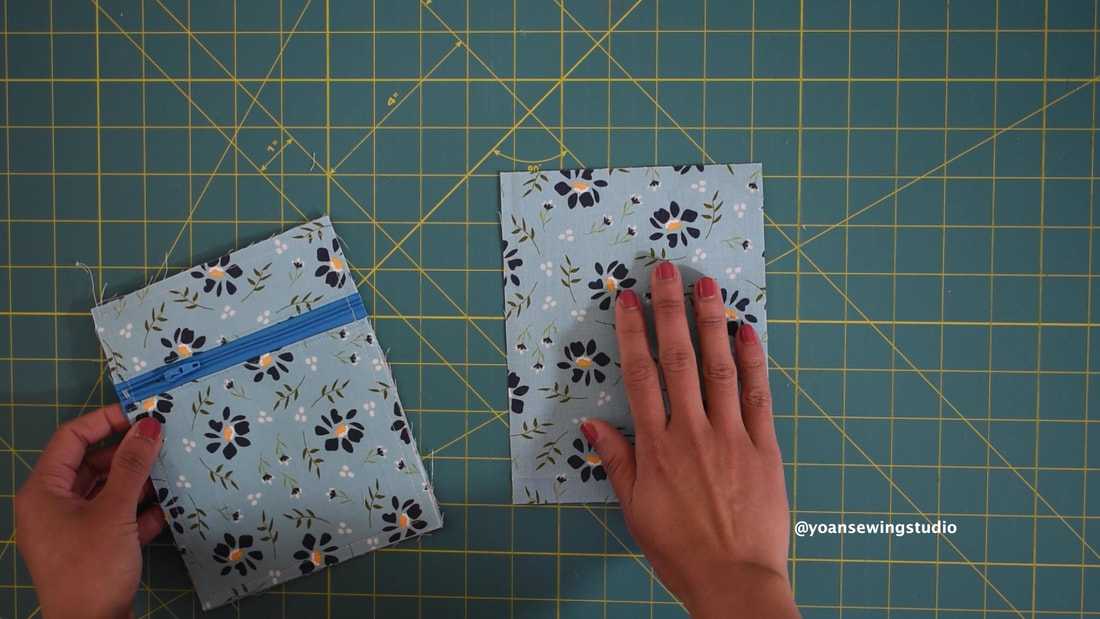
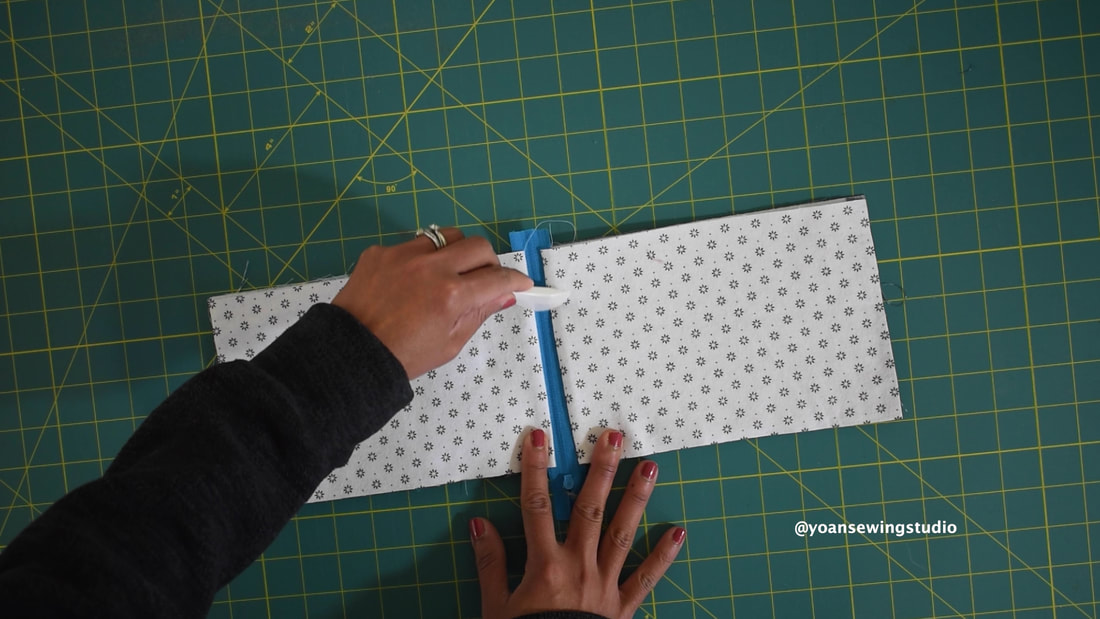
8. Lay panel 3 right side up, lay the zipper panel right side up, pin them in place, then sew all around with 1/4" of seam allowance.
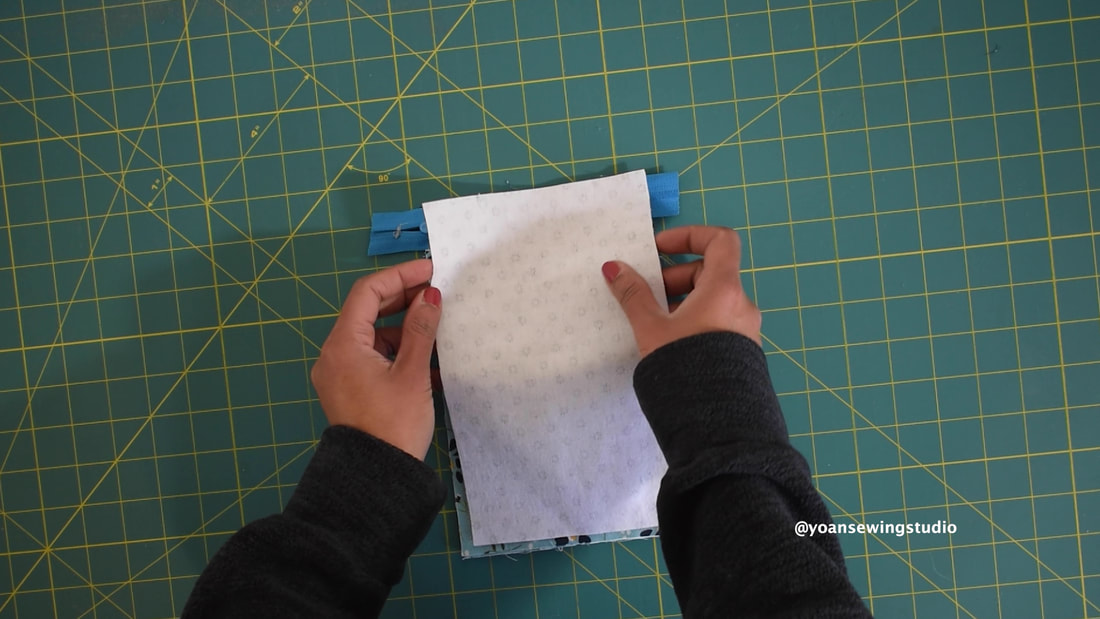
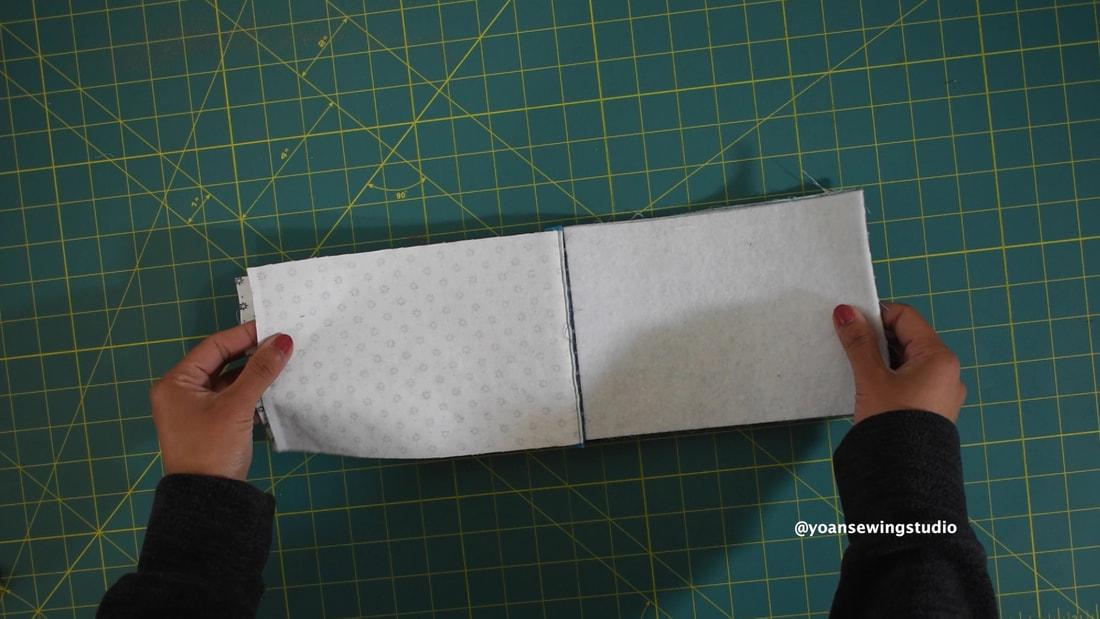
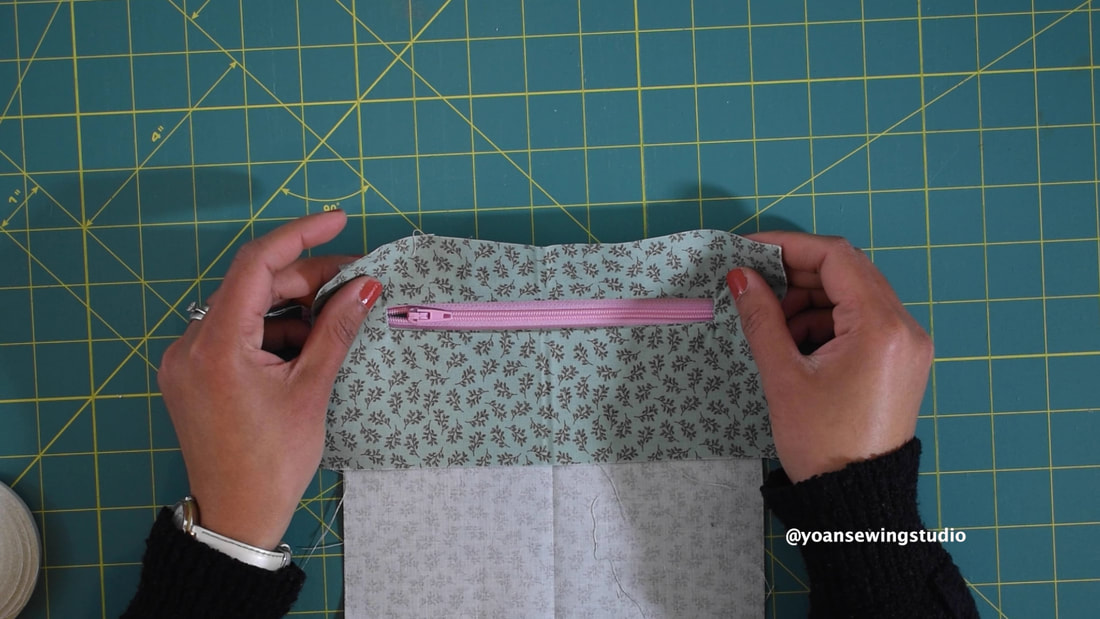
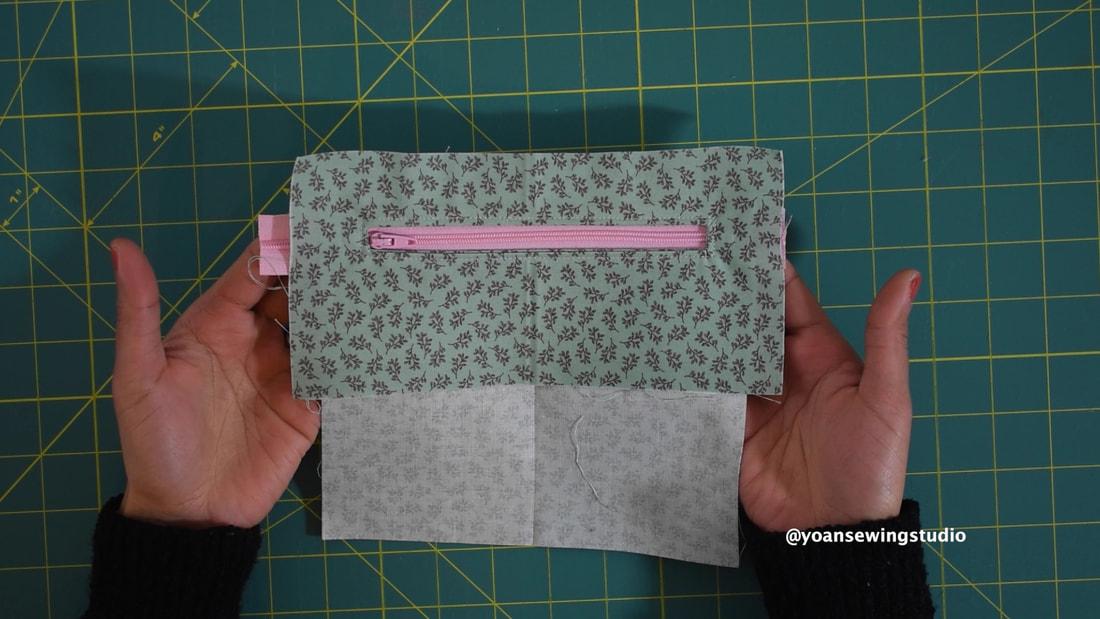
9. Lay panel 4 right side up, lay the zipper pocket panel right side down, sew the top edges with 1/4" of seam allowance.
10. Press the seams open, then topstitch along the top edges.
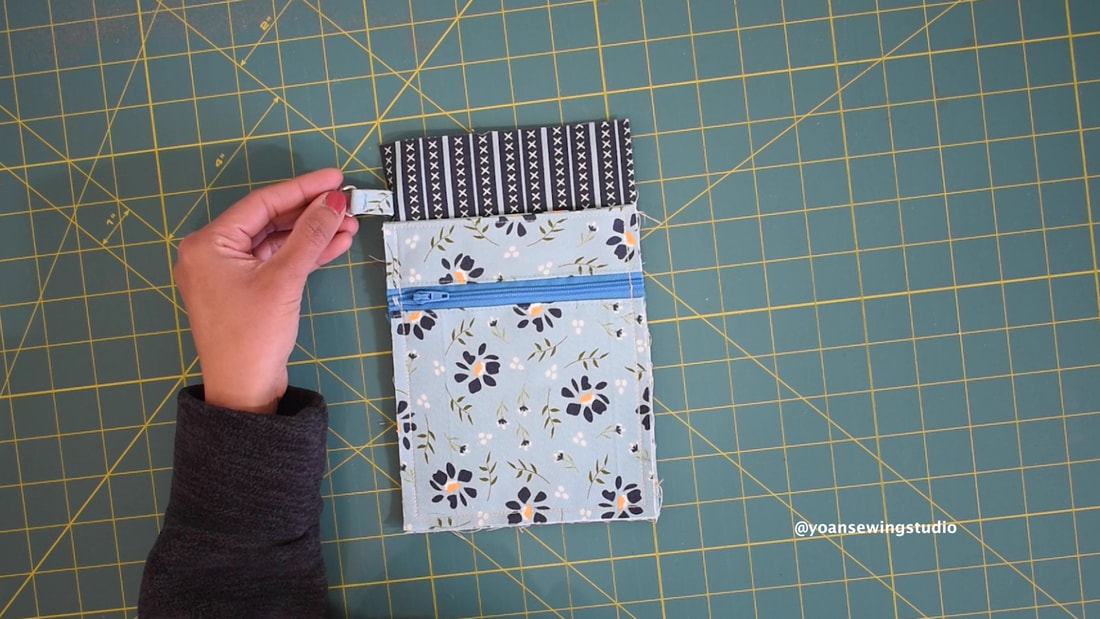
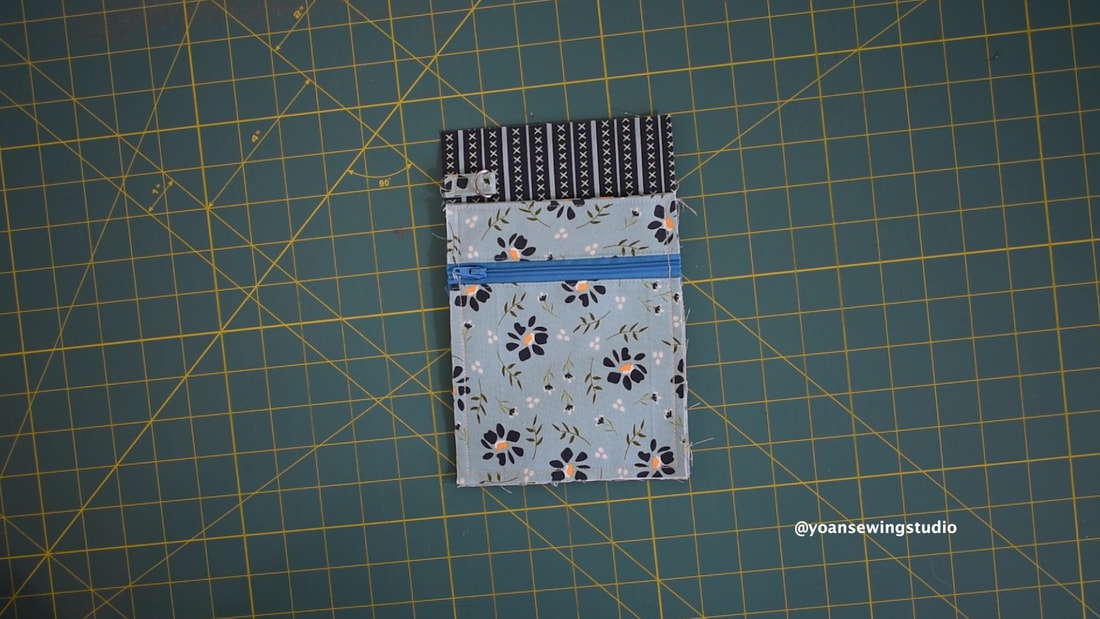
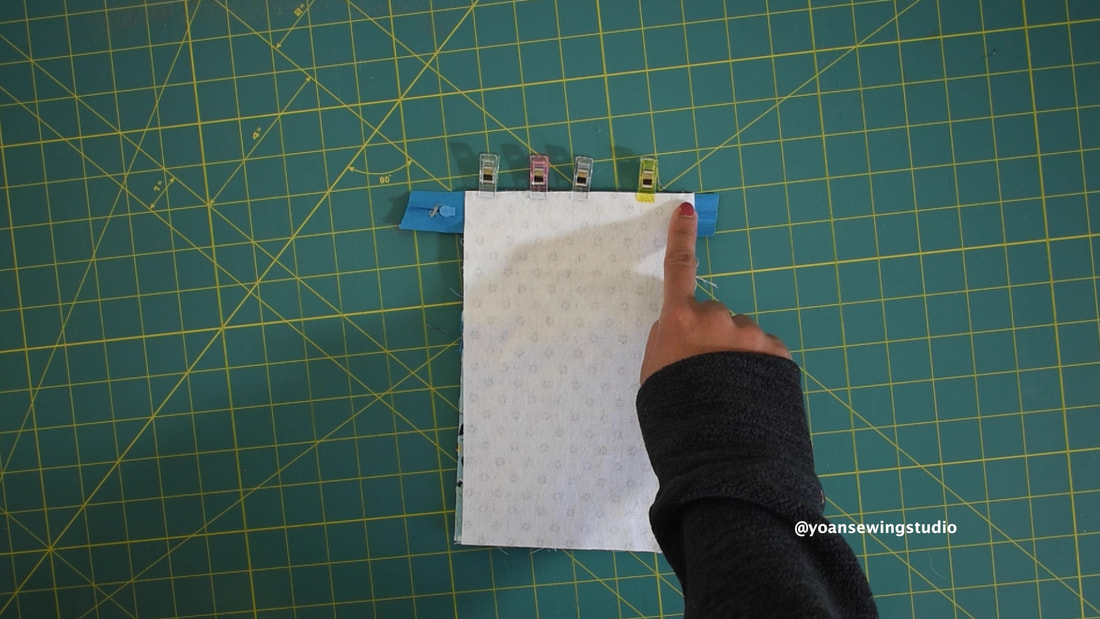
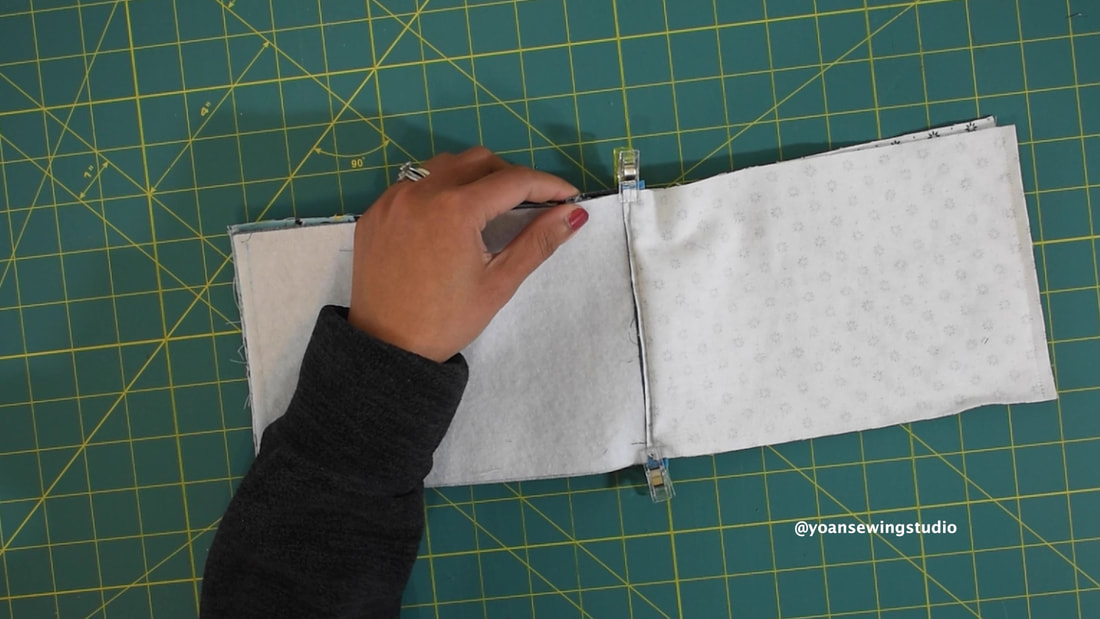
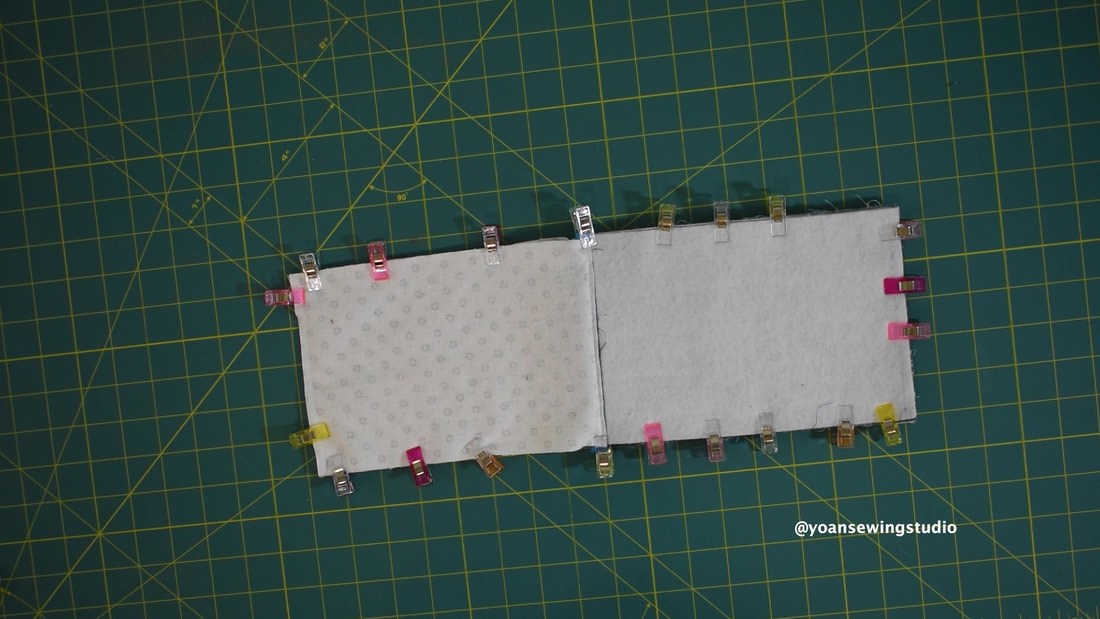
11. Lay the front exterior piece, right side up, lay the pocket panel right side down, aligning the sides and the bottom edges, secure them in place with some sewing clips, then sew along the edges with 1/4" of seam allowance.
12. Sew the strap anchor tab
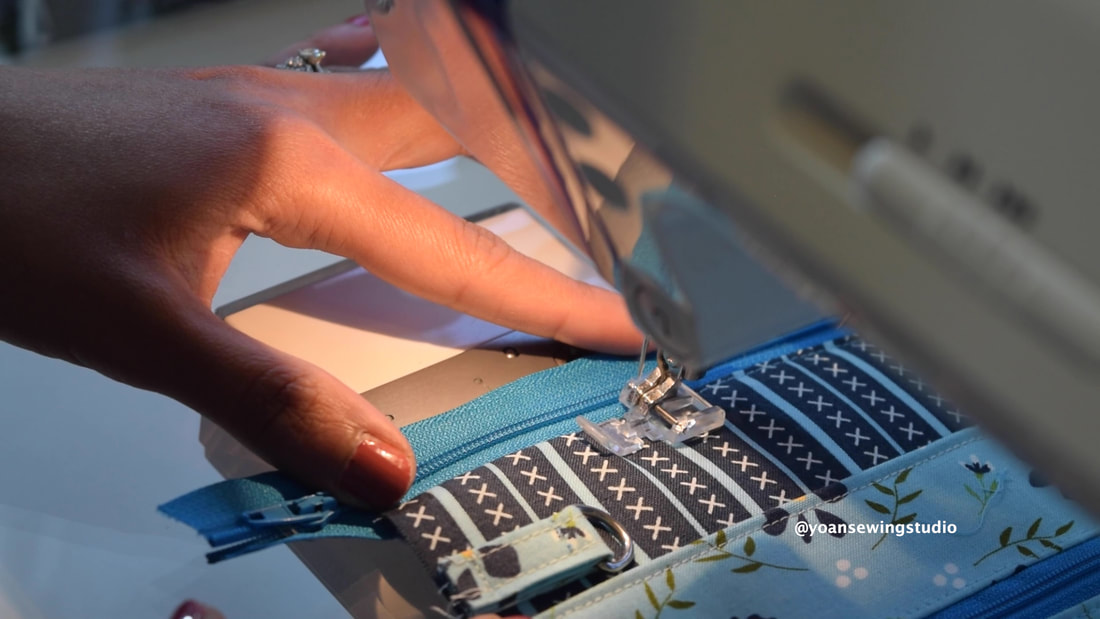
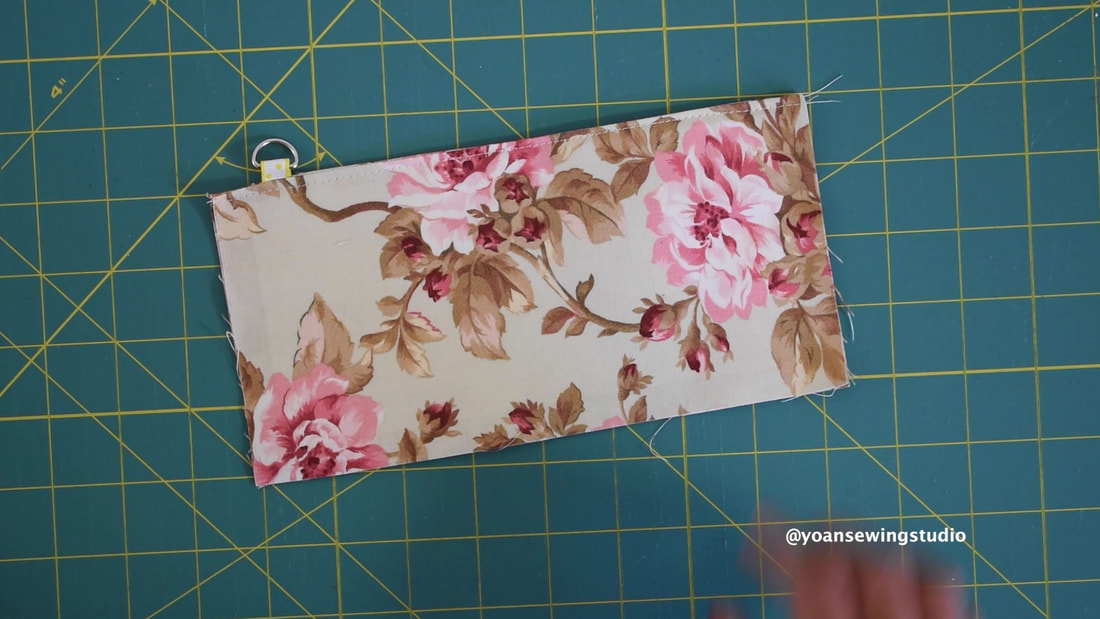
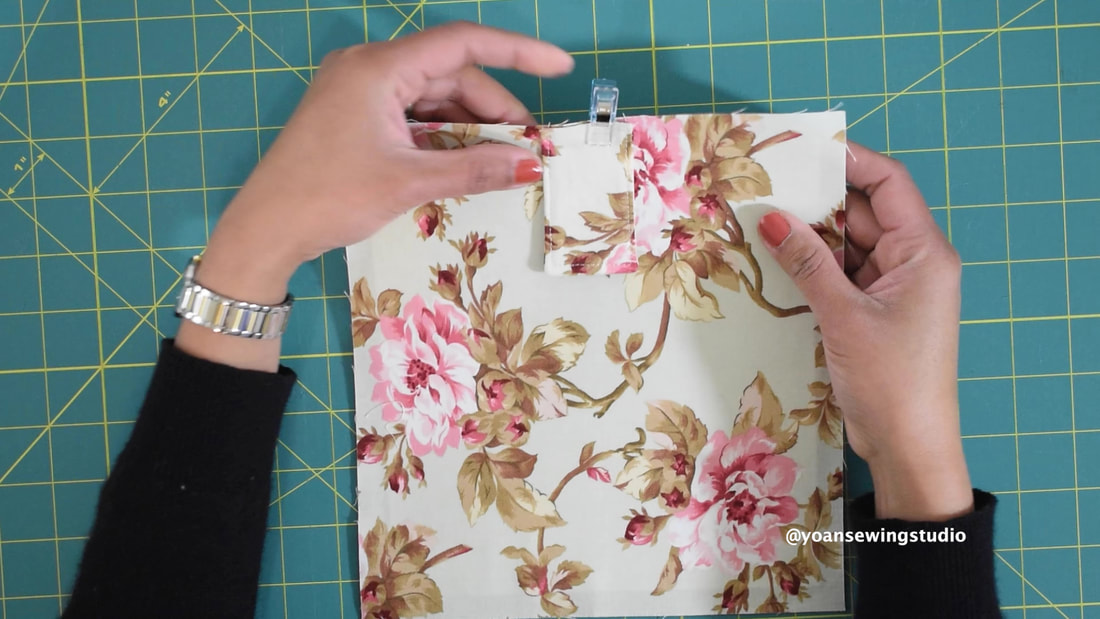
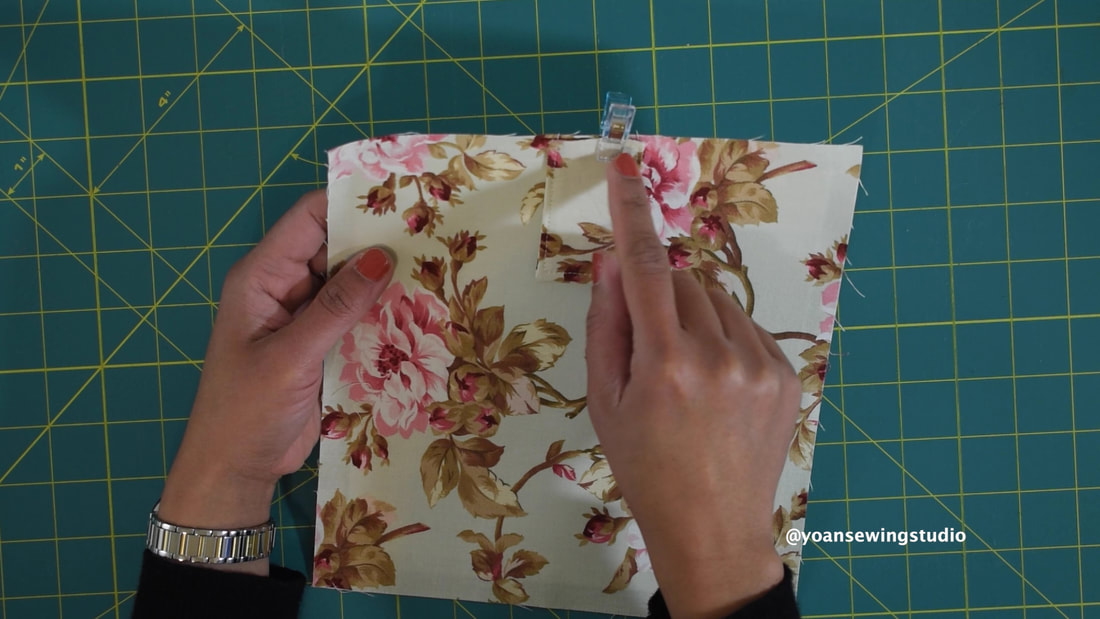
13. Feed the strap anchor through the hole of the d-ring 14. Position the strap anchor 1" down from the top edge of the front exterior piece, secure in place with a sewing clip, then sew with 1/4" seam allowance
15. Sew the wristlet strap.
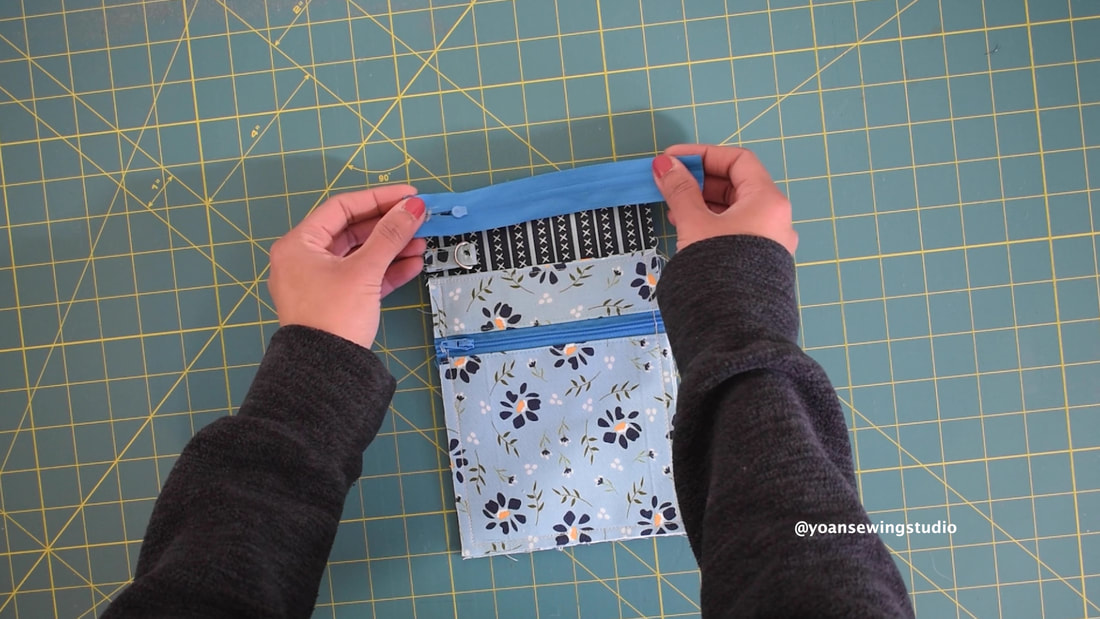
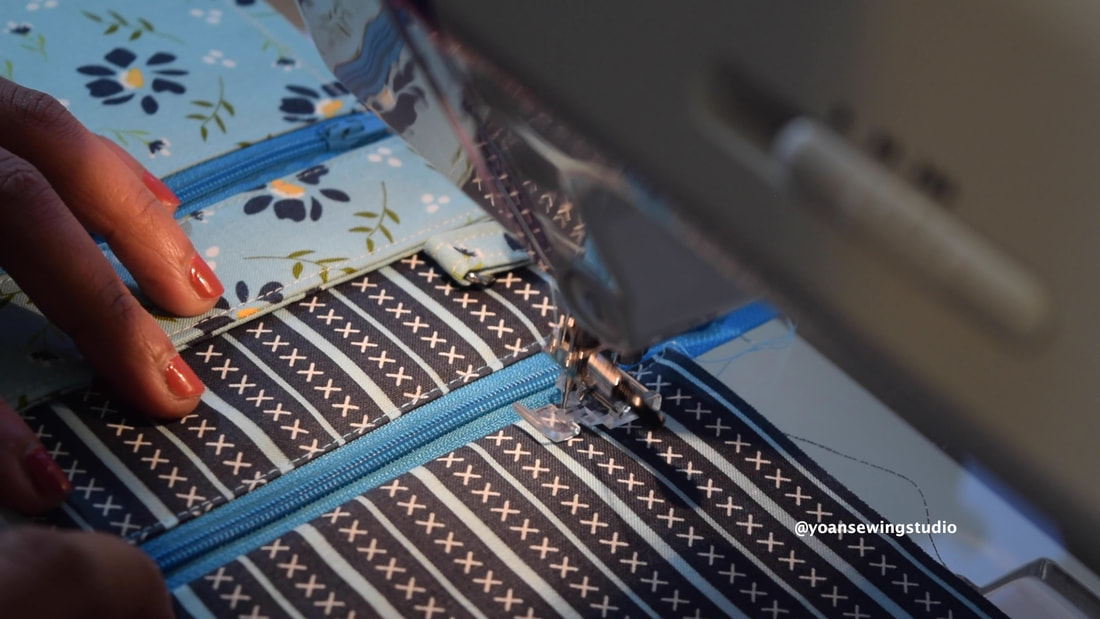
16. Lay the front exterior piece right side up, lay the zipper right side down, lay the lining right side down, secure them with some sewing clips, then sew with 1/4" seam allowance.
17. Separate the fabric from the zipper, press the seams, topstitch.
18. Lay the back exterior right side up, lay the zipper right side down, lay the second lining piece right side down, secure them in place with some sewing clips then sew with 1/4" of seam allowance.
19. Separate the fabrics from the zipper, press the seams, then topstitch.
20. Trim off any excess zipper.
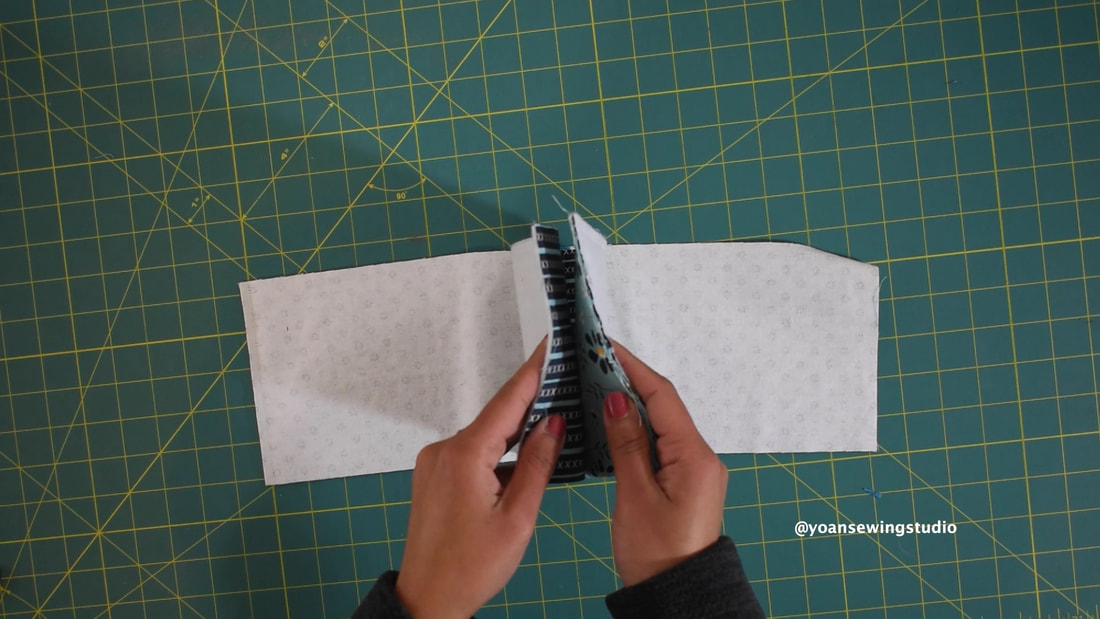
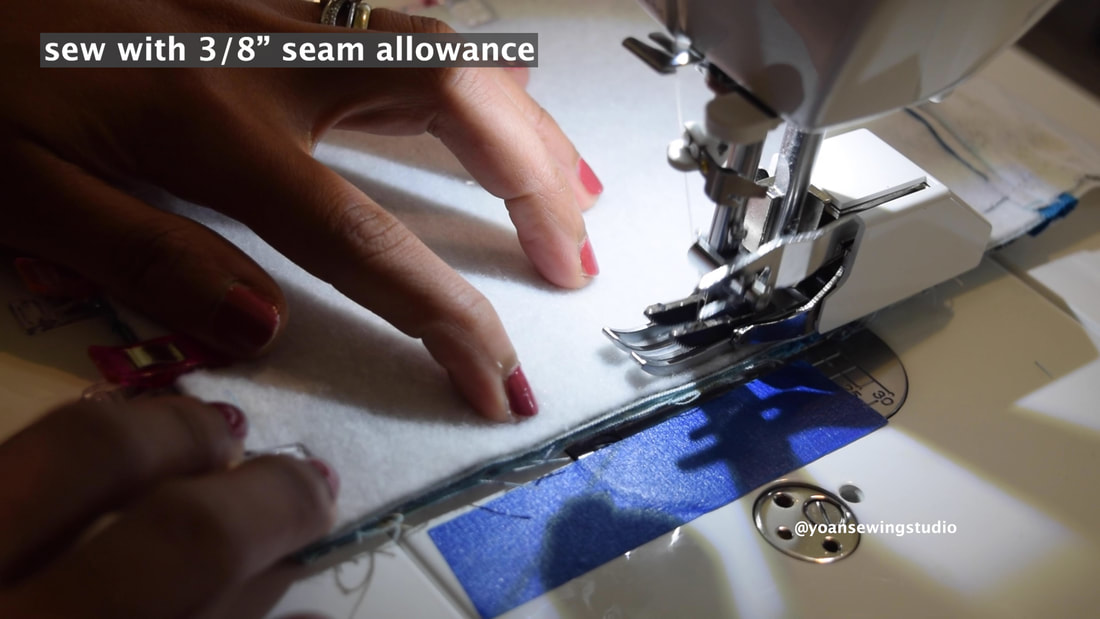
21. Separate the exterior pieces from the lining pieces (with the right sides touching each other), secure them in place with some sewing clips (matching the zipper seams) then sew with 3/8" seam allowance, leaving about 3" of opening at the bottom edge of the lining.
22. Cut all the corners, be careful not to cut through the stitches, turn the pouch inside out through the opening hole. Tip : Poke the corners with a knitting needle or chopstick, or skewer.
23. Sew the opening hole close.
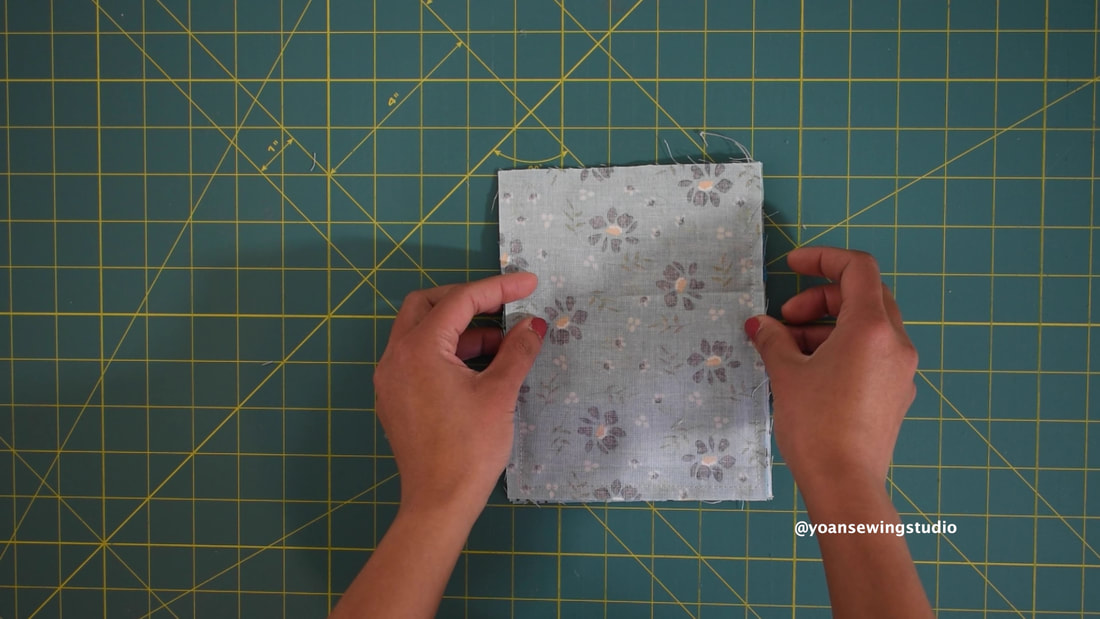
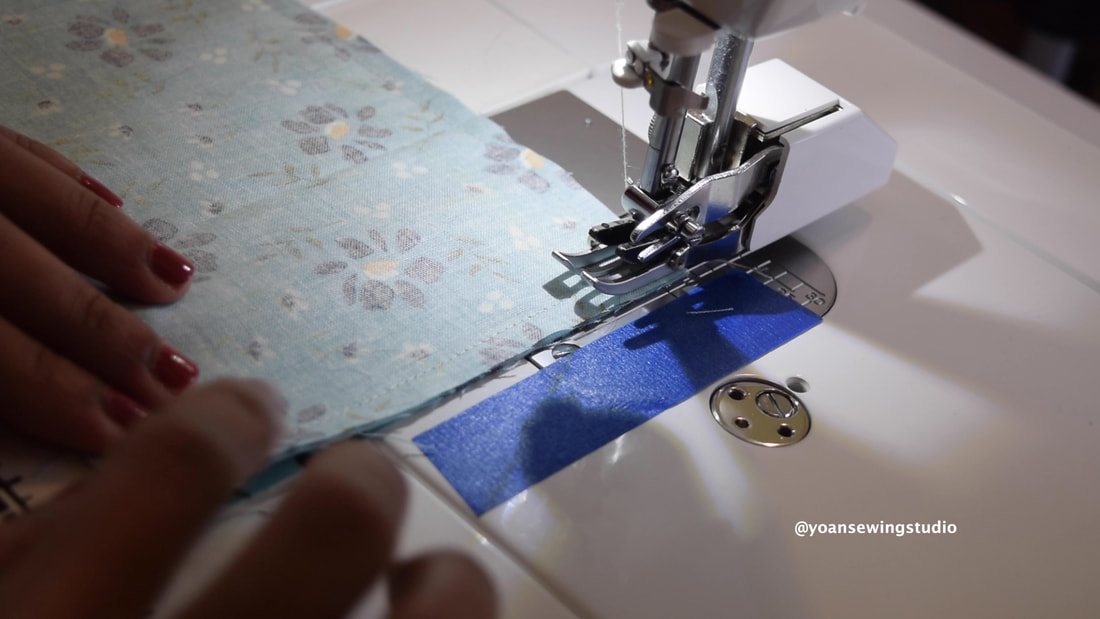
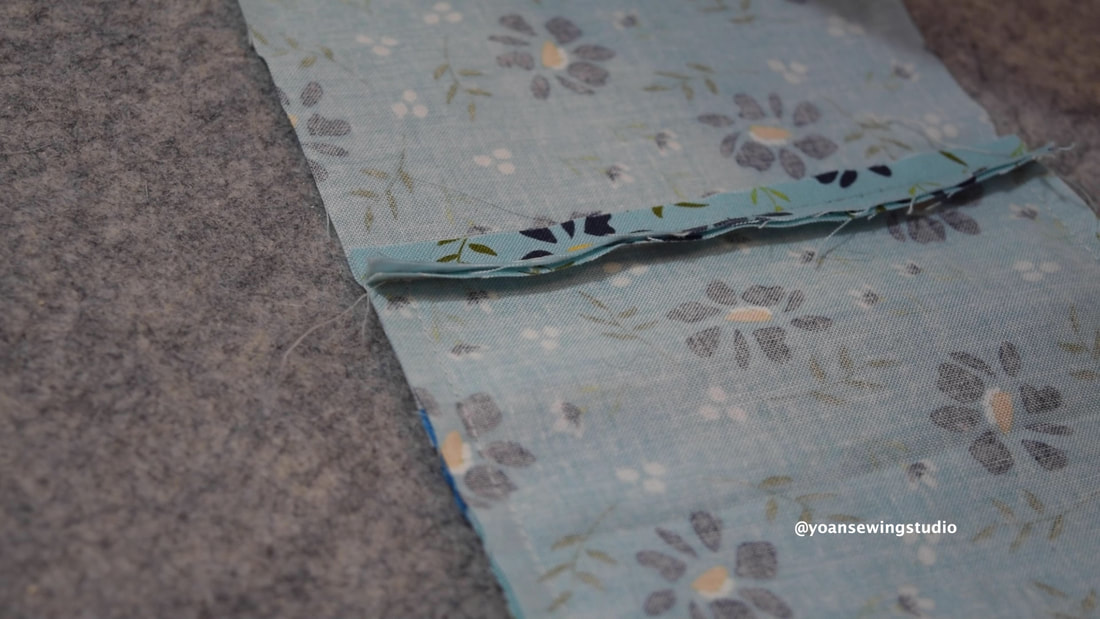
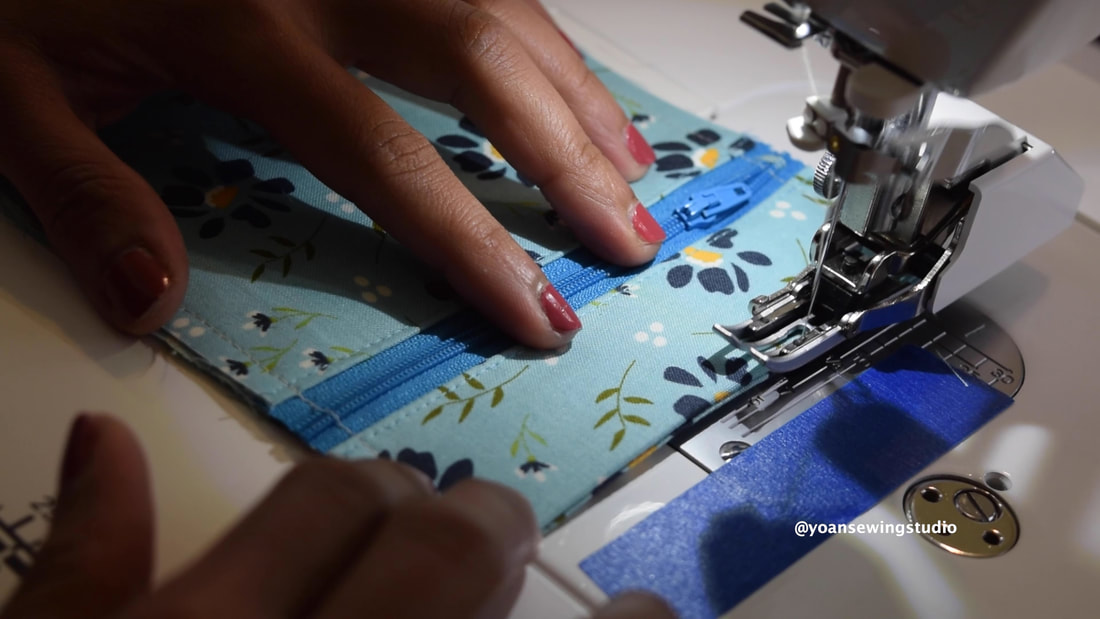
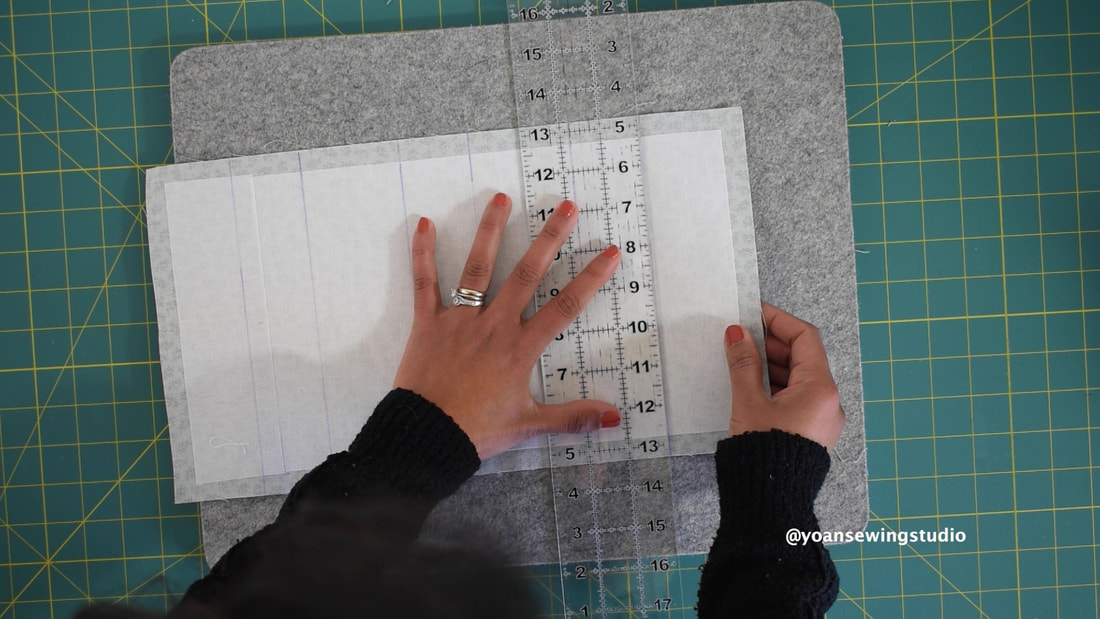
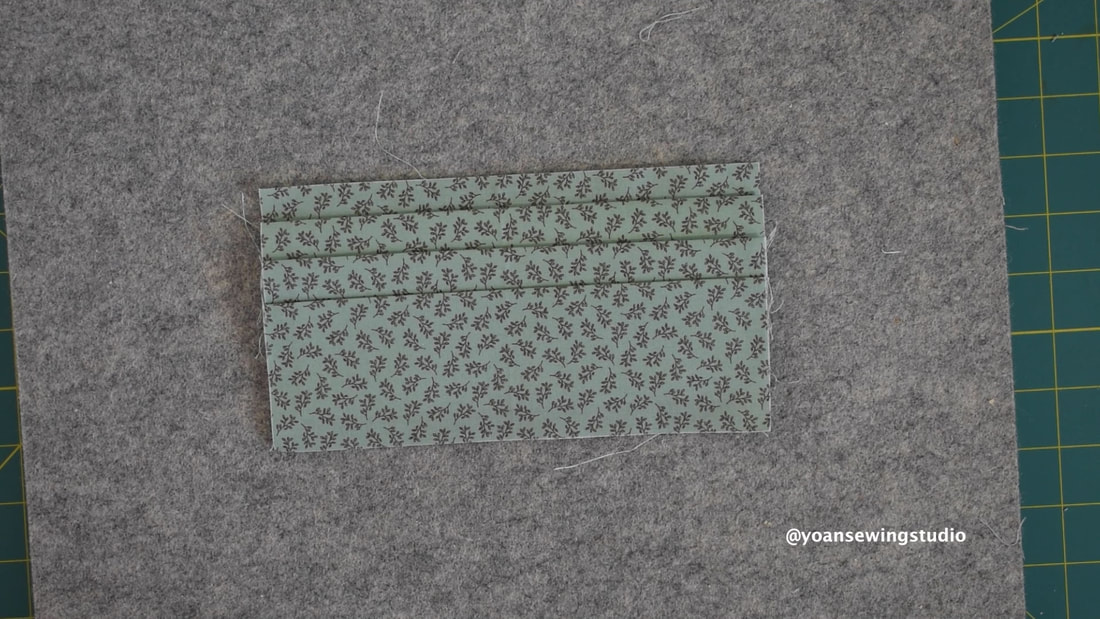
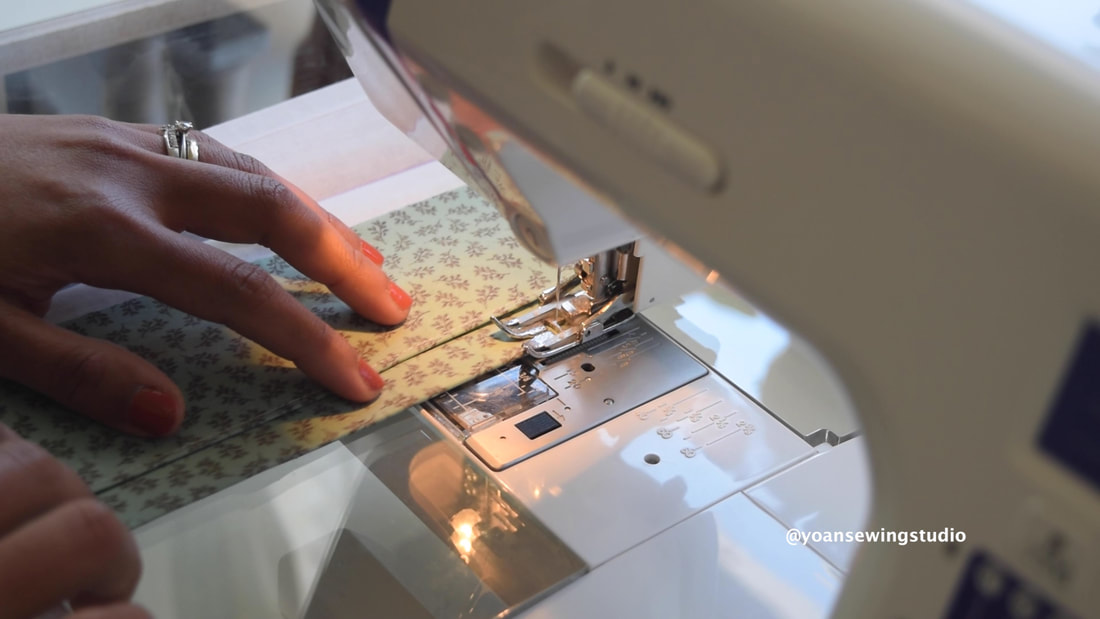
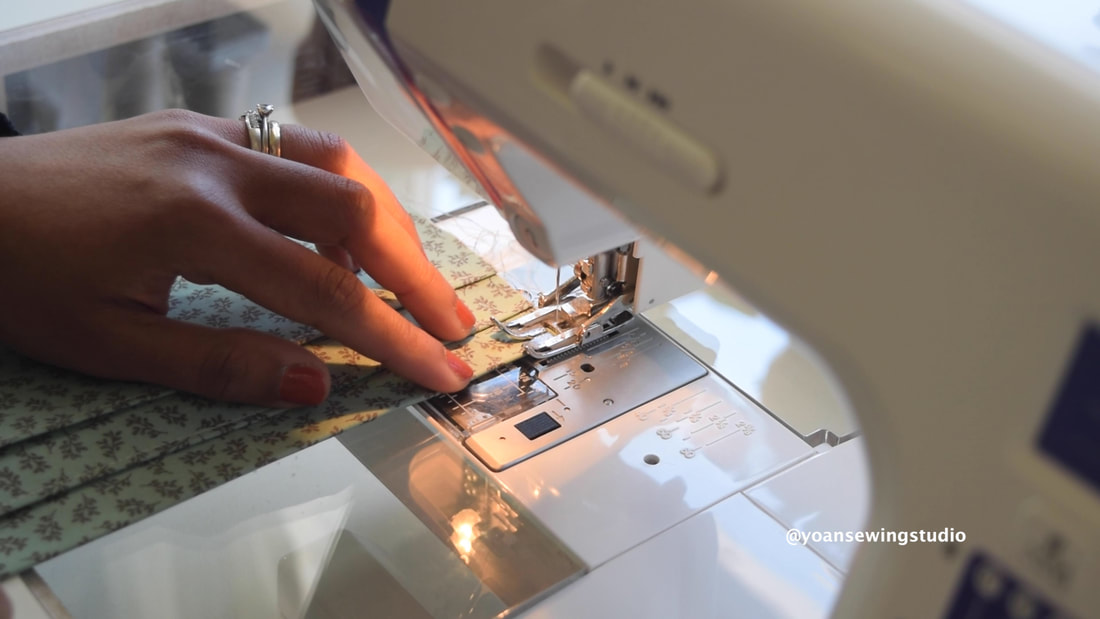
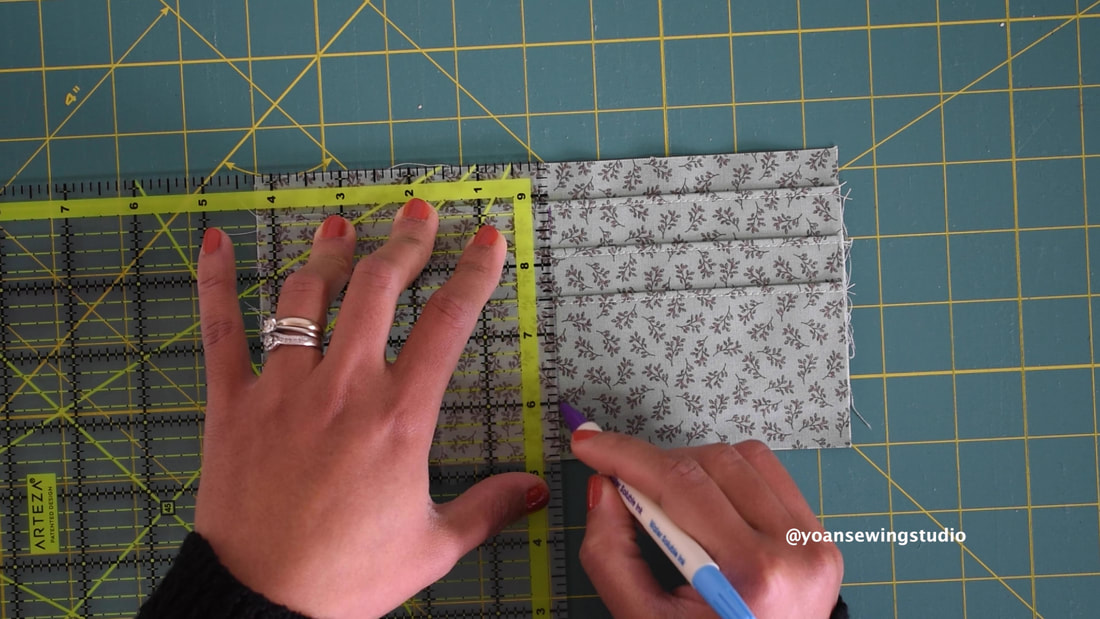
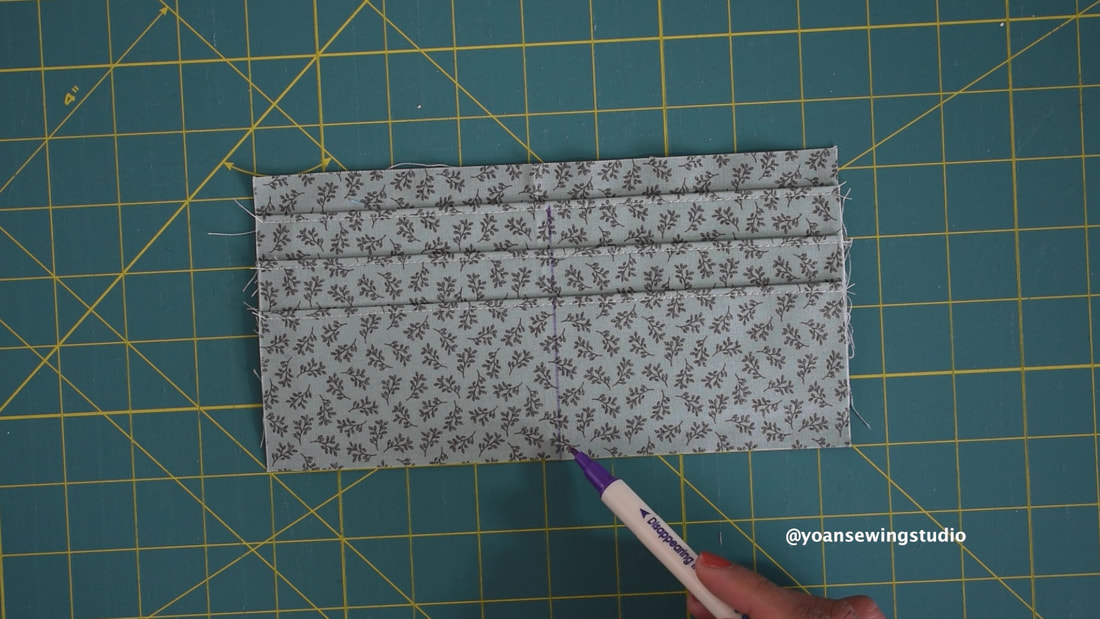
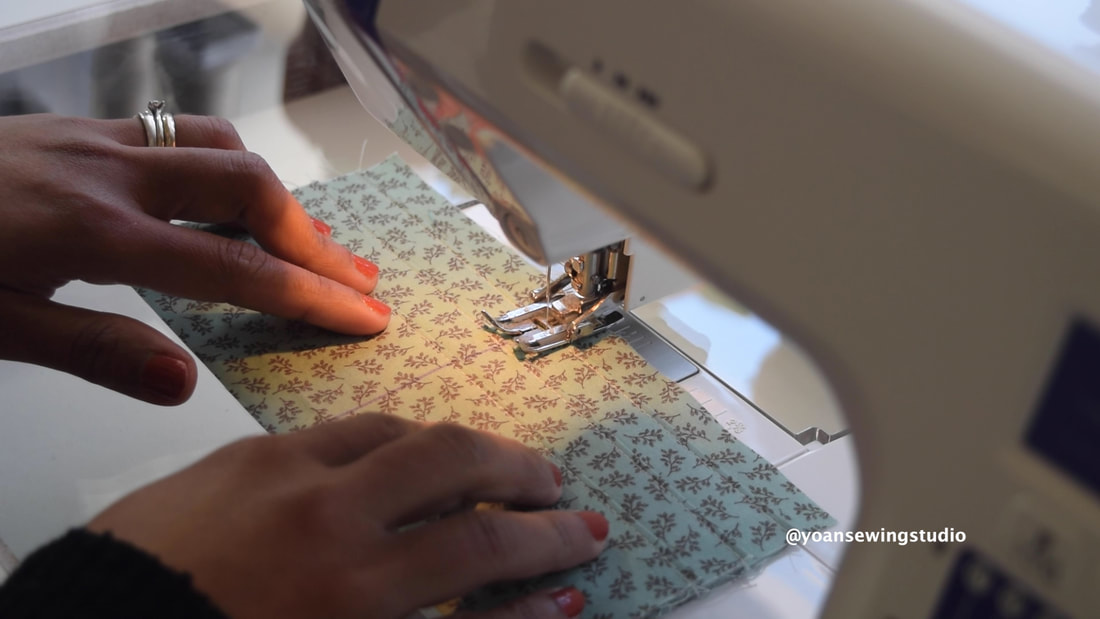
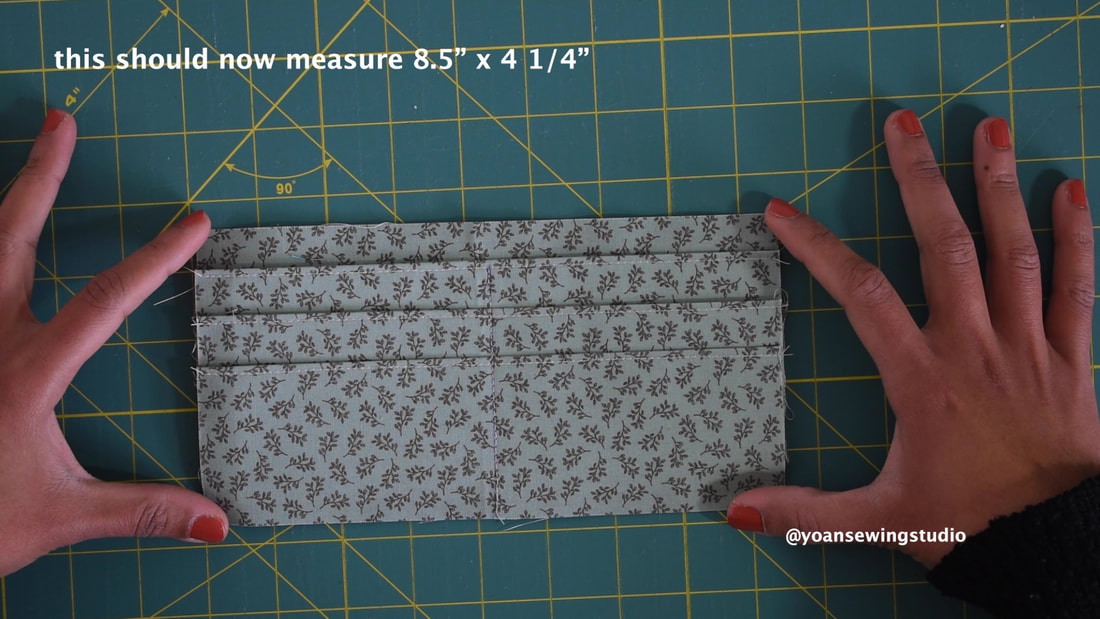
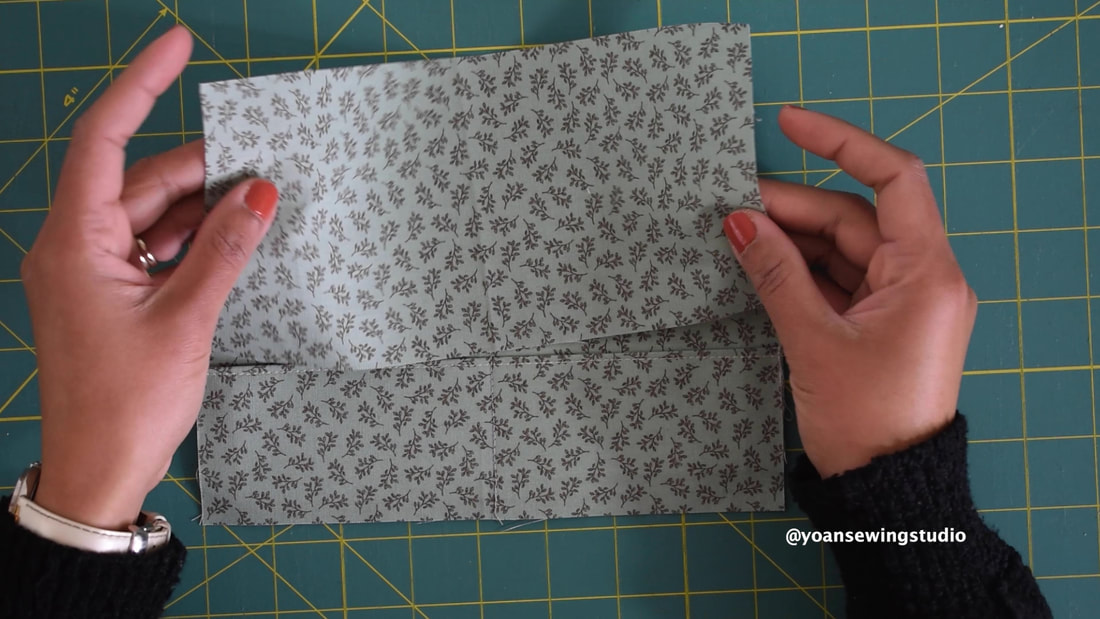
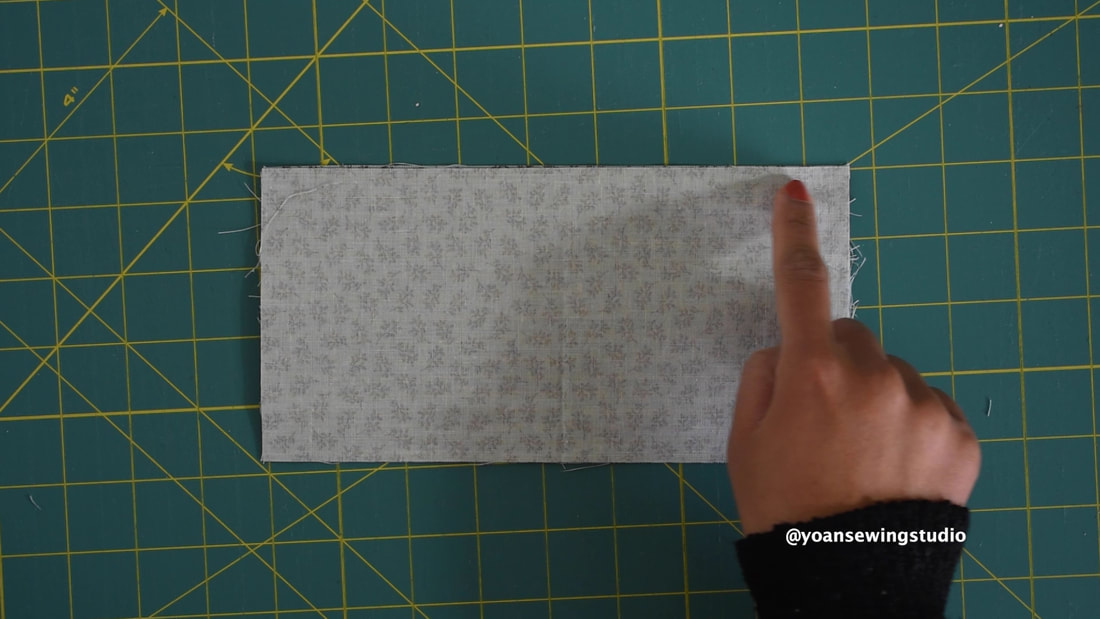
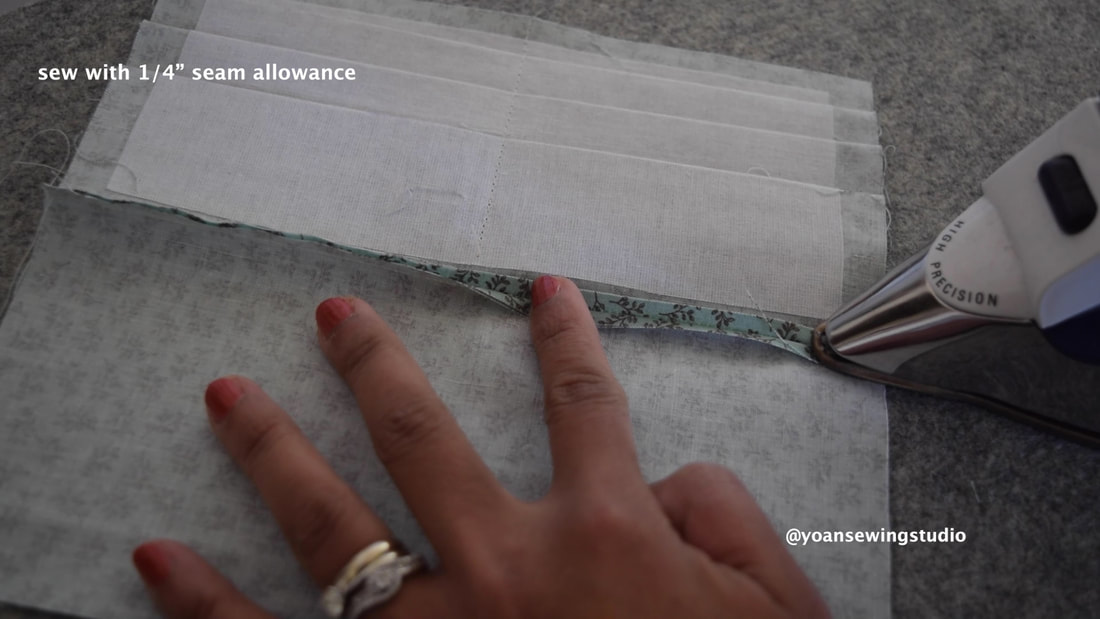
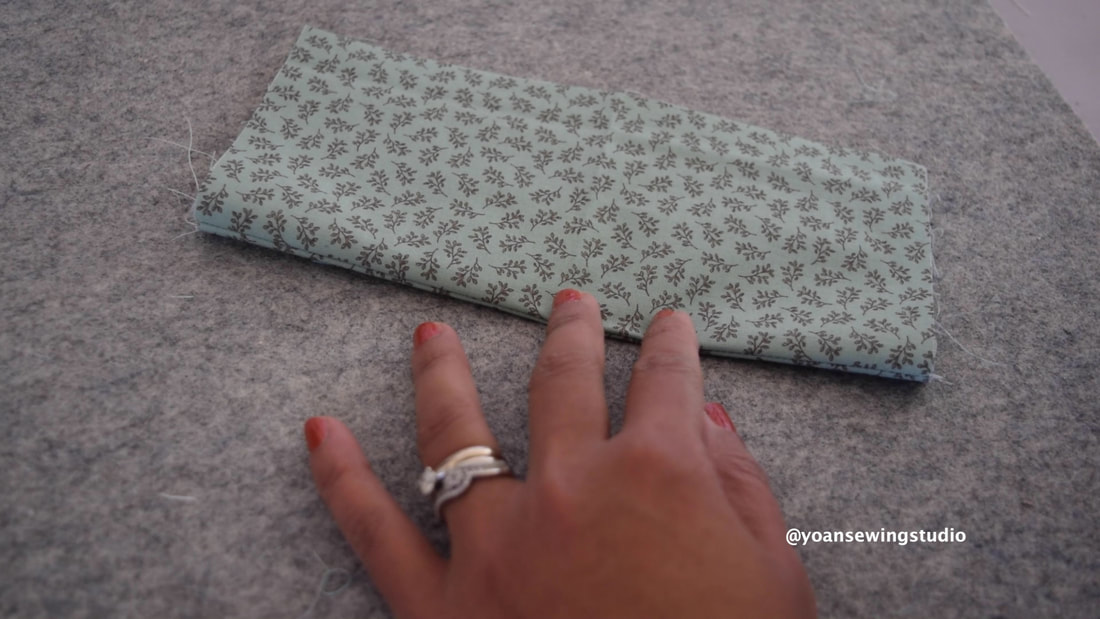
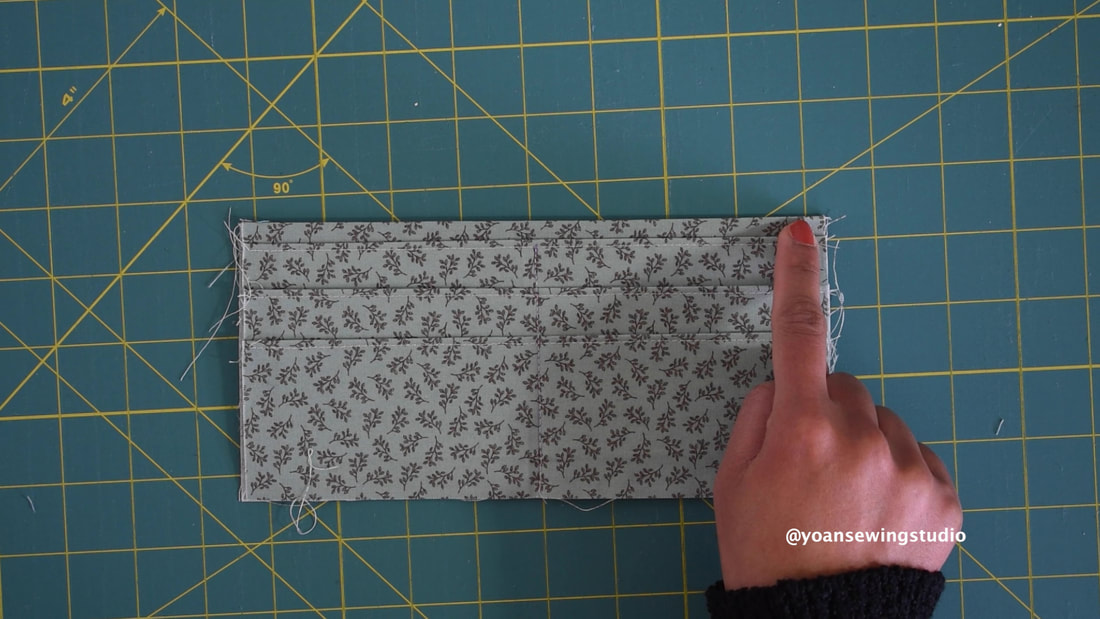
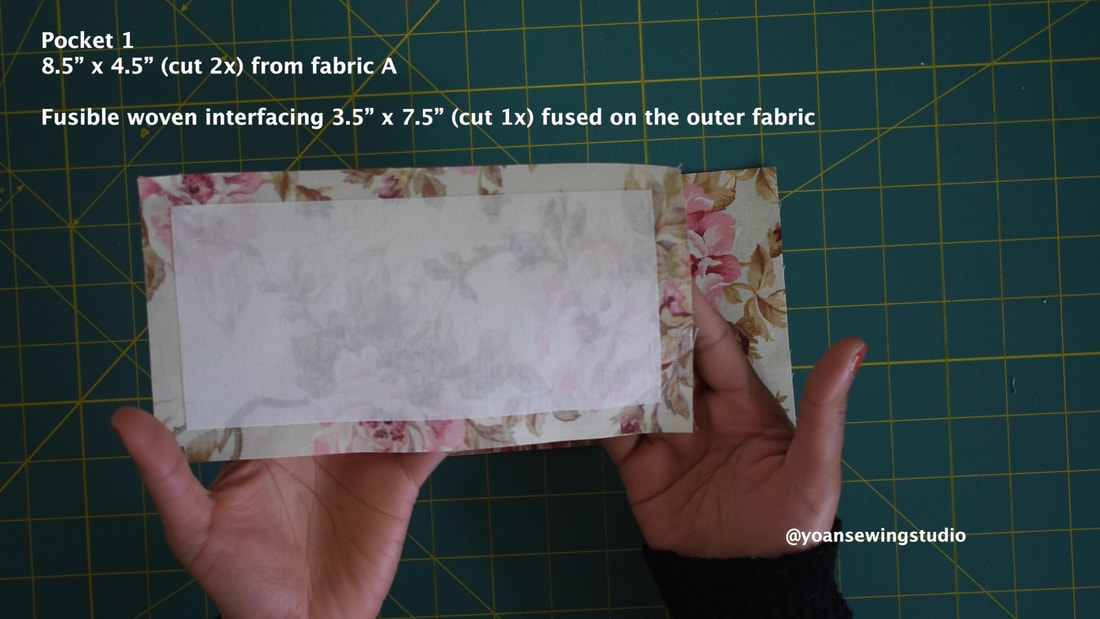
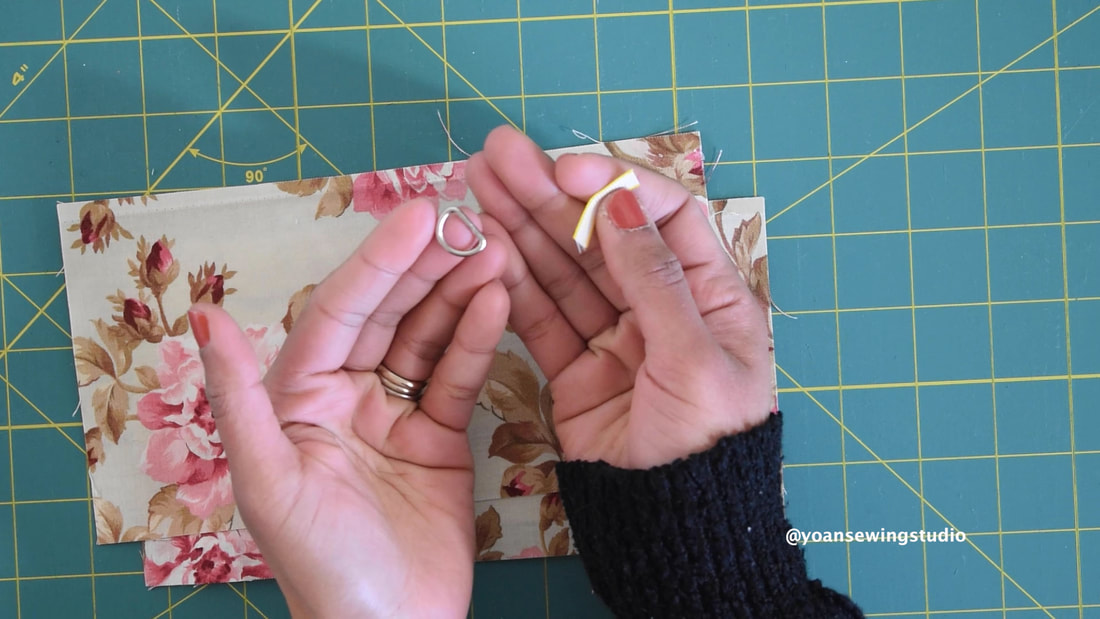
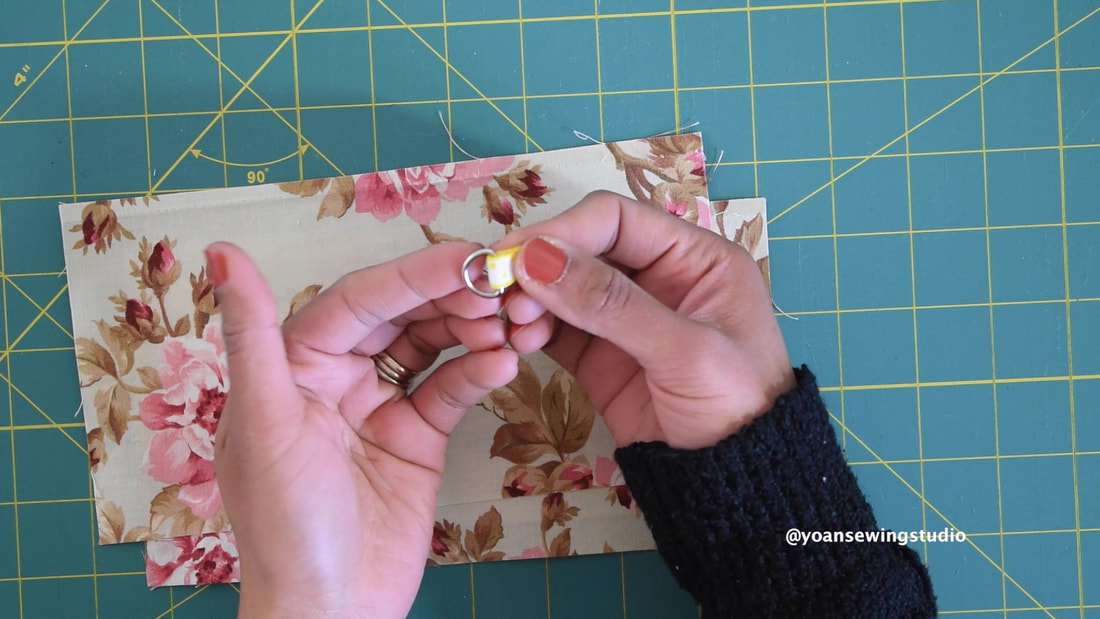
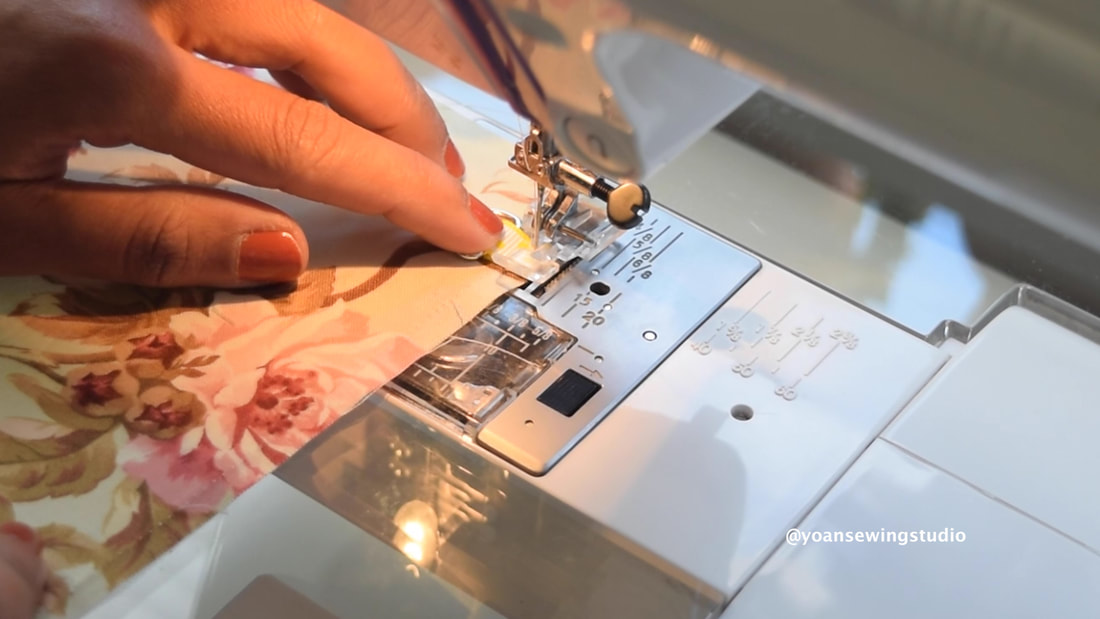
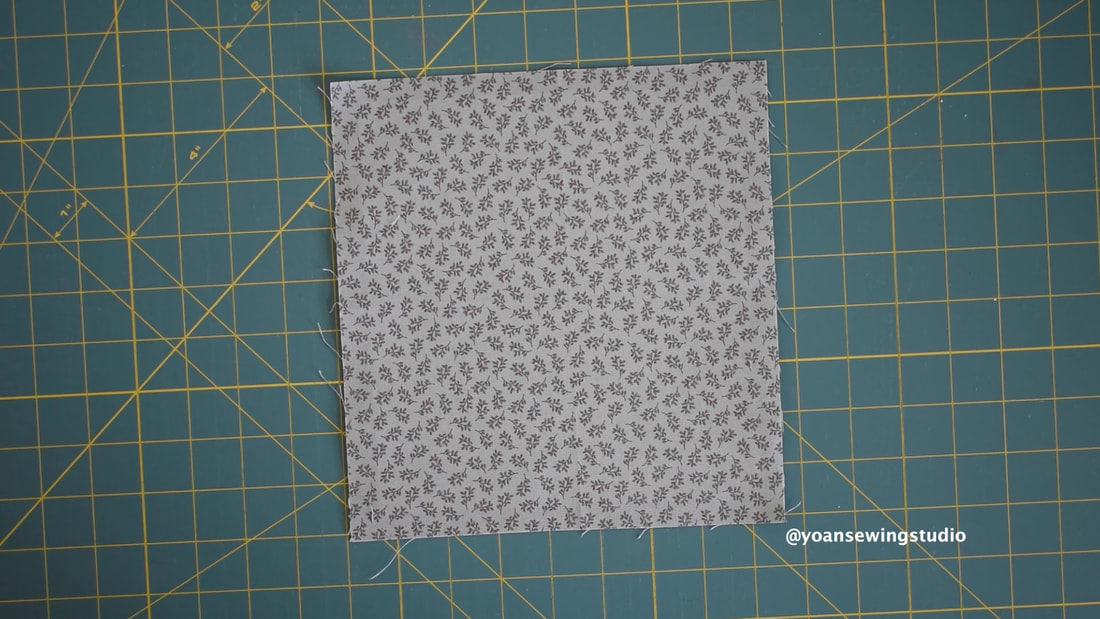
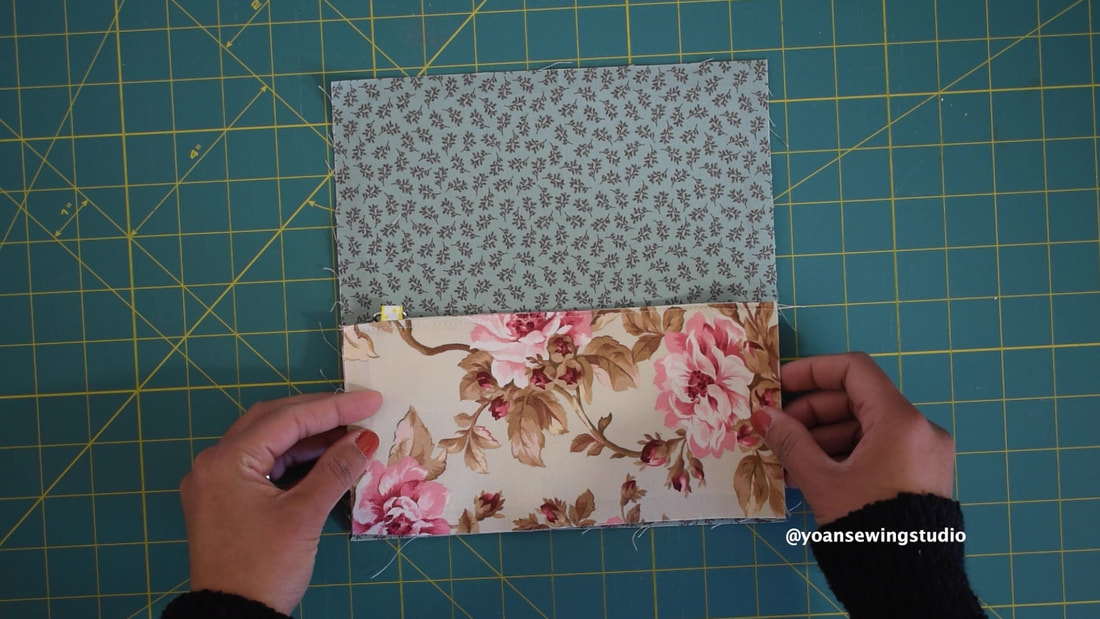
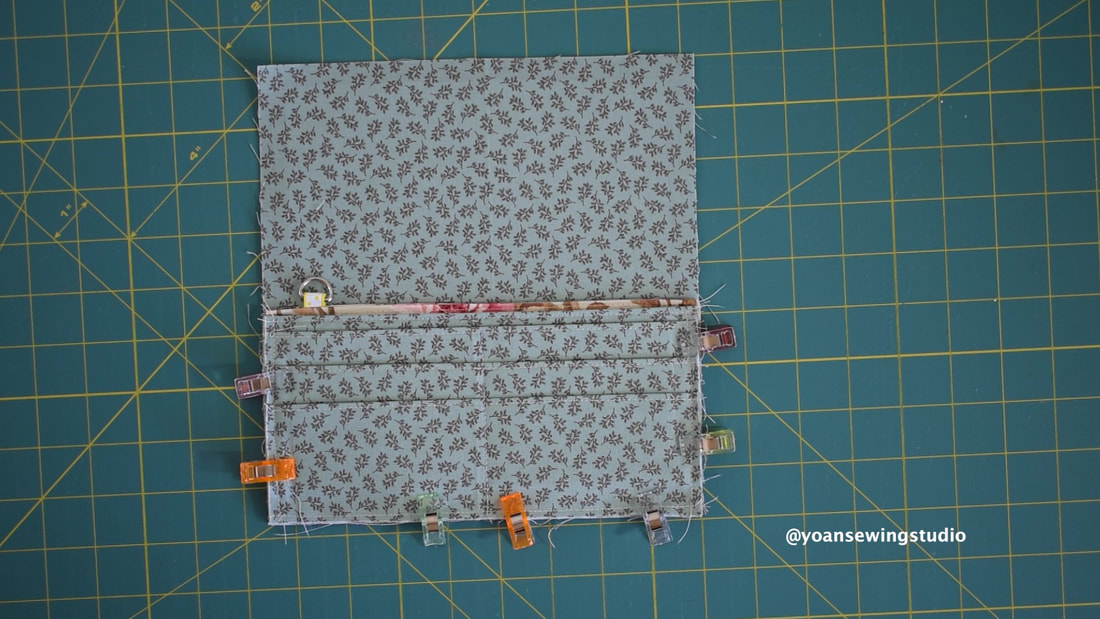
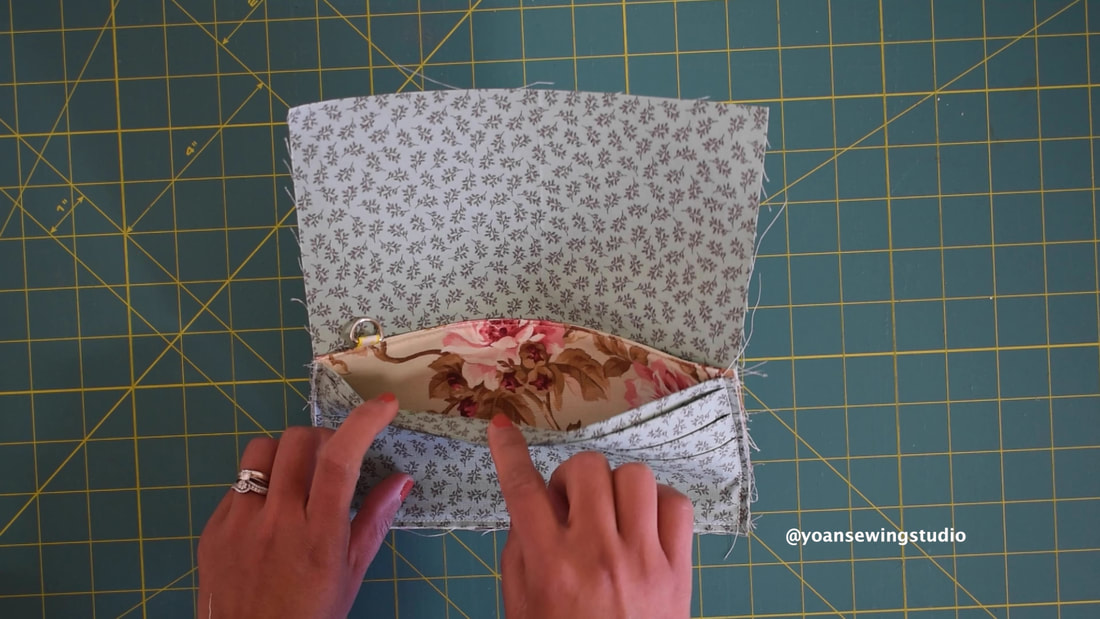
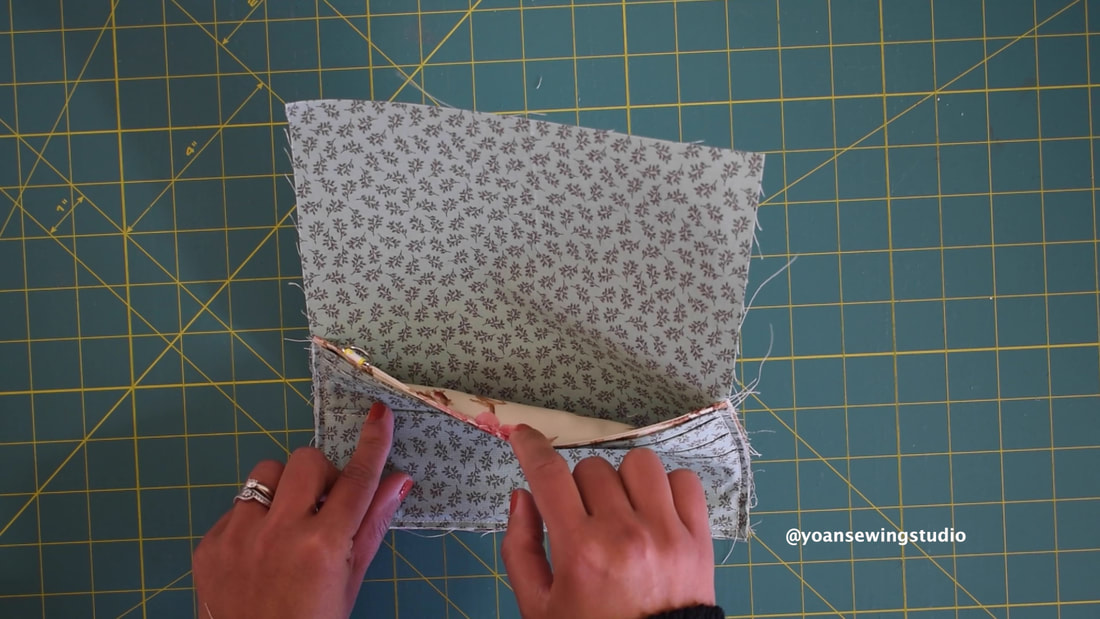
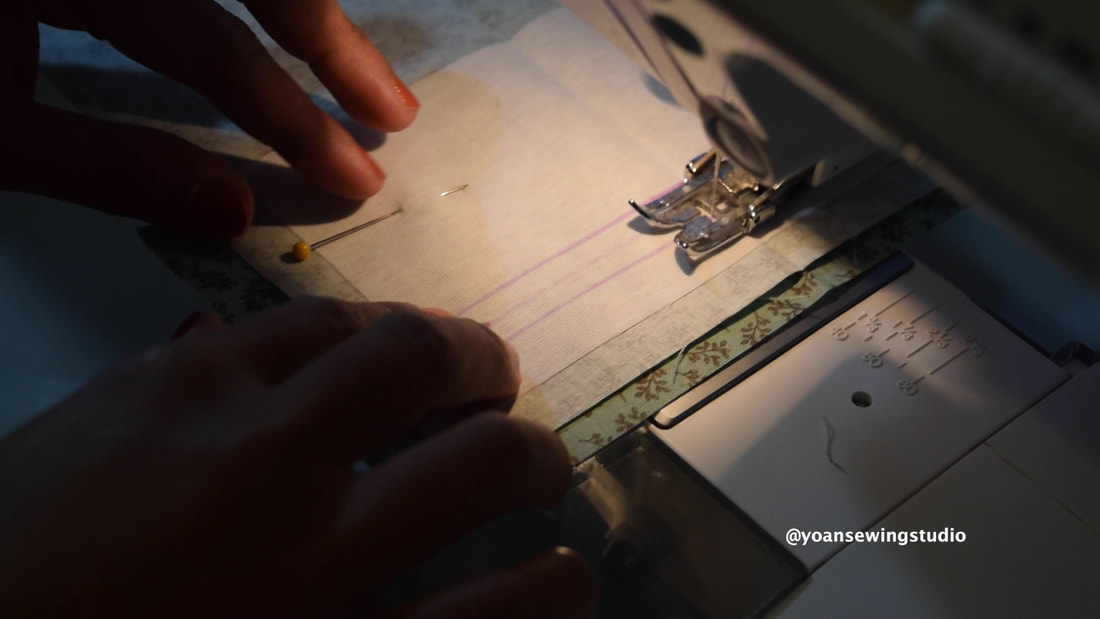
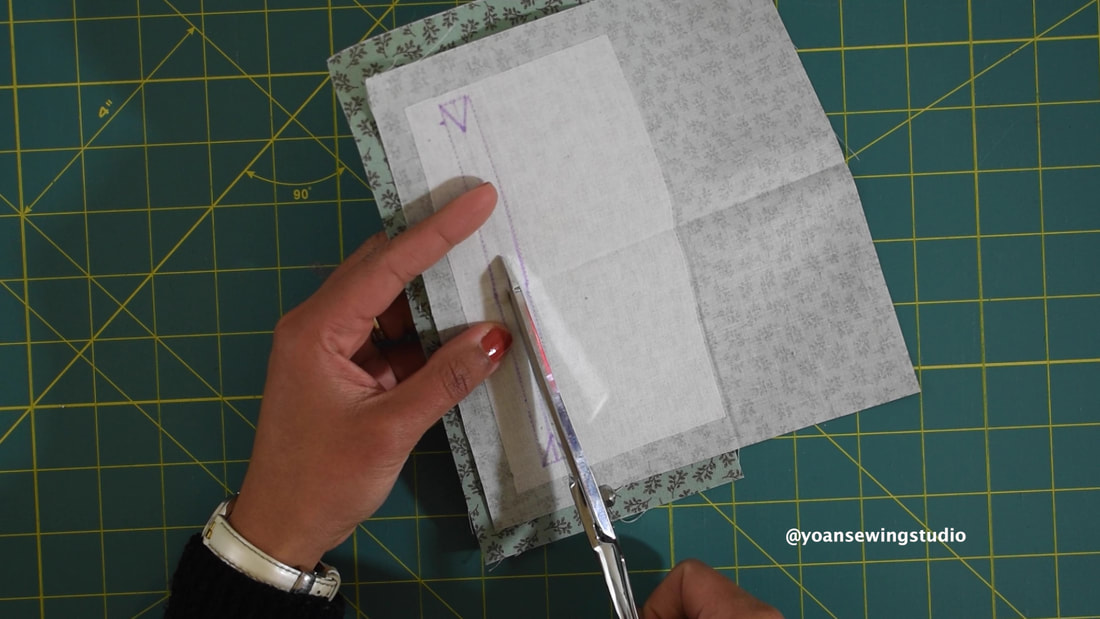
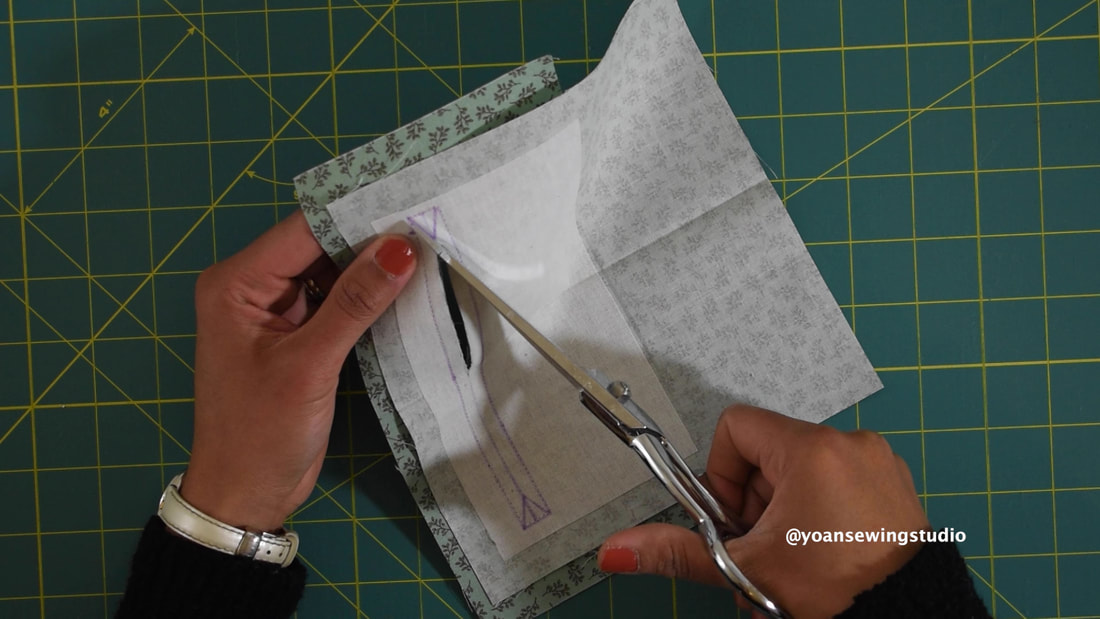
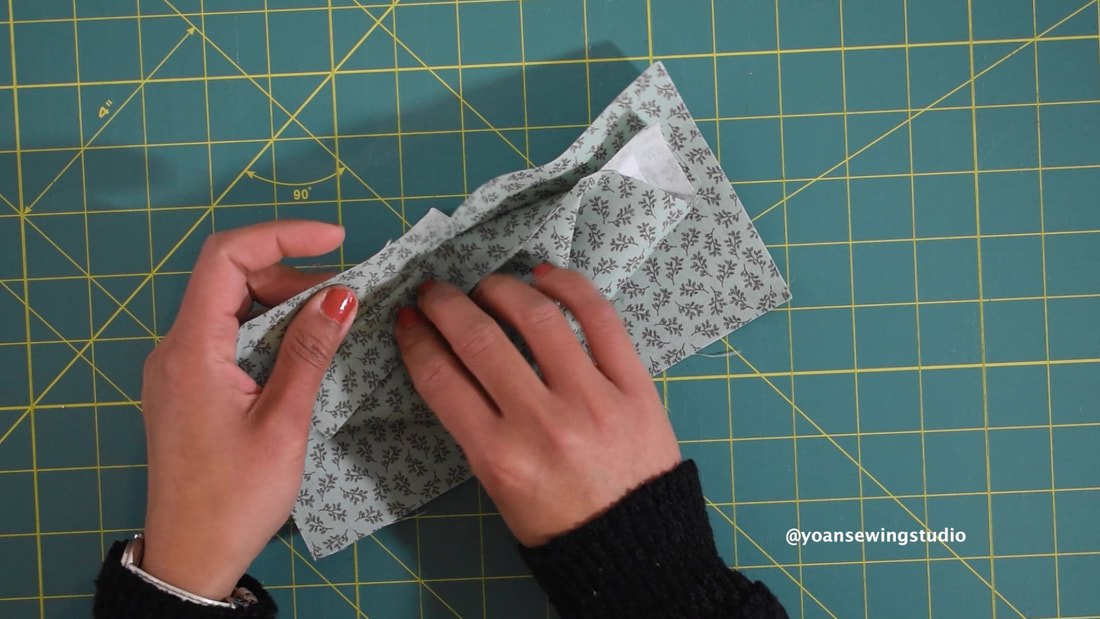
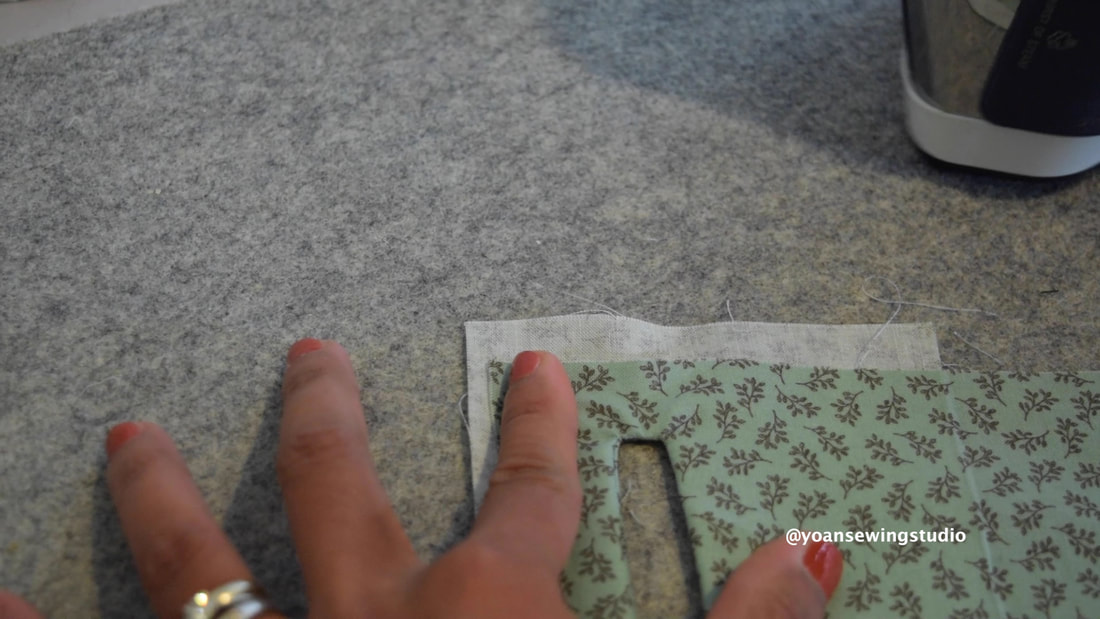
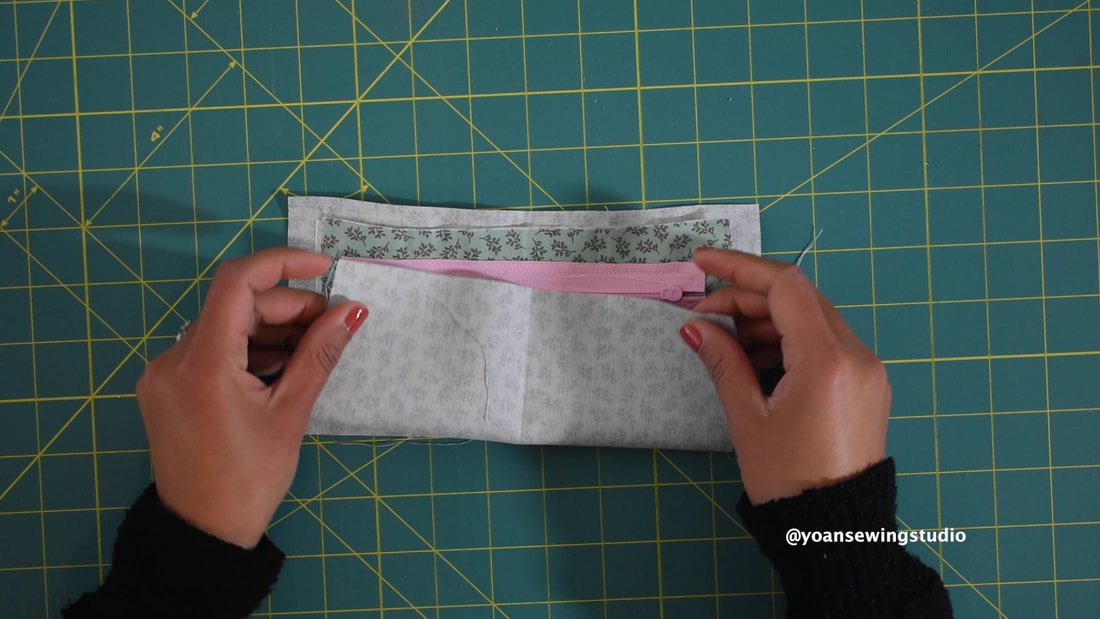
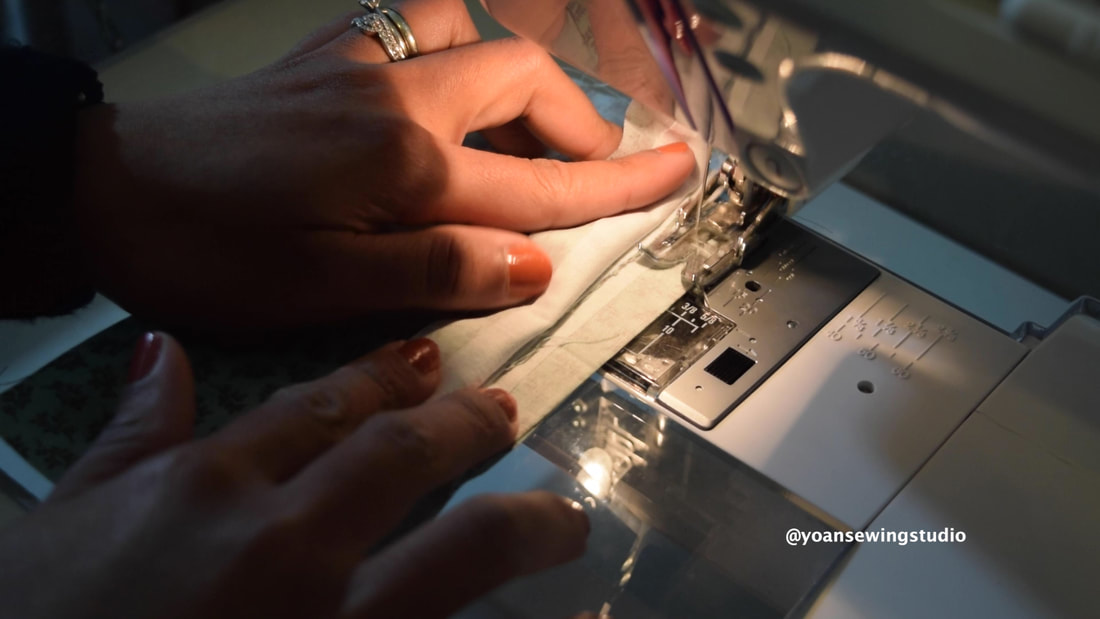
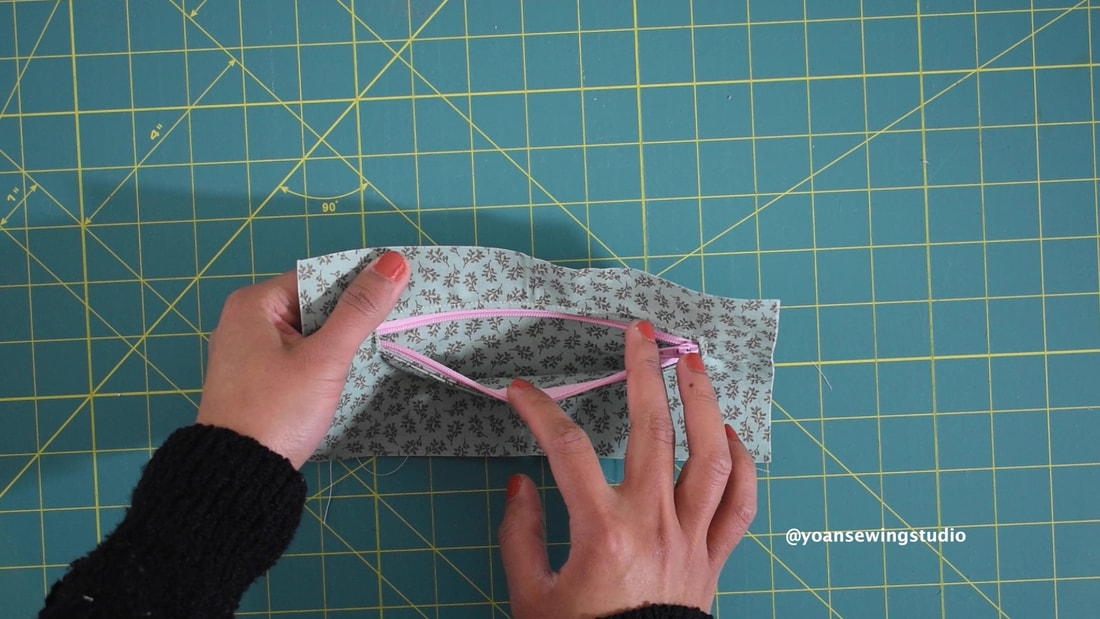
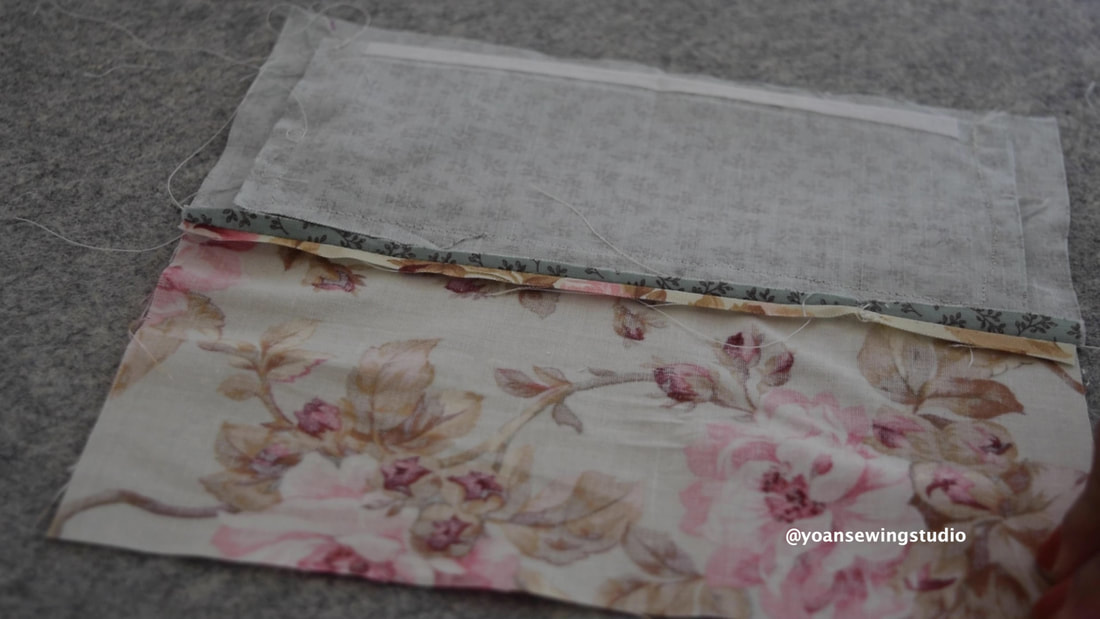
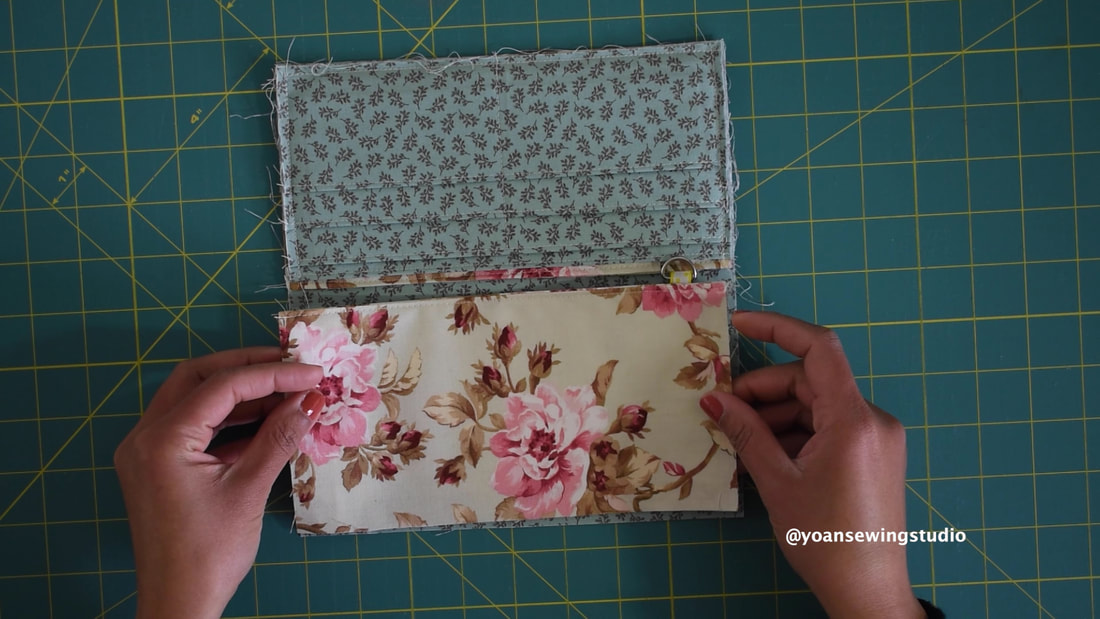
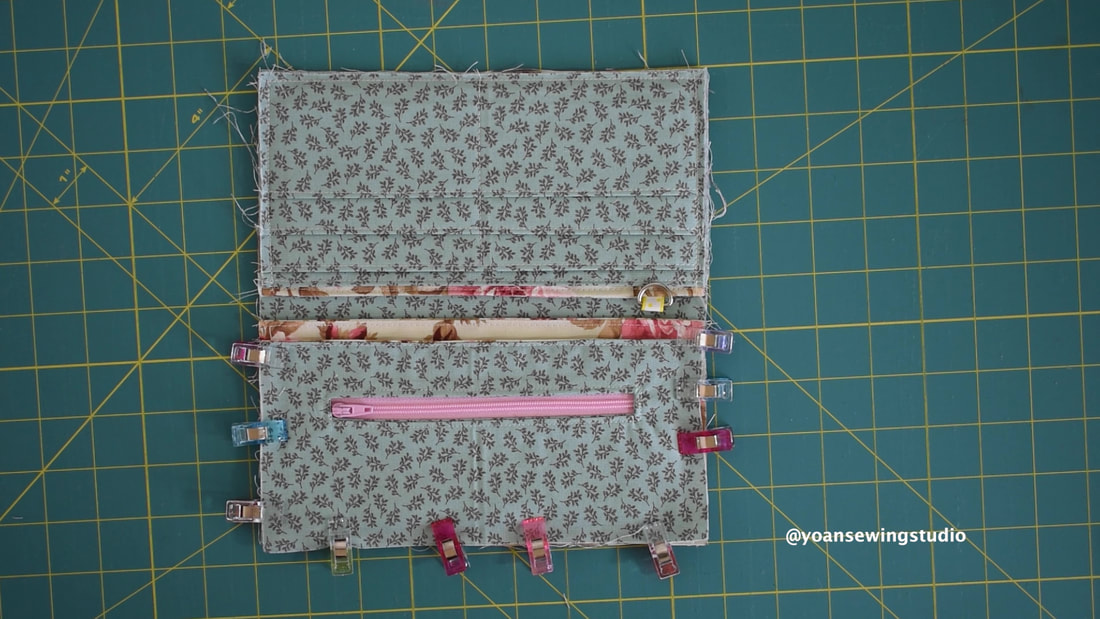
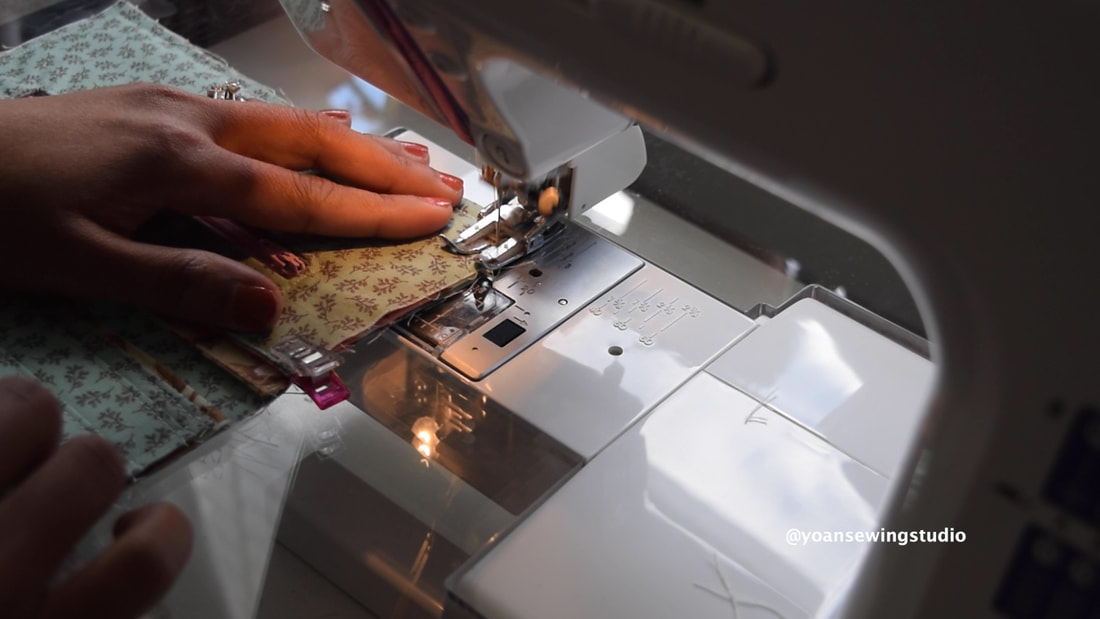
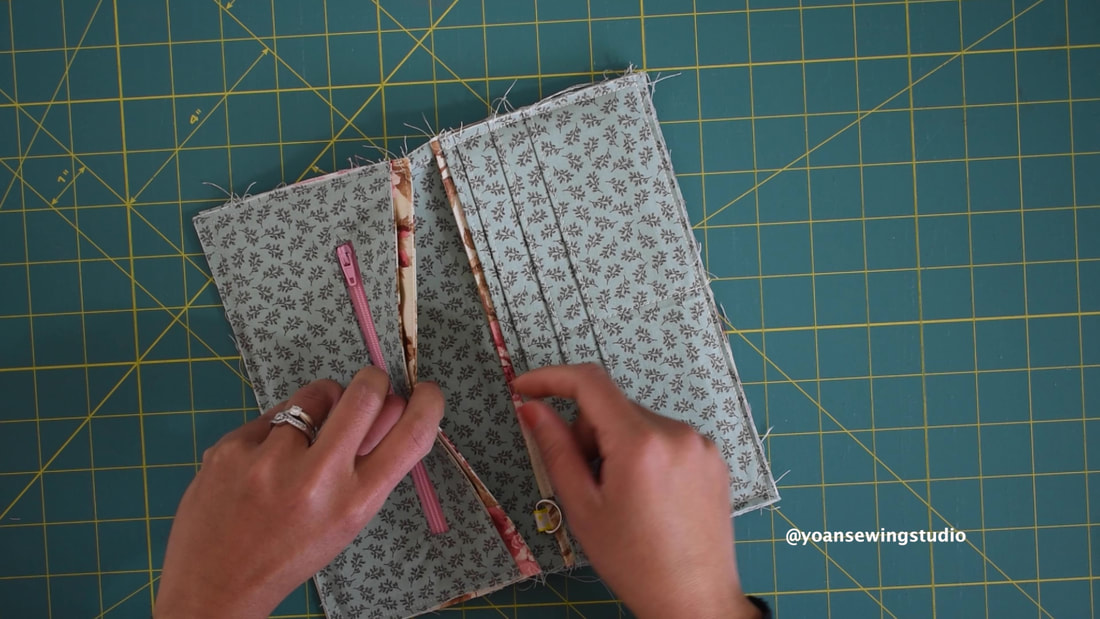
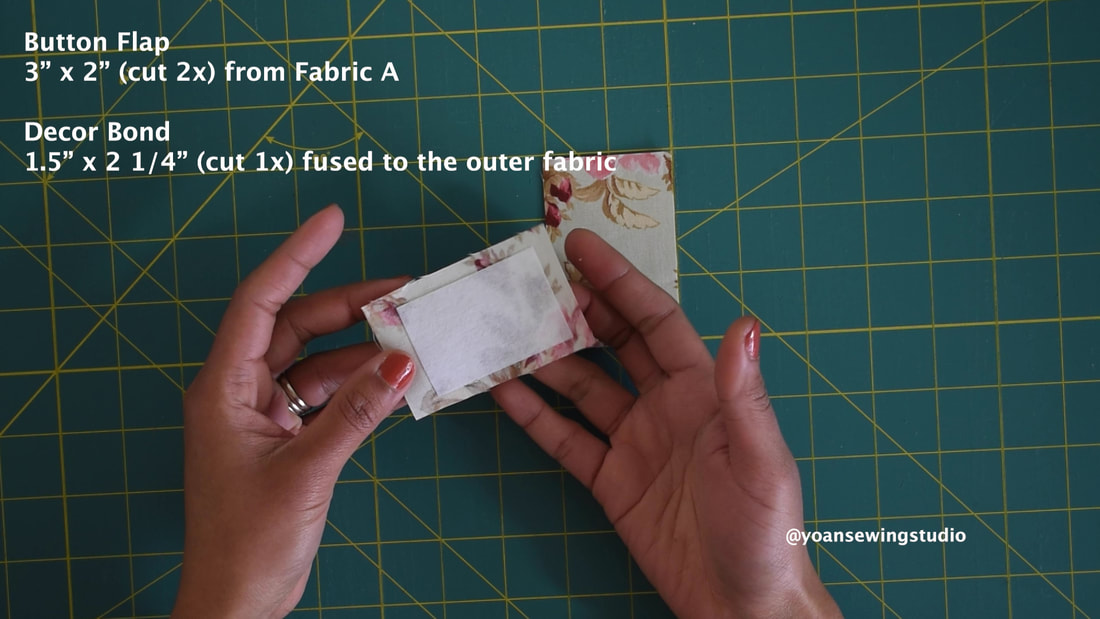
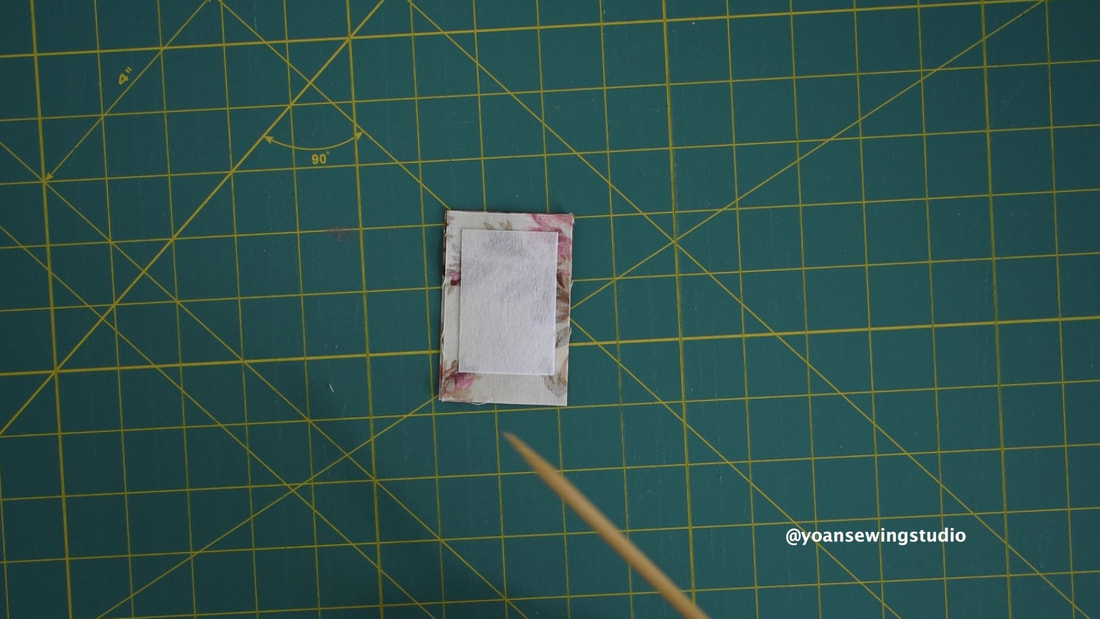
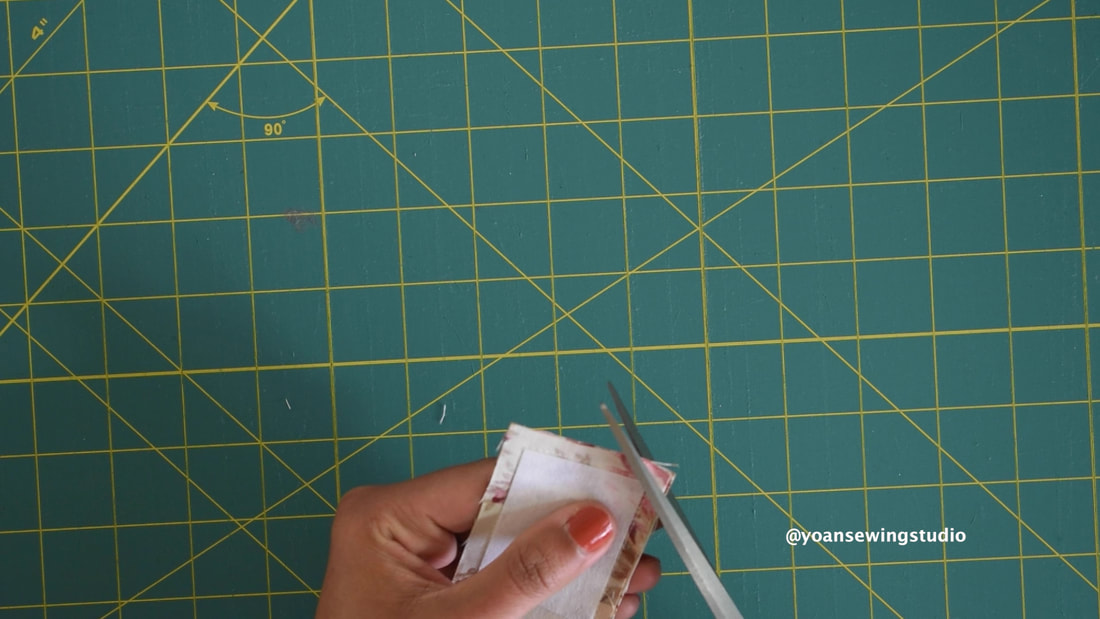
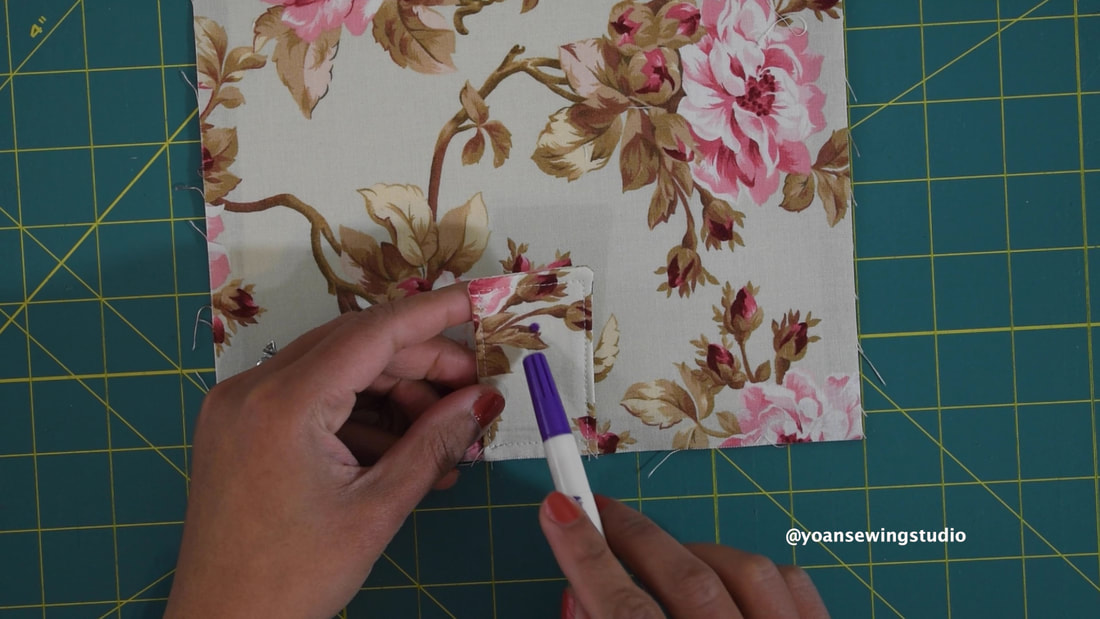
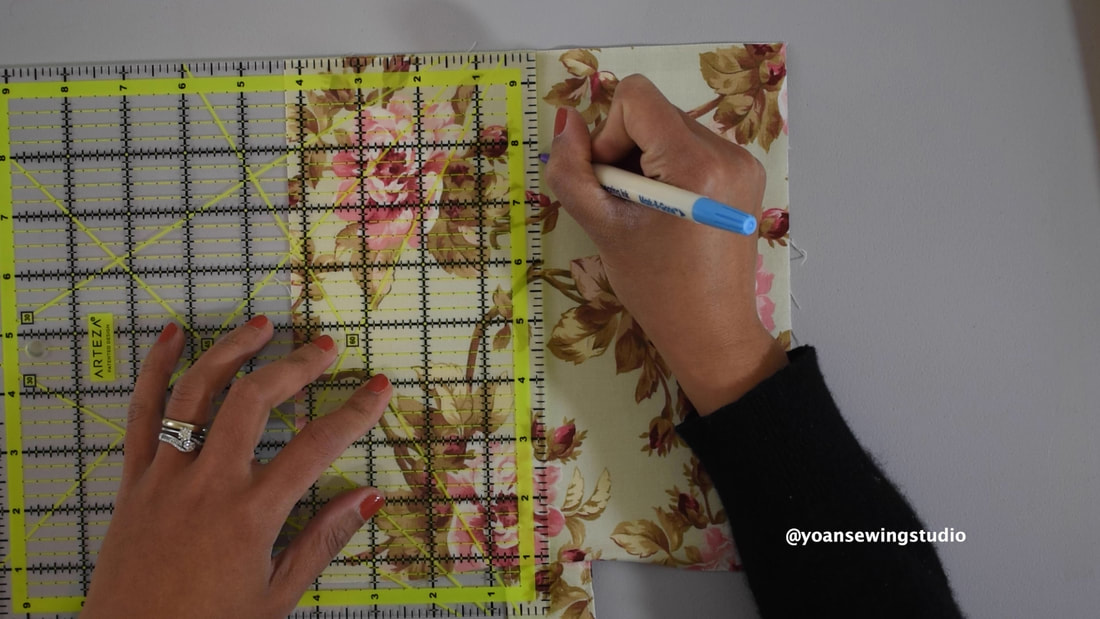
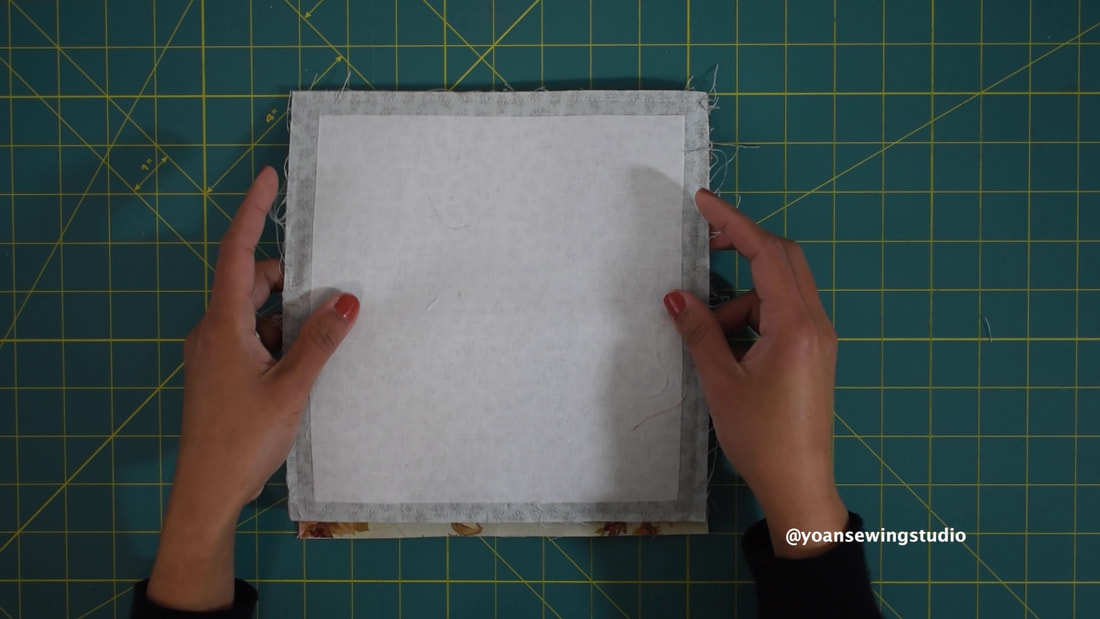
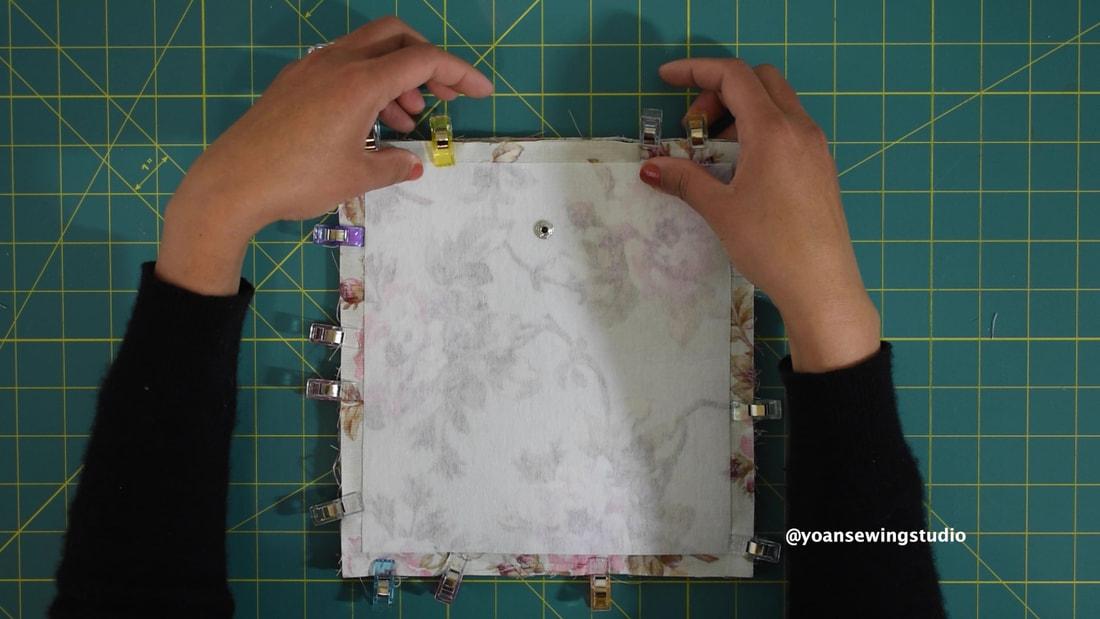
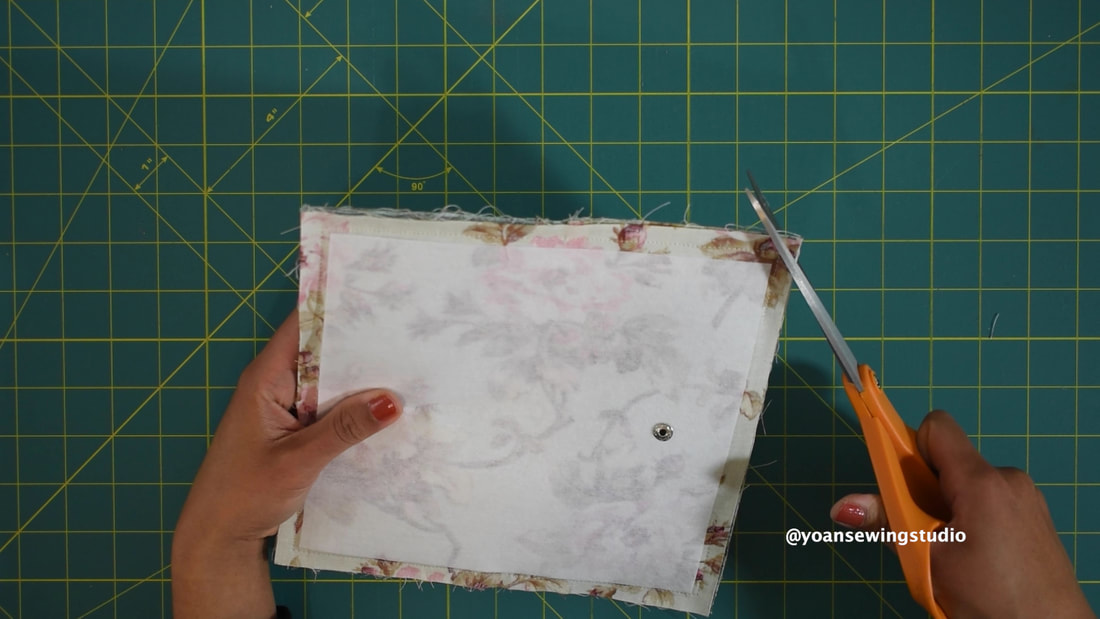
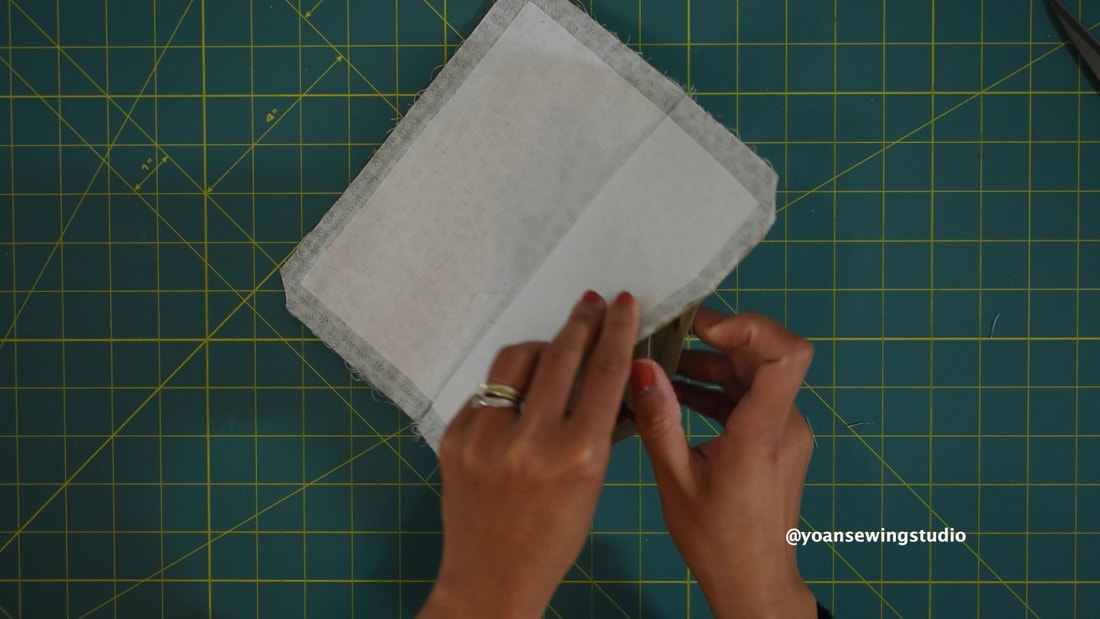
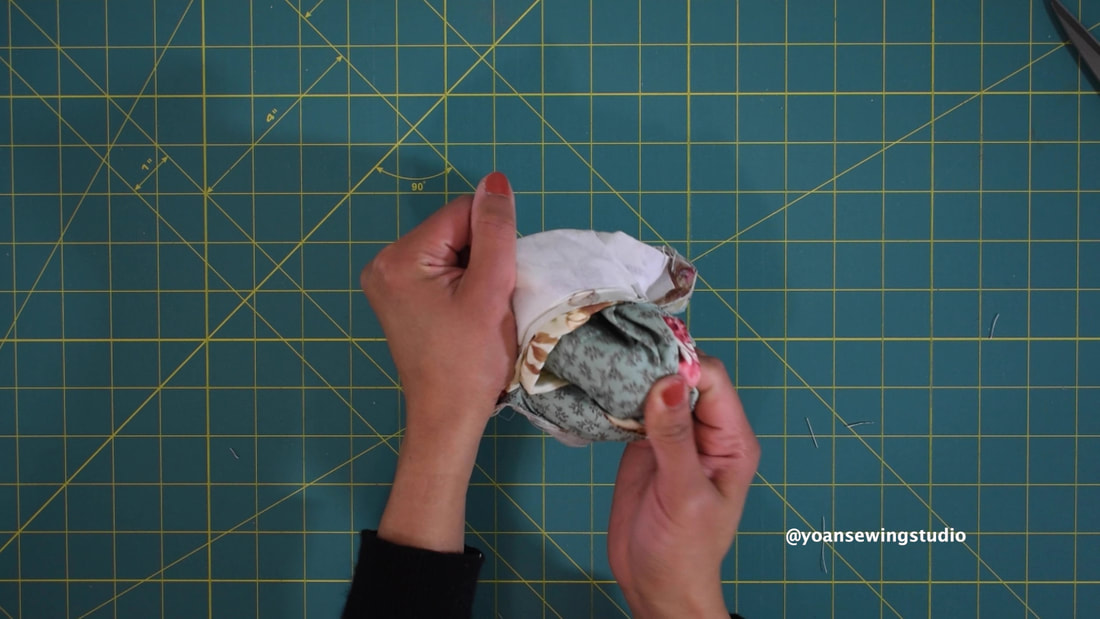
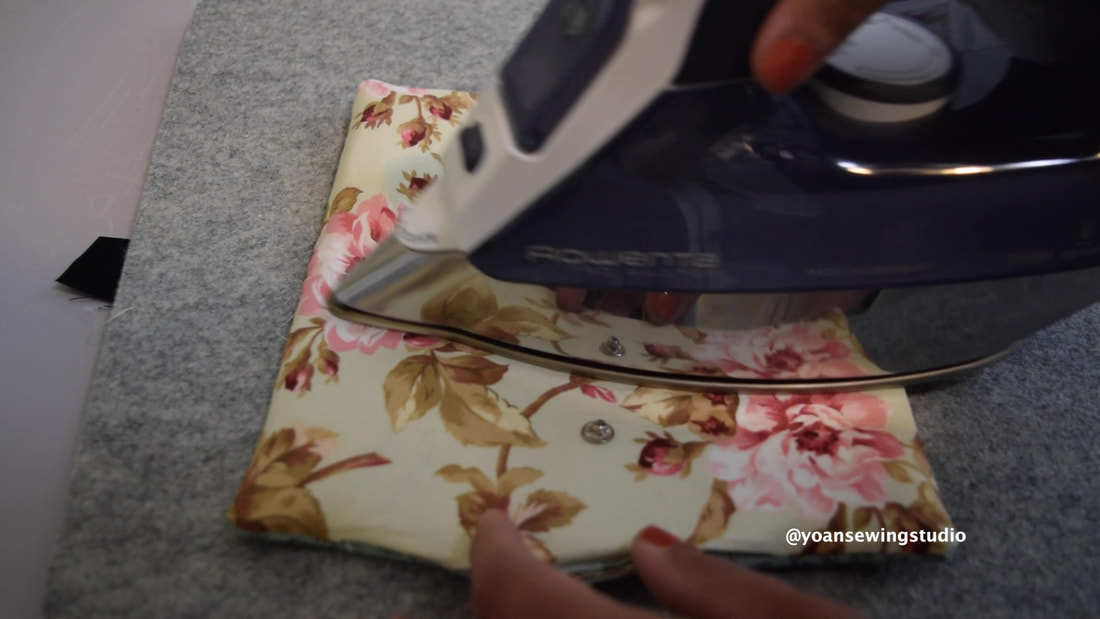
24. Give your pouch a final pressing. 25. Attach the wristlet strap, Enjoy!  Slim Bifold Wallet with wristlet strap Here's a new wallet for you to sew. This is a simple slim bifold wallet, that comes with 6 card pockets, a zipper pocket, 4 compartments to keep your cash, cellphone, cheque book, or passport. The added wristlet strap, allows you to carry this wallet itself pretty much everywhere. I posted the full tutorial on my Youtube channel, however you may scroll down below for the list of supplies, cutting measurements, and written instructions. SUPPLIES 2 x Fat Quarters or 2x 1/4 yard of cotton fabric  Decor Bond 10" x 10" (alternative : decovil, fusible fleece/thermolam or your preferred mid-heavy weight interfacing) *note : if you use fusible fleece, your wallet will turn out on the softer side 1/2 yard Fusible Woven interfacing (20" wide) 1 all purpose zipper (at least 6" long) 1/2" D ring 1/2" swivel hook 1 scrap of ribbon (1" x 1/2") Metal Snap Closure (alternative: magnetic snap, velcro, button) Basic sewing notions CUTTING Wallet Exterior -From Fabric A 8.5" x 9" (cut 1x) -From Decor Bond 7.5" x 8" (cut 1x) Wallet Interior -From Fabric B 8.5" x 9" (cut 1x) -From Fusible Woven Interfacing 7.5" x 8" (cut 1x) Card Pockets -From Fabric B 8.5" x 15" (1x) -From Fabric B 4.25" x 8.5" (1x) - for the lining -From Fusible Woven interfacing 7.5" x 14" (cut 1x) Pocket 1 & Pocket 2 -From Fabric A 8.5" x 4.5" (cut 4x) -From Fusible Woven Interfacing 7.5" x 3.5" (cut 2x) *fuse the interfacing to the outer fabric Zipper Pocket -From Fabric B 8.5" x 4.25" (cut 1x) - outer pocket -From Fabric B 7.5" x 7" (cut 1x) - Inner pocket -From Fabric A 8.5" x 4.25"(cut 1x) - lining -From Fusible Woven interfacing 7.5" x 3.25" (cut 1x) - outer pocket -From Fusible Woven interfacing 6.5" x 3.5" (cut 1x) - Inner Pocket Button Flap -From Fabric A 3" x 2" (cut 2x) -From Decor Bond 2.25" x 1.5" (cut 1x) Wristlet Strap -From Fabric A 13" x 2" -From Fusible woven interfacing 12" x 1" DIRECTIONS 1. Cut your fabric and apply the interfacing as instructed on the above cutting instructions. Center the position of the interfacing on your fabric. 2. Draw the pleat lines on wrong side of the pocket piece 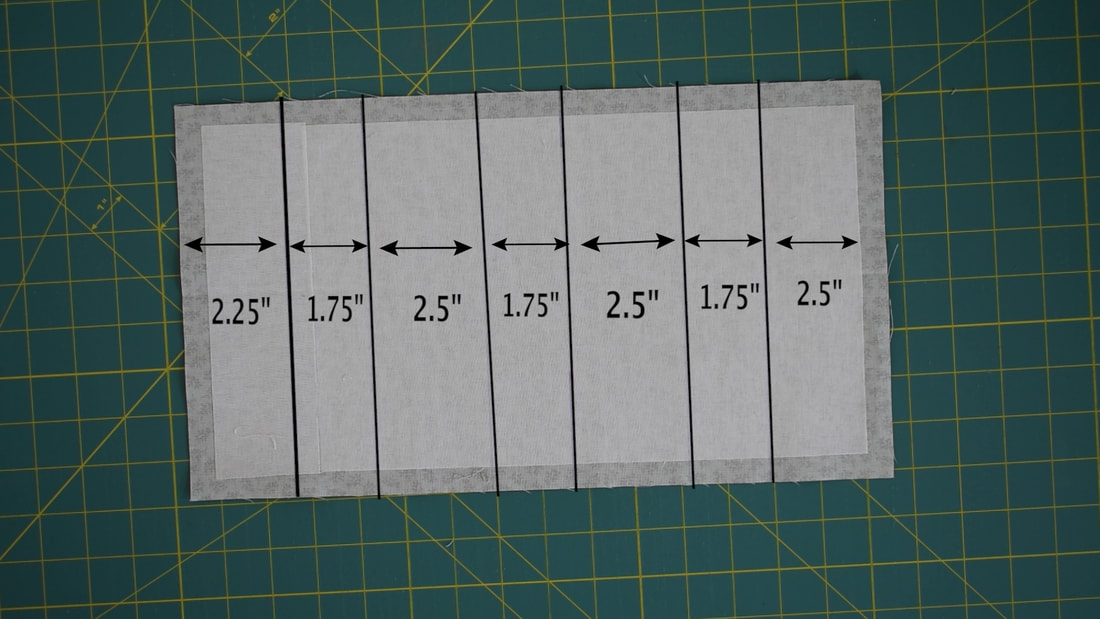 3. Fold the first 2.5" line towards the wrong side, press. Then fold the next line (1.75" line) towards the right, press. 4. Fold the next 2.5" line towards the wrong side, press, then fold the next 1.75" line towards the right, press. 5. Repeat the same till you get to the last line. Do the final pressing. 6. Top stitch along the pleat lines. 7. Draw a line on the center of the pocket starting from the first pleat, all the way down. Sew on the line to divide the card slots. 8. Your pocket piece should now measure 8.5" x 4.25" . Take the card pocket lining piece, lay them right side together, then sew the top edge with 1/4" of seam allowance. 9. Press the seams open, fold wrong side together, press, top stitch the top edges, then sew along the sides and the bottom with 1/4" of seam allowance 10. Prepare the pocket 1 pieces, the d ring, and the ribbon. 11. Feed the ribbon through the d ring, lay them on the top edge of the outer pocket piece, 3/4" away from the left. then stitch along the edges with 1/4" of seam allowance (tips : use a zipper foot for easier move) 12. Lay the pocket pieces right side together, pin, then sew with 1/4" of seam allowance 13. Press the seams open, fold wrong side together, press, then topstitch along the top edges. 14. Lay the wallet interior piece right side up, lay the pocket 1 right side up, then the card pocket right side up, aligning the sides and the bottom edges. Secure them with some sewing clips, then sew along the sides and the bottom with 14" of seam allowance. 15. Prepare the zipper pocket pieces, draw the zipper template on the wrong side of the inner pocket piece, 1" down from the top edge, center the position. 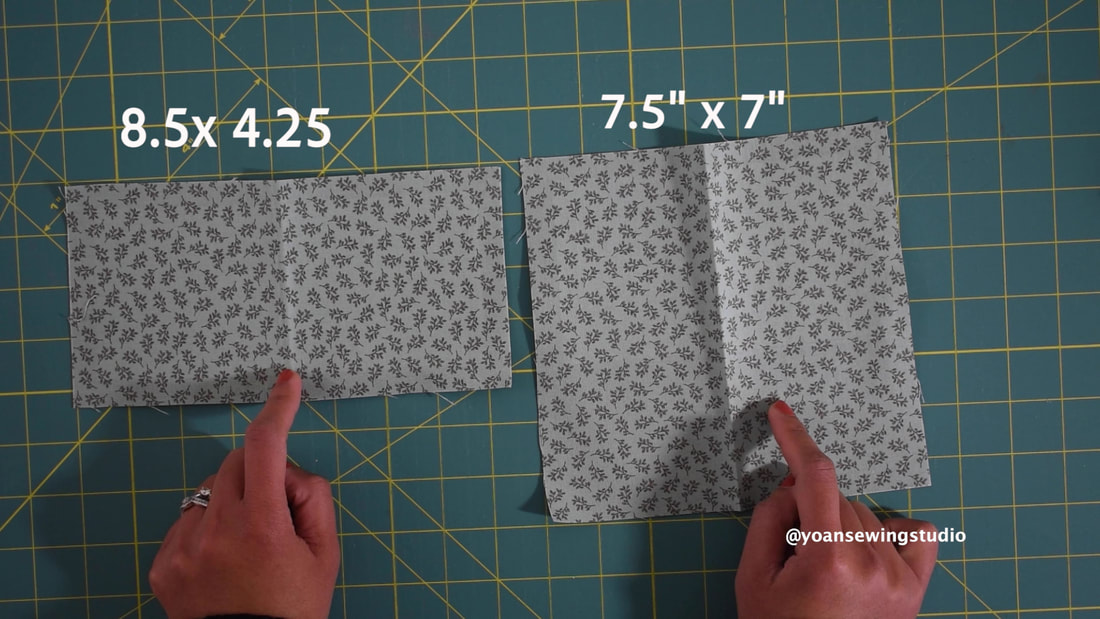 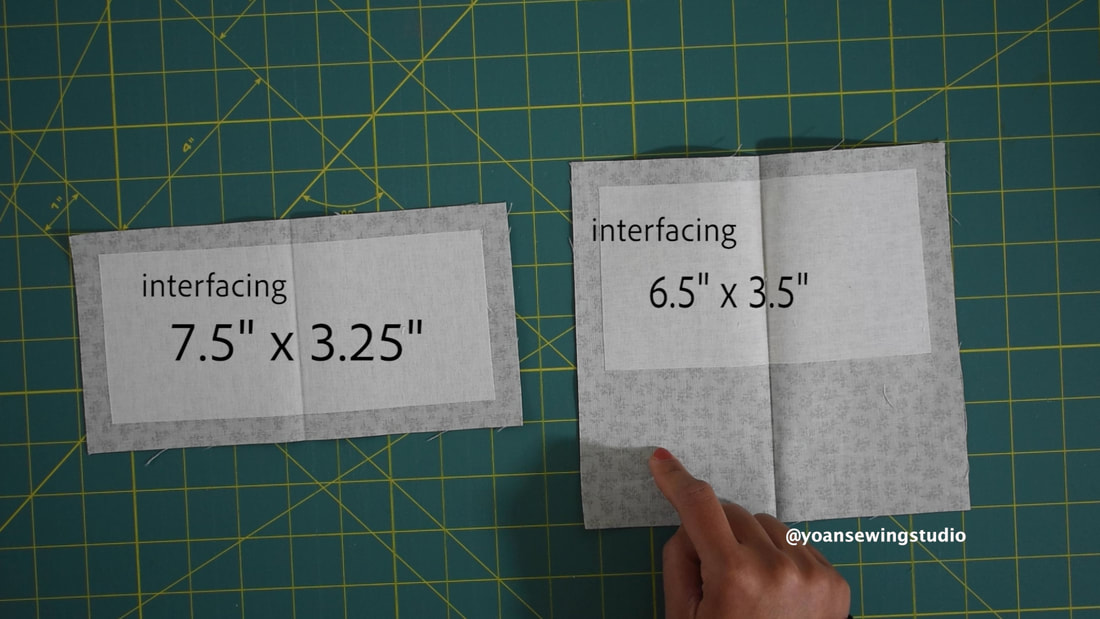  16. Lay the inner pocket on the right side of th outer pocket, 3/8" down from the edge of the outer pocket, pin them in place, then sew along the perimeter of the zipper template. 17. Cut the center line, and the corner triangles, be careful not to cut through the stitches. Turn your inner pocket piece to the wrong side, press. 18. Apply the basting tape on the edges of the zipper tape, peel the top layer off, place the zipper template on top of the zipper, center the position of the zipper teeth, finger press along the zipper tape to make sure that the basting tape is sticking to the fabric. Sew along the edges of the zipper template. 19. Trim off the excess zipper, fold the inner pocket in half, aligning the bottom edges with the top edges, pin them in place, then sew along the sides and the top edges. 20. Take the zipper pocket lining piece, lay that on the zipper pocket right side together, pin the top edges then sew with 1/4" of seam allowance. 21. Press the seams open, fold wrong side together, press, then top stitch along the top edges. 22. Sew pocket 2 the same way you did the pocket 1 (minus the strap anchor), refer to step 12 & 13. 23. On the opposite side of the card pockets, lay the pocket 2 right side up, then lay the zipper pocket right side up, aligning the sides and the bottom edges, secure them in place with some sewing clips, then sew along the sides and the bottom with 1/4" of seam allowance. 24. Lay the flap pieces right side together, sew the sides and the bottom with 1/4" of seam allowance 25. Clip the corners, be careful not to cut through the stitches, turn the flap inside out, press. 26. Position the flap on the center of the back side of the wallet right side together, sew with 1/4" of seam allowance. 27. Mark 3/4" from the edge of the flap (center the position). Mark 1 1/4" down from the edge of the front side of the wallet (center the position). 28. Install the button closure. 29. Sew the wristlet strap watch the tutorial here. 30. Lay the wallet exterior and interior right side together, (the card pocket should be facing the flap side (or the back side). Secure them in place with some sewing clips, leaving about 4" of opening at the front side, sew with 3/8" of seam allowance. 31. Clip all the corners, be careful not to cut through the stitches. Turn the wallet inside out through the opening hole, press. 32. Fold the raw edges from the opening hole towards the inside (3/8"), secure with some sewing clips, then top stitch all around. 33. Give your wallet a final pressing, attach the wristlet strap, enjoy!
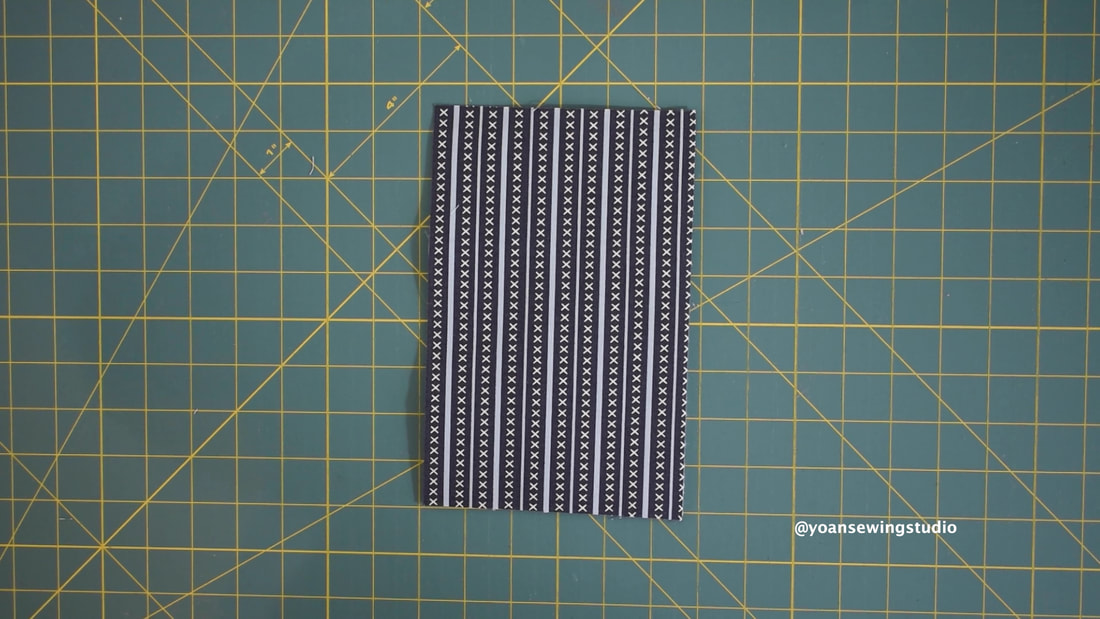
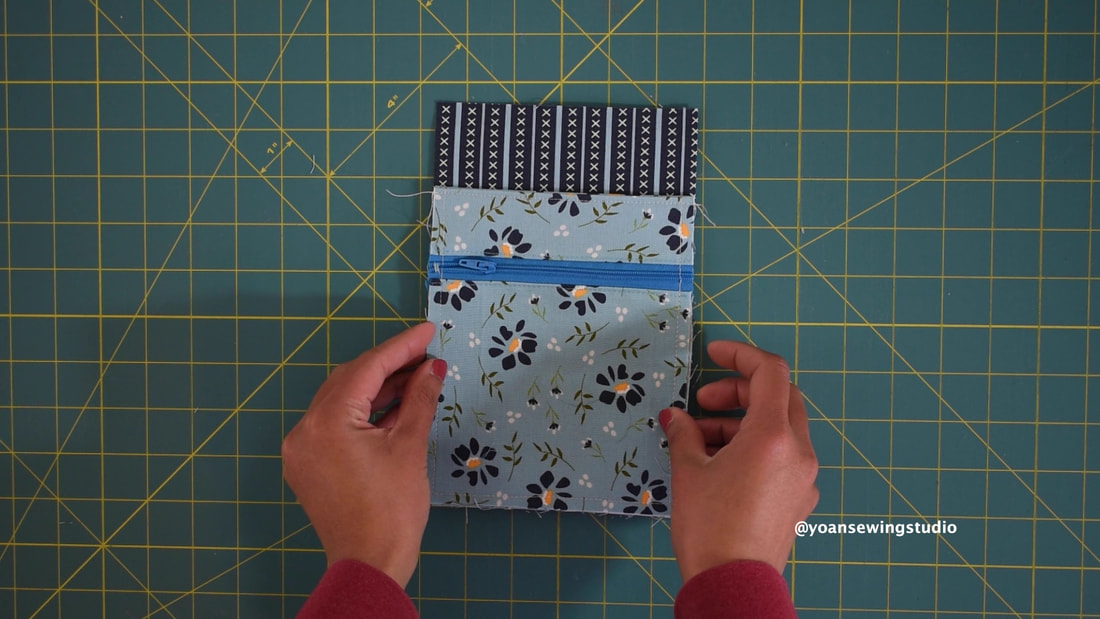
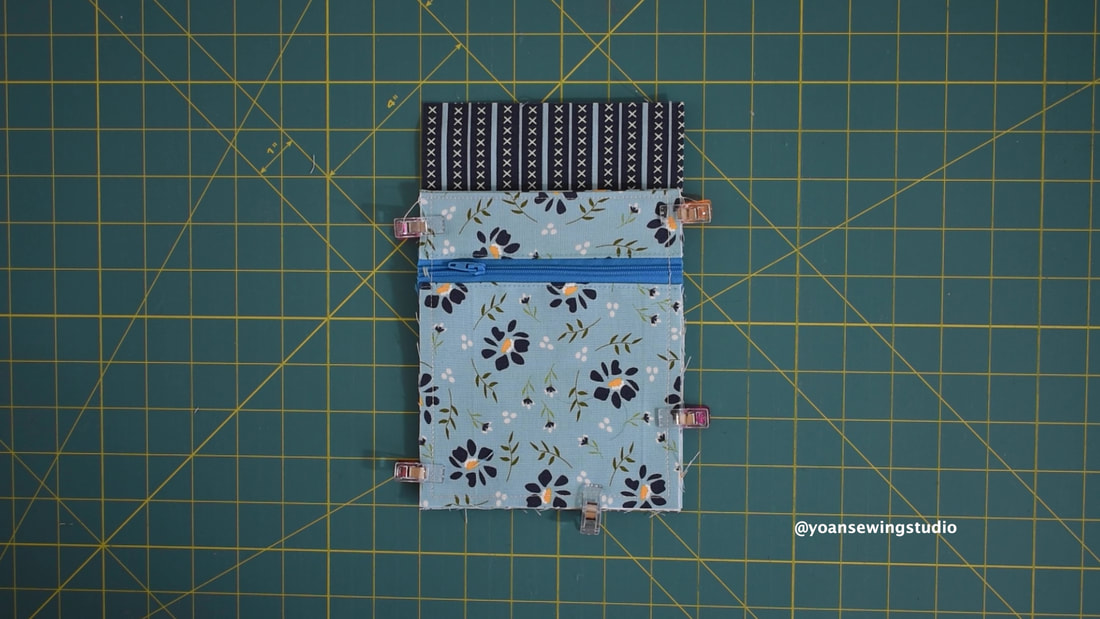
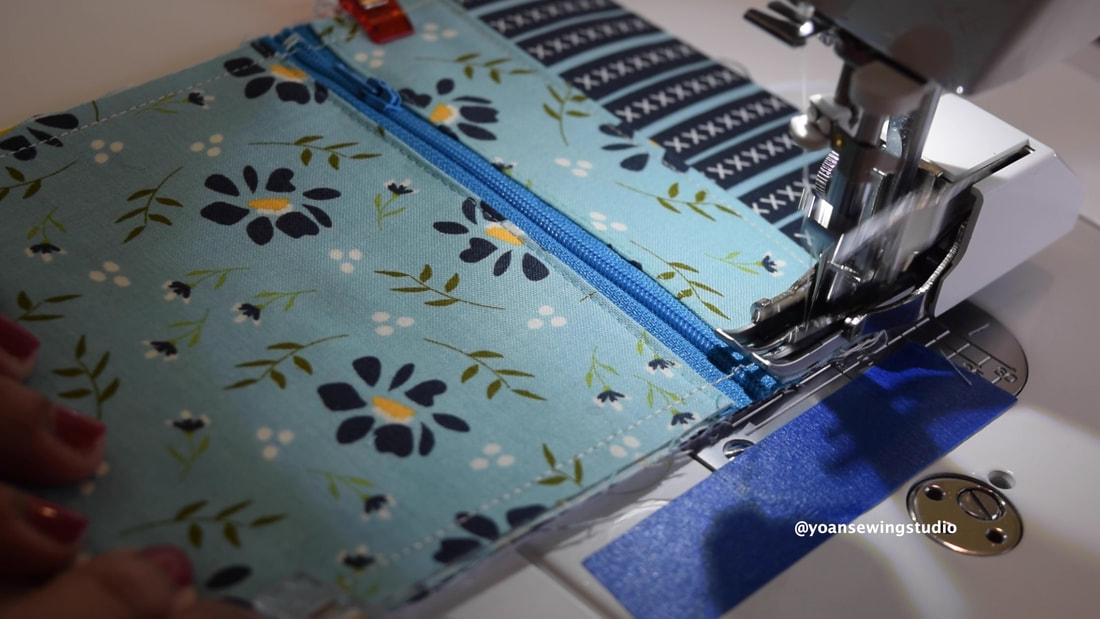
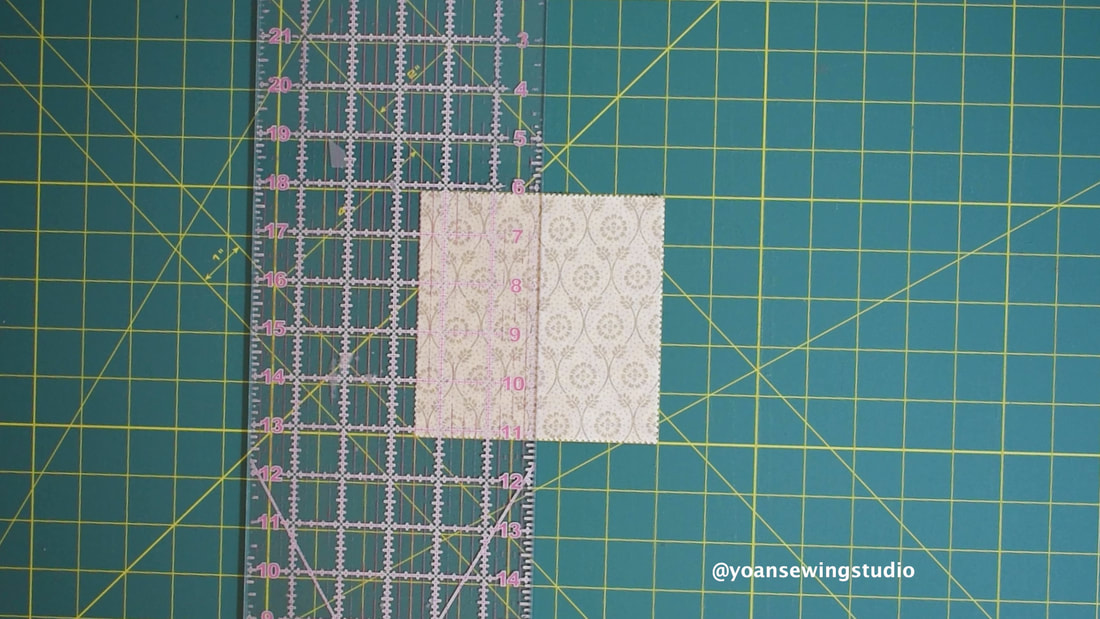
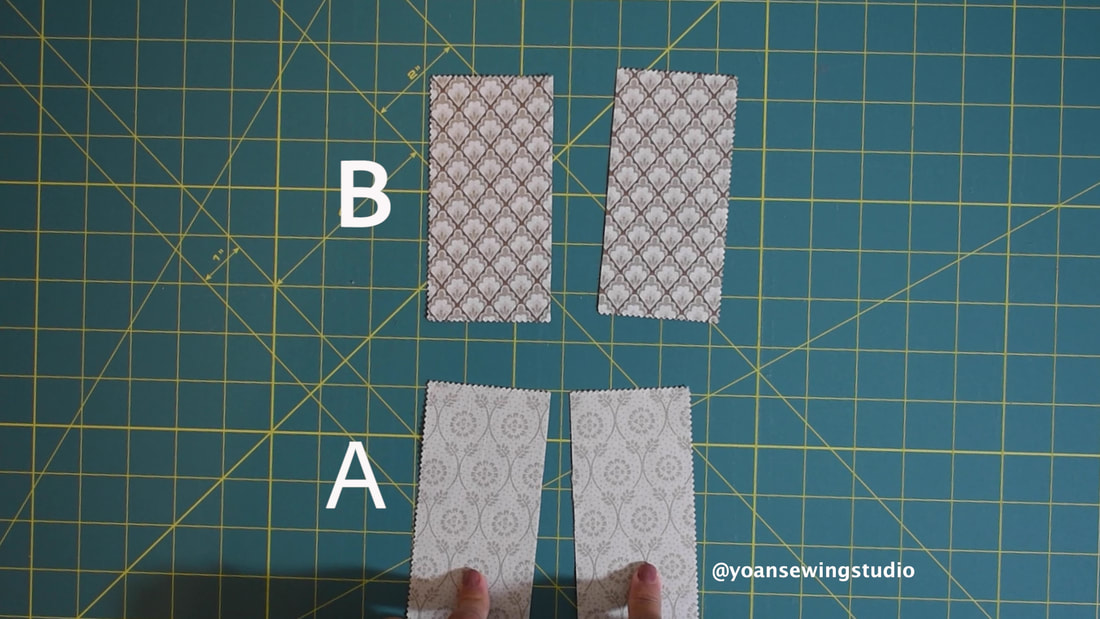
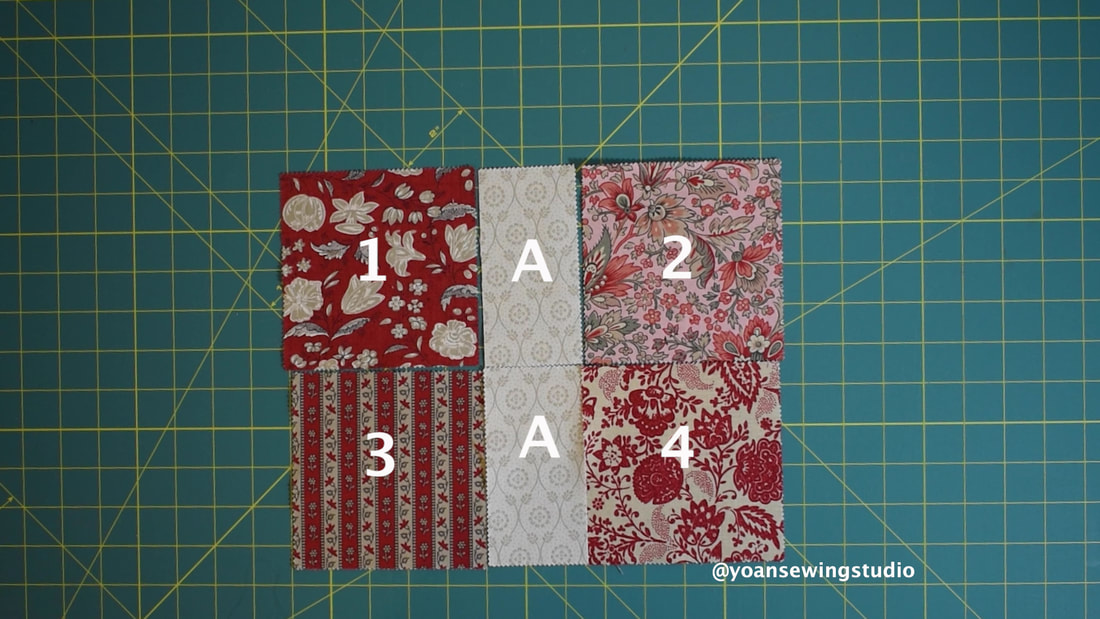
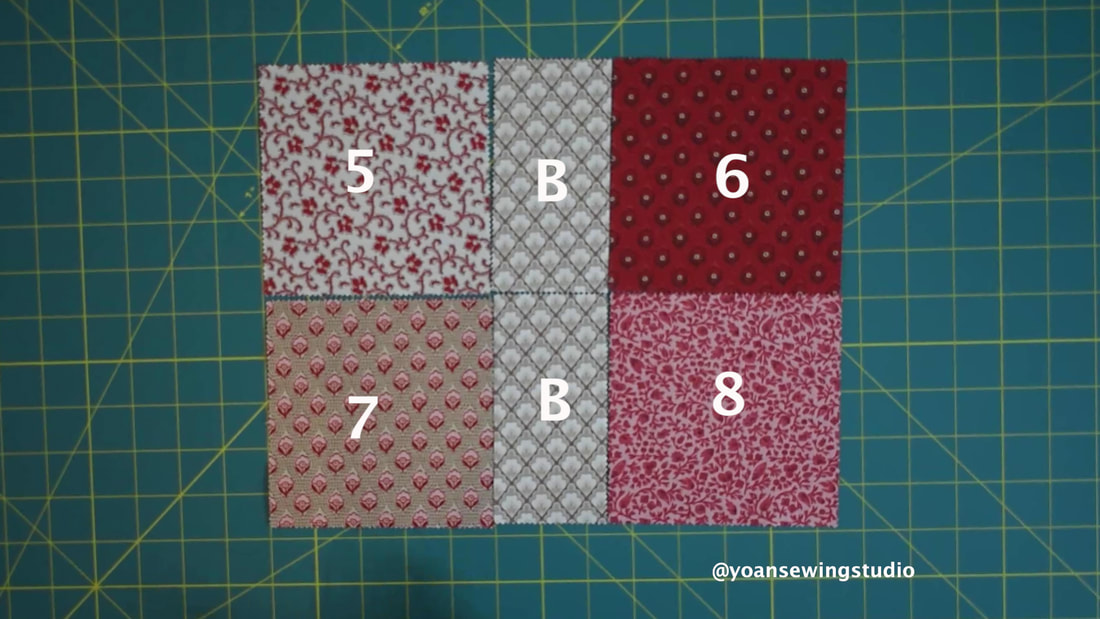
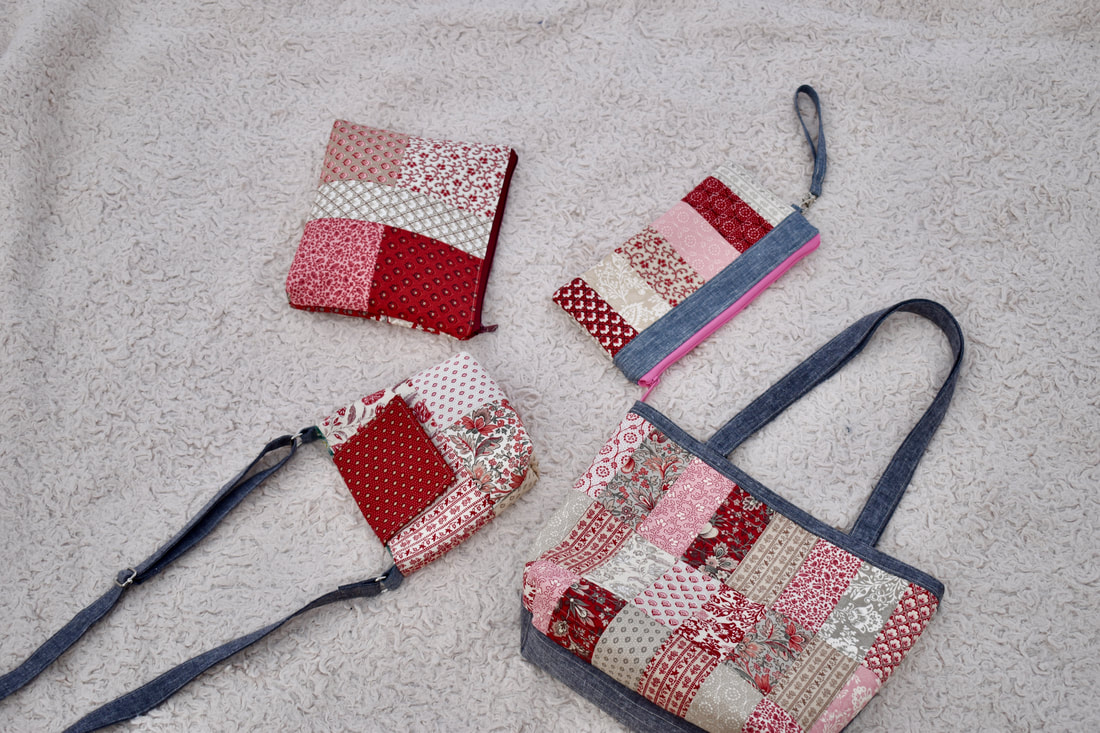 This is the 2nd project of the Charming Projects series, where I share with you four charming stuffs to make for this gifting season (although you can certainly make them for yourself ;) 1. The Charming Crossbody Purse 2. The Charming Pouch 3. The Charming Tote 4. The Charming Wristlet Clutch In this post we will make this charming multi purpose pouch. 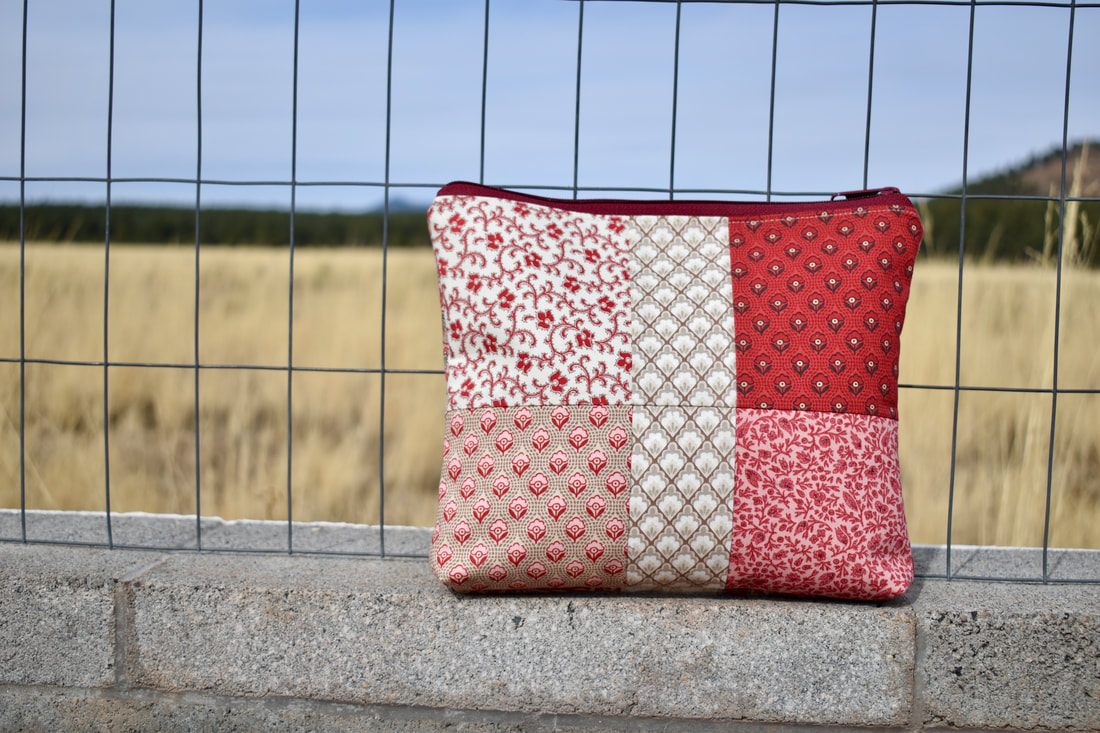 The finished measurements of this pouch is about 10" x 9" Supplies 10x pcs Charm Pack 1/3 yard lining fabric Fusible Woven Interfacing Fusible Fleece Nylon zipper (at least 12" long) Cutting Lining 11.5" x 9.5" (cut 2x) Fusible woven Interfacing 11.5" x 9.5" (cut 2x) Fusible Fleece 11.5" x 9" *Disclaimer : This post contains affiliate links, thank you for your support! Cut 2x pieces of Charm Pack in halves
Lay out the patchwork for both exterior pieces.
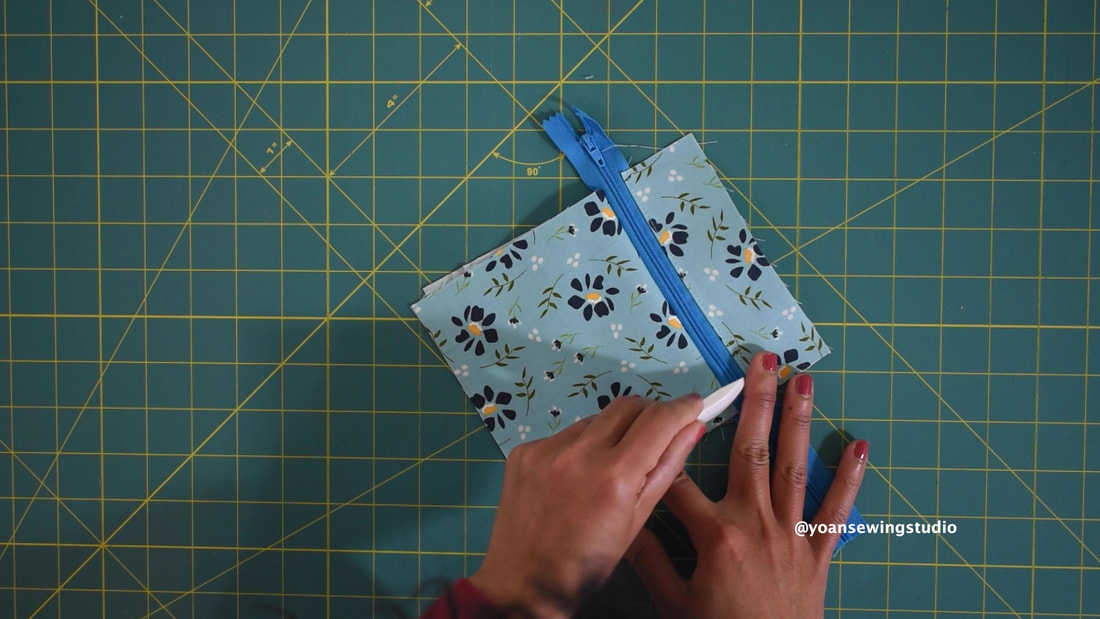
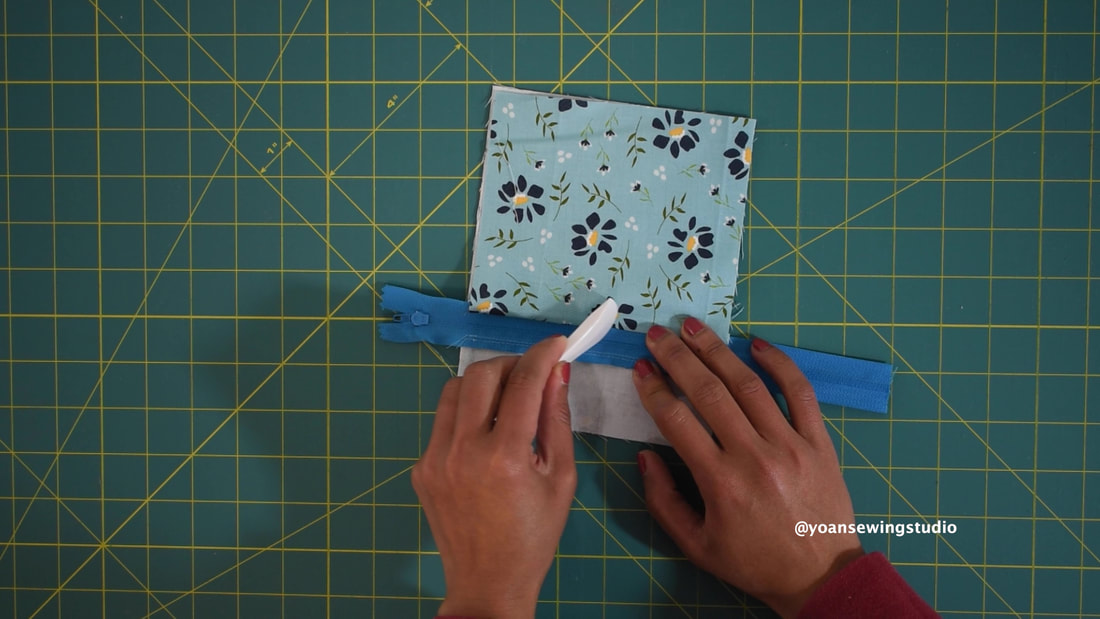
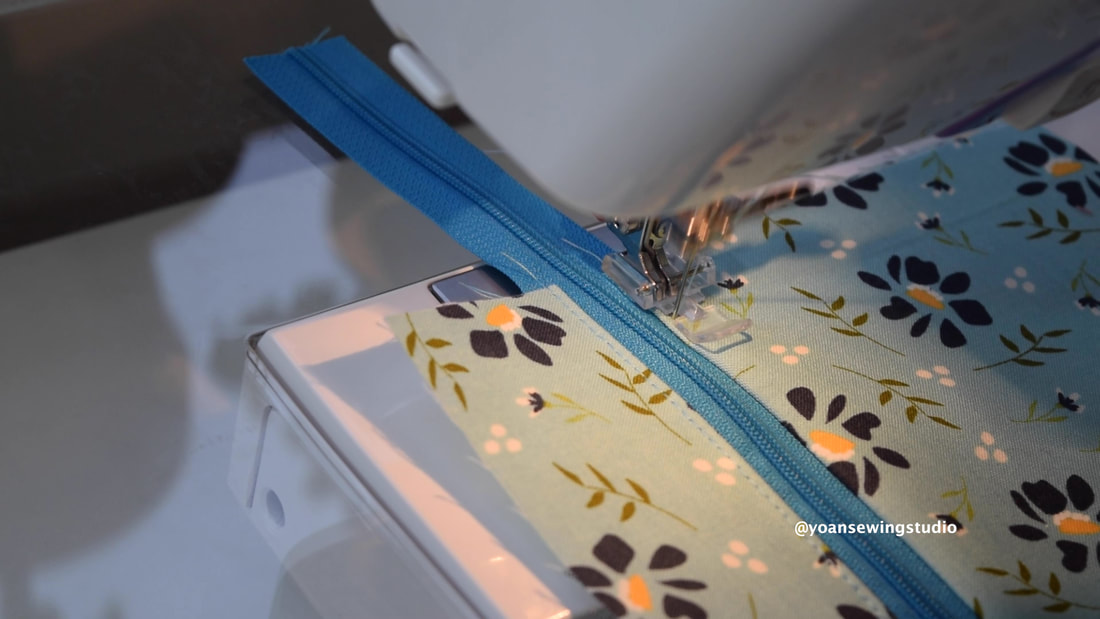
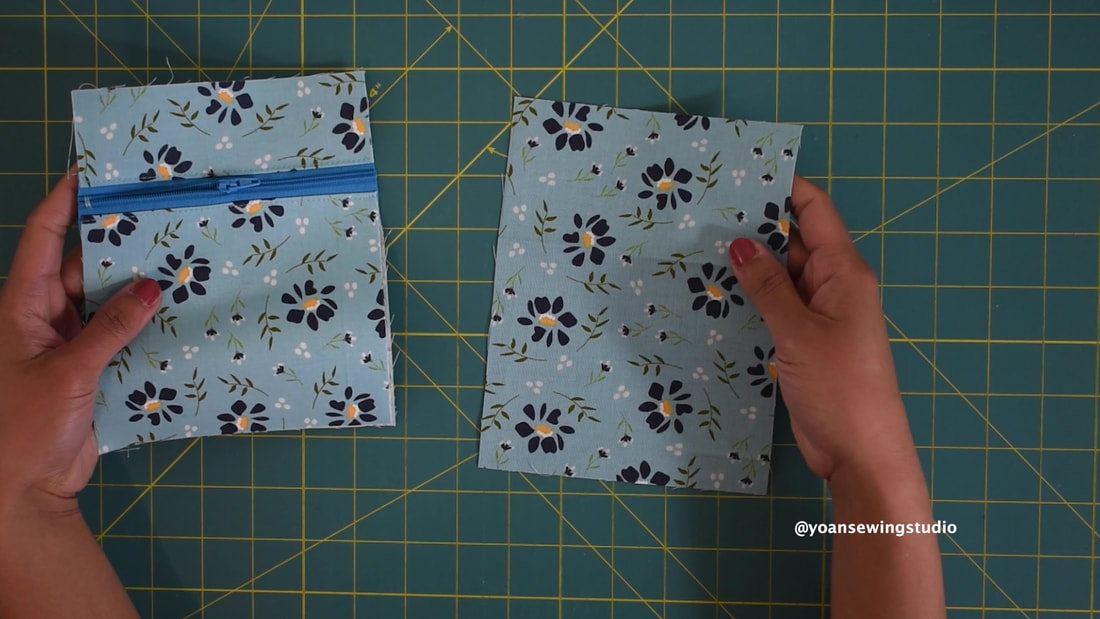
Piece them together with 1/4" of seam allowance 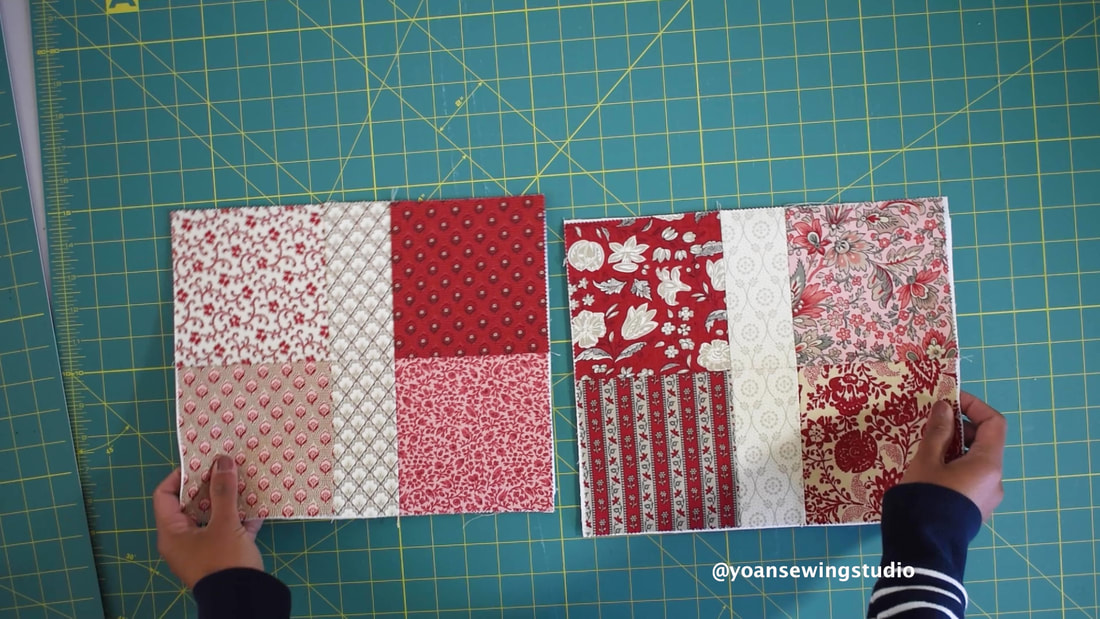 Apply the interfacing (I use the combo of fusible woven interfacing and fusible fleece), then quilt your fabrics (optional). Now prepare the lining pieces 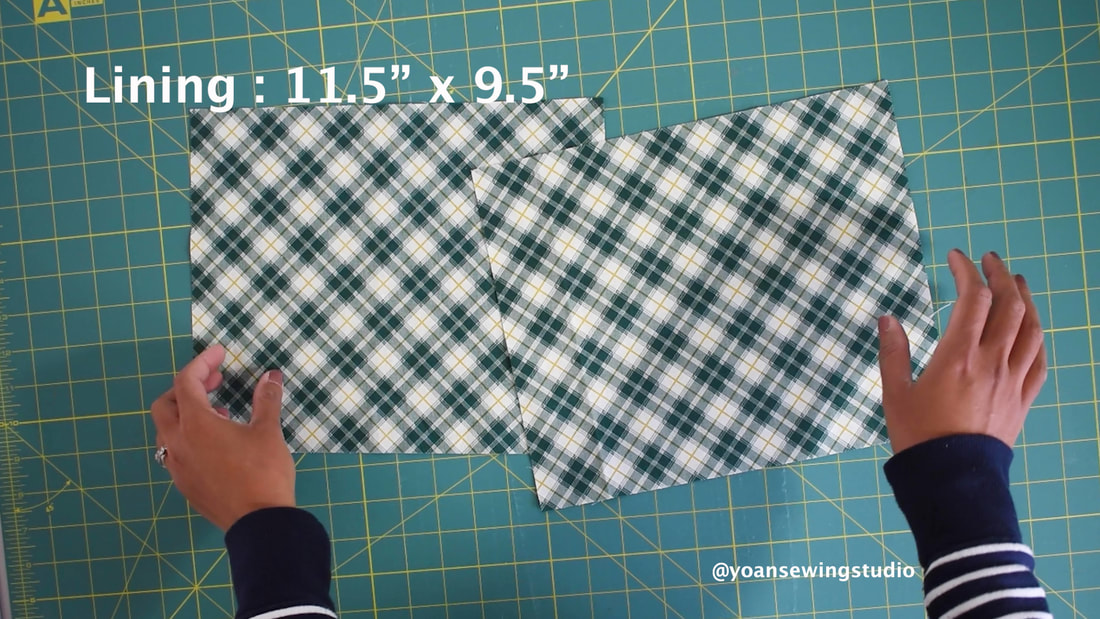 For the zipper you will need at least a 12" long zipper, mine is a bit too long, but it's okay since this is a nylon coil zipper, thus I can easily trim the excess zipper off. 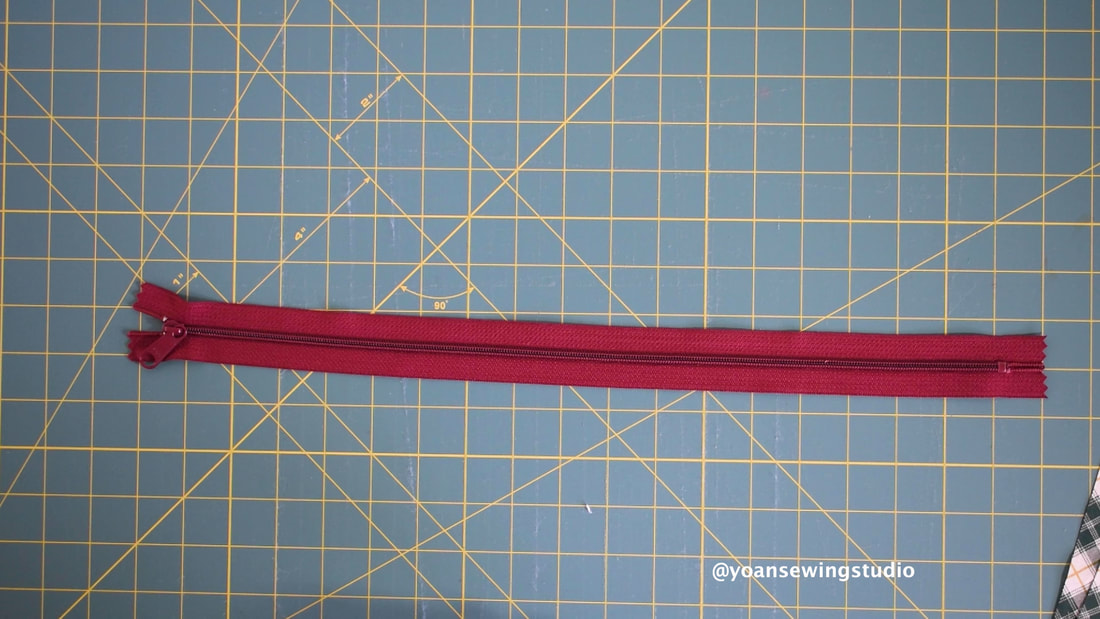 Now go ahead and assemble your pouch by attaching the zipper first. 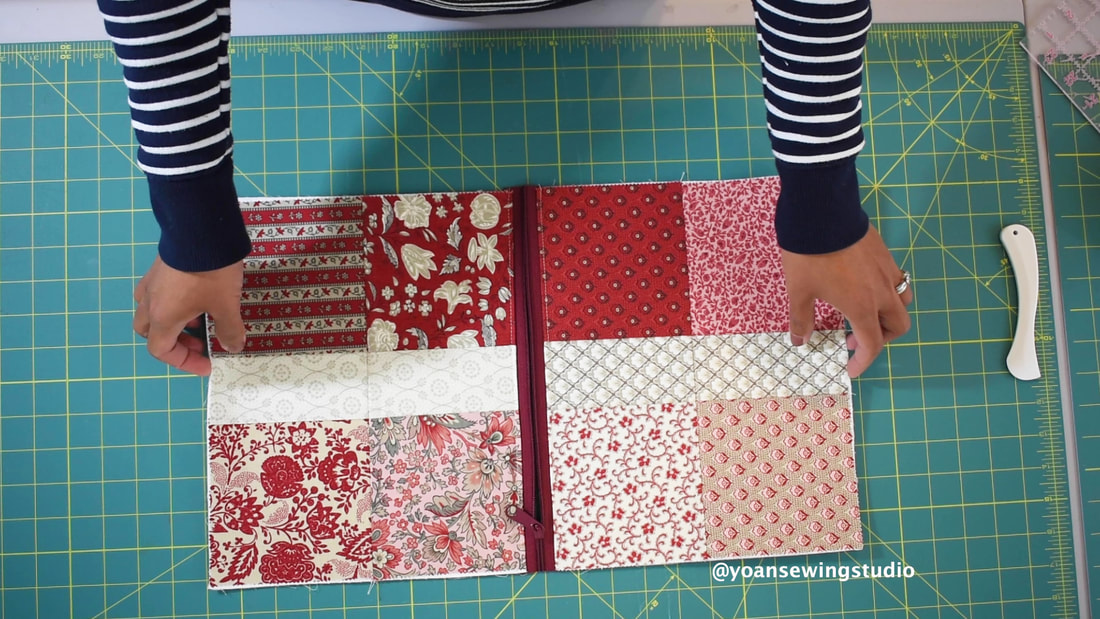 Watch the full video tutorial on my Youtube Channel Happy Sewing!
|
Categories
All
©
Yoan Sewing Studio | All Rights Reserved
|


 RSS Feed