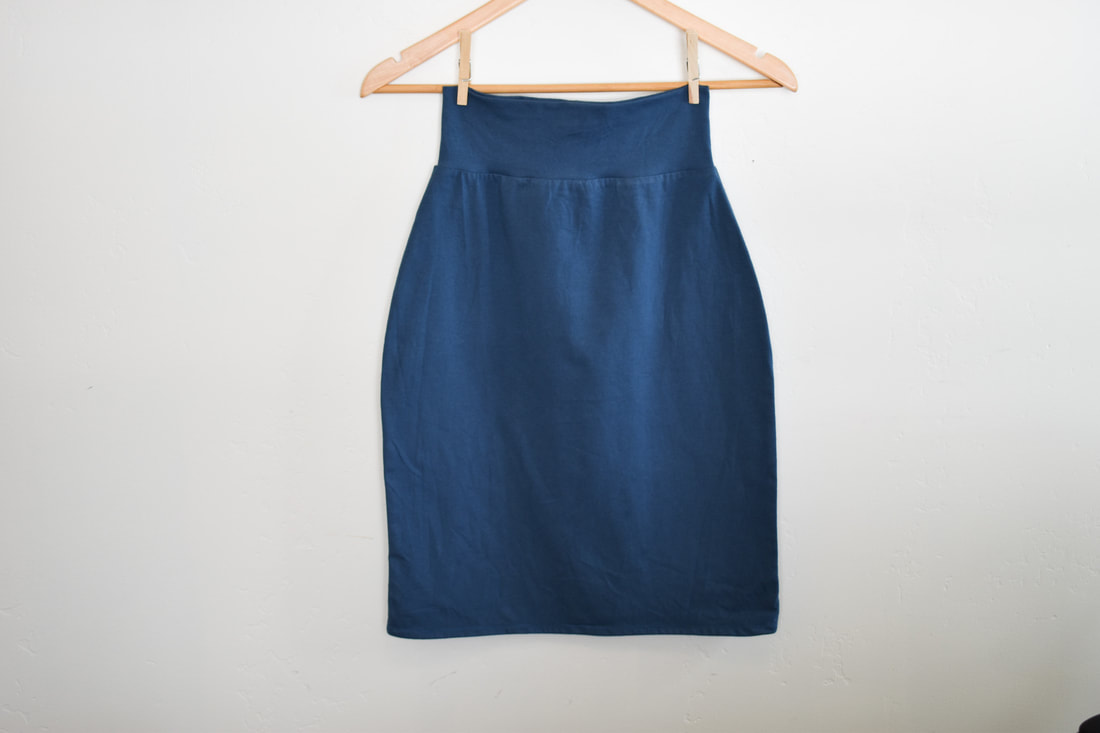
 Making your own garment can be quite intimidating at times, but the result is definitely very rewarding. Being able to choose your own fabric, color, style and more importantly using your own measurements really worth all the effort. Thus today I am excited to share this simple yet beautiful knit pencil skirt project. What I love about this pencil skirt is the lovely close fitted silhouette that is flattering in most body type, also the comfort in wearing it (thanks to the yoga pants style waistband). The pattern is relatively simple to make with no complex math or shaping required. This post may contain affiliate links. Commission earned when you make a purchase through any of these links with no additional charge. Thank you for your support.
2 Comments
Hello my creative friends!! As the weather gets warmer, why not treat yourselves a new skirt. This linen skirt is not only adorable, it is also comfortable, and very easy to sew. I added some sashiko style hand embroidery (literally simple vertical lines running stitches). We are going to use elastic for the waistband, and add some in seam pockets on both sides, this will come very handy, to keep your cellphone or keys. DOWNLOAD THE POCKET TEMPLATE :
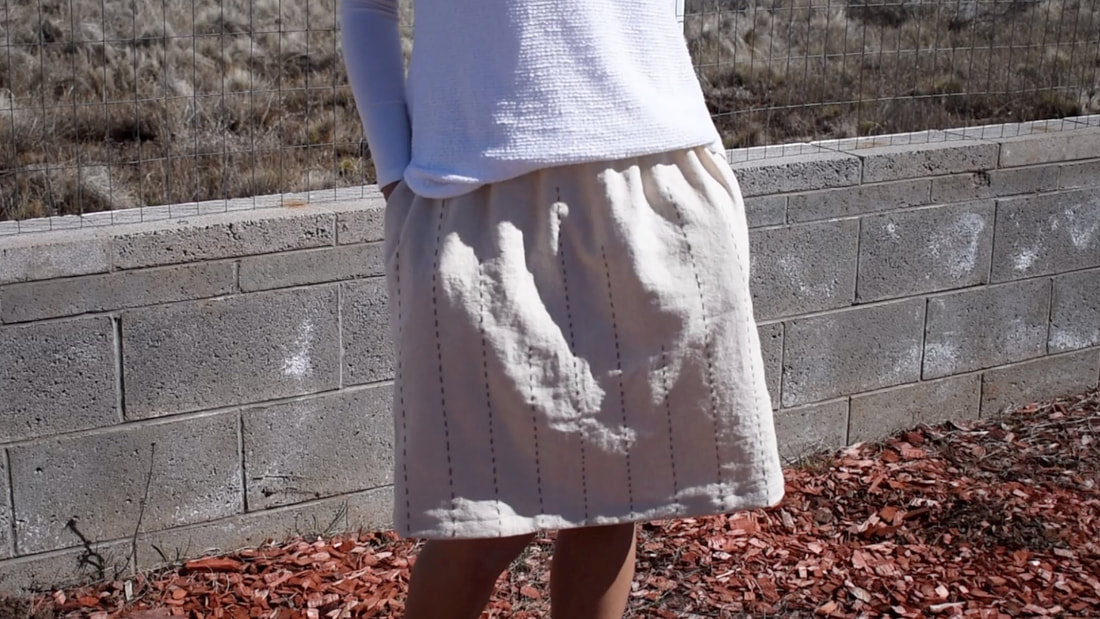 linen gathered skirt with pockets linen gathered skirt with pockets To start off you're going to take the following measurement : 1. Waist circumference 2. Hips circumference 3. Length from your waist to your knee (or wherever you want your skirt to fall) Then you will need to cut two rectangles with the following formula : 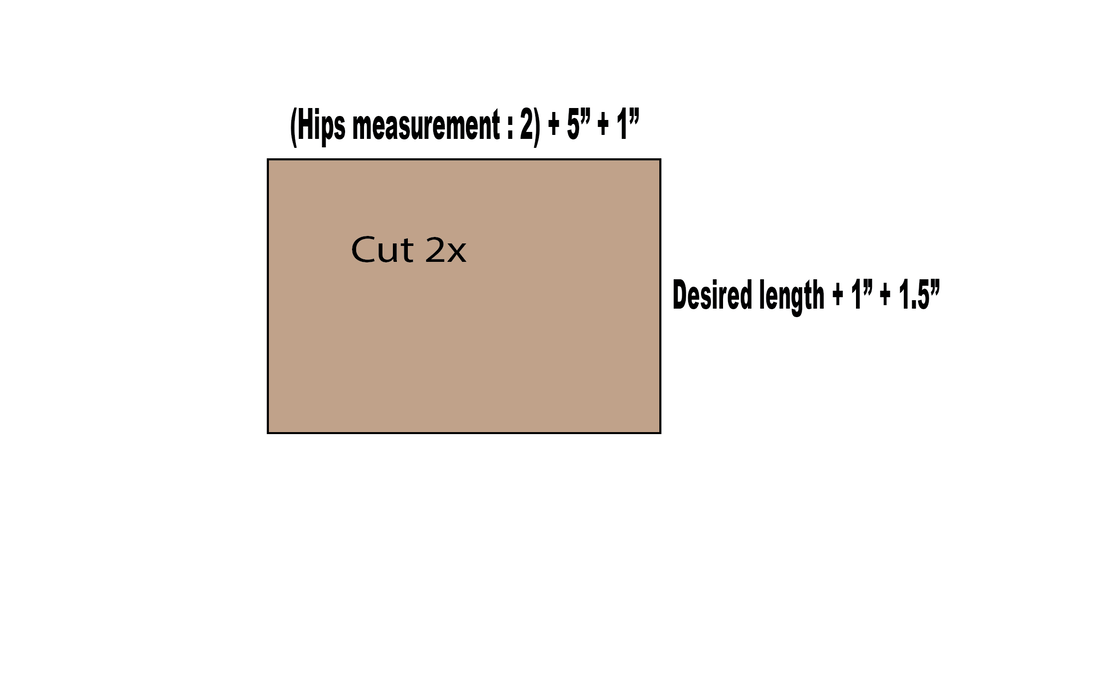 I uploaded the full tutorial on constructing this skirt from start to finish on my Youtube channel. Check that out below Enjoy!!
A line skirt is one of the most flattering skirt silhouette for pretty much every body type. This is one of the fashion staple that you should have at least one in your closet.  Knit A Line Skirt This skirt is made out of jersey knit fabric, and the waistband is the foldover waistband that simply makes this skirt extremely comfortable. The pattern of this skirt was made out of my existing skirt, hence in this tutorial you will also learn a little bit about pattern making/manipulation The full video tutorial is available on my Youtube channel, and you may also watch it below. Supplies : At Least 2 yards of Jersey Knit fabric Swedish tracing paper Styling (curved) ruler Walking Foot Jersey sewing needle Disclaimer : Some affiliate links are used above, which I earn a small commission from when you make a purchase (with no additional cost), however you don't have to use those links, it is up to you. Thank you for your support. If you have any question at all, please let me know by leaving a comment down below. Happy sewing! DIY Women Pullover tutorial using fleece fabric | With Alabama Chanin style handstitched applique2/4/2019
 Hello my creative friends! In this tutorial, we are going to make a pullover/ sweatshirt using the oh so warm and cozy fleece fabric. The pattern that you are going to use will be from your existing one, so if you have one that you truly love, but started to wear out, simply pull that out, I am going to show how you can make a sewing pattern out of it. Supplies : Anti pill fleece fabric at least 2 yards Scrap of jersey knit fabric Embroidery thread Swedish tracing paper Styling ruler Walking Foot Embroidery needle/ hand sewing needle Stretch sewing machine needle I have uploaded the full video tutorial on my Youtube channel below : Disclaimer : This post contains affiliate links. Thank you for your support! Happy sewing!! |
Archives
March 2023
Categories |
||
 RSS Feed