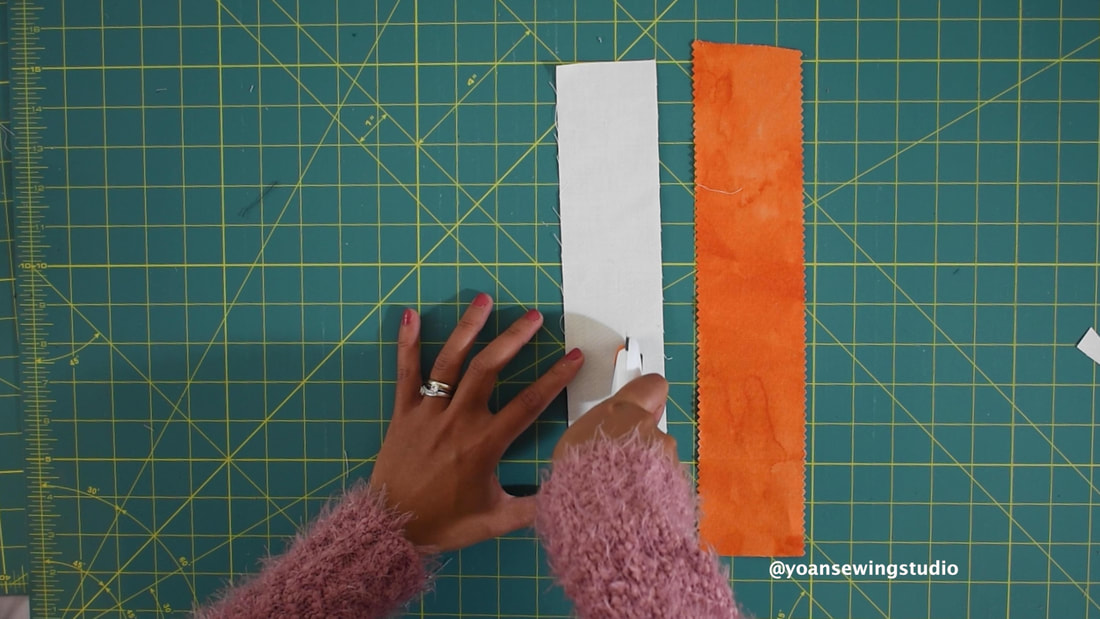
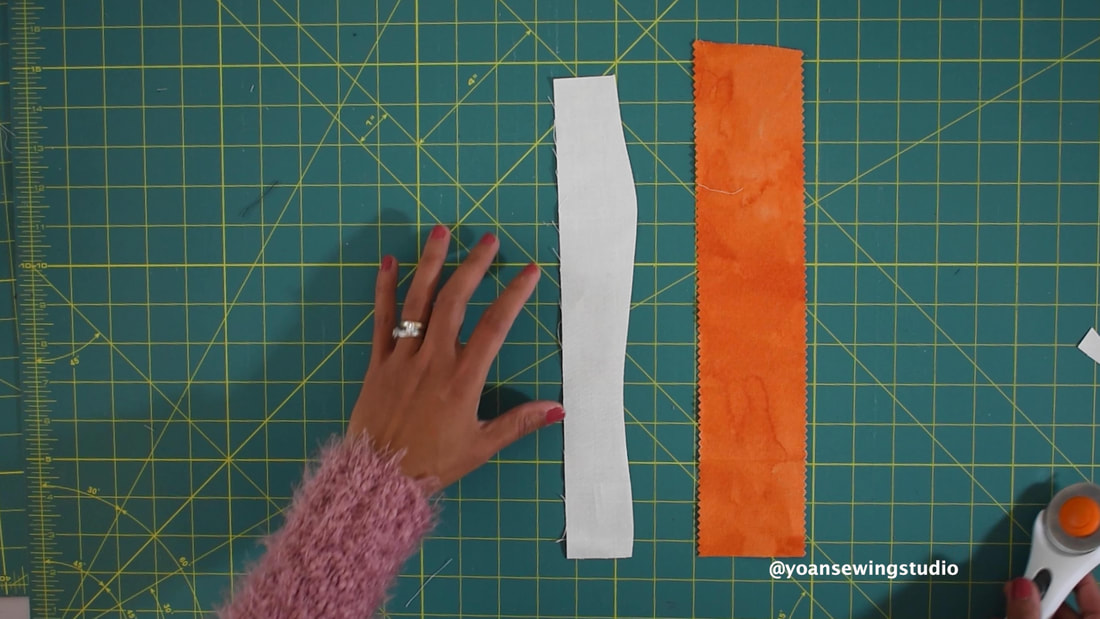
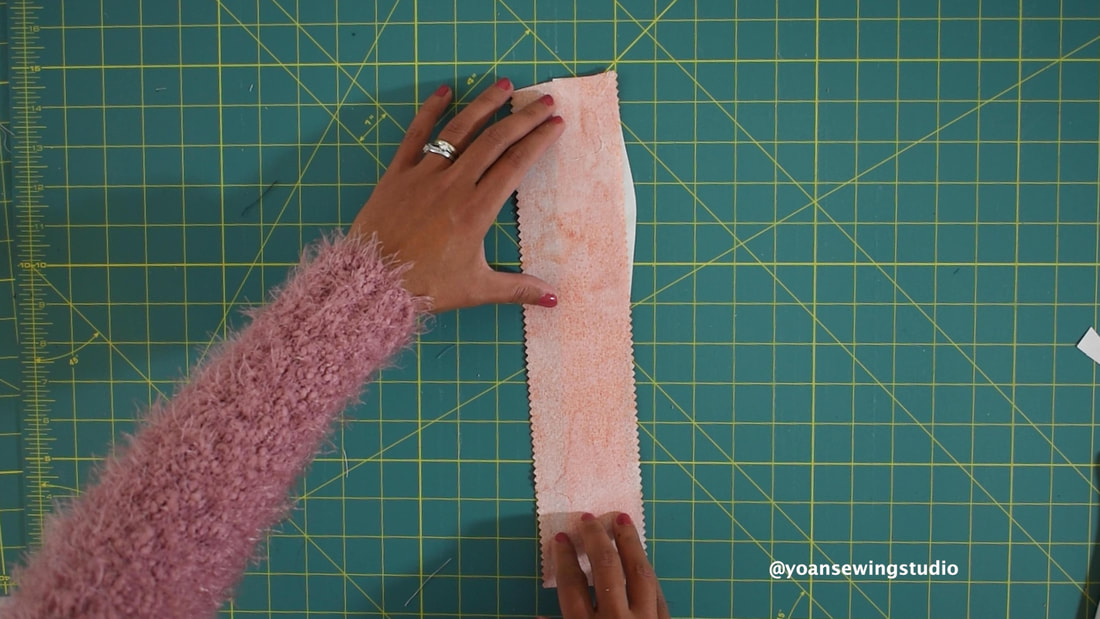
 Scrappy improvise quilt performing gentle curves Before the end of the year, I promised myself to empty up or at least get rid of some of my scraps that have been laying around in my scrap bin. Few months ago, I posted the Crazy Scrap Quilt video and got quite a positive feedback, so I figured it will be great to make another Scrap quilt episode, with different pattern, featuring different technique. This time I decided to try out the "gentle curves" free piecing, I've seen this technique performed in several blogs and Youtube videos, and decided to give this a try. Supplies: Assorted fabric strips at least 11" long (the width should be between 1" -3") Quilt Batting Backing Fabric Basic sewing and quilting notions -Machine Quilting Needle -Machine Quilting Thread -Spray Basting -Square ruler Disclaimer : The above links are affiliate links, thank you for your support! Let's Get Started! Gather your scraps and cut them into various sized strips (the width should be between 1"-3", and the length should be at least 11", I divided mine into 3 categories, light/neutral, medium, and dark. 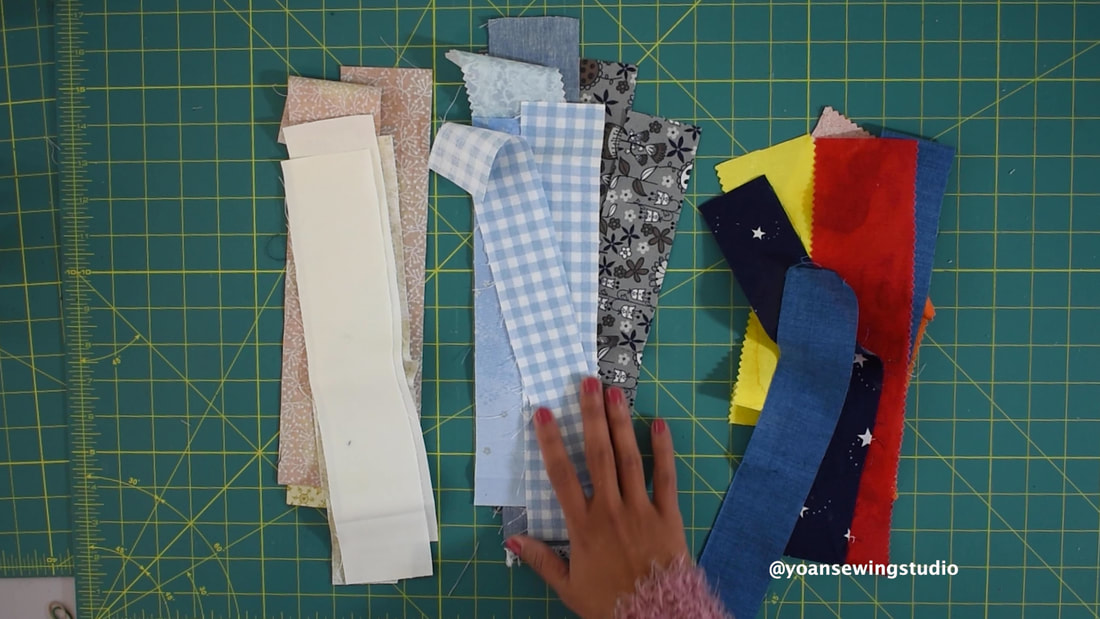 Take two strips in contrasting color, then make a gentle curve cut to one of the strip using your rotary cutter. 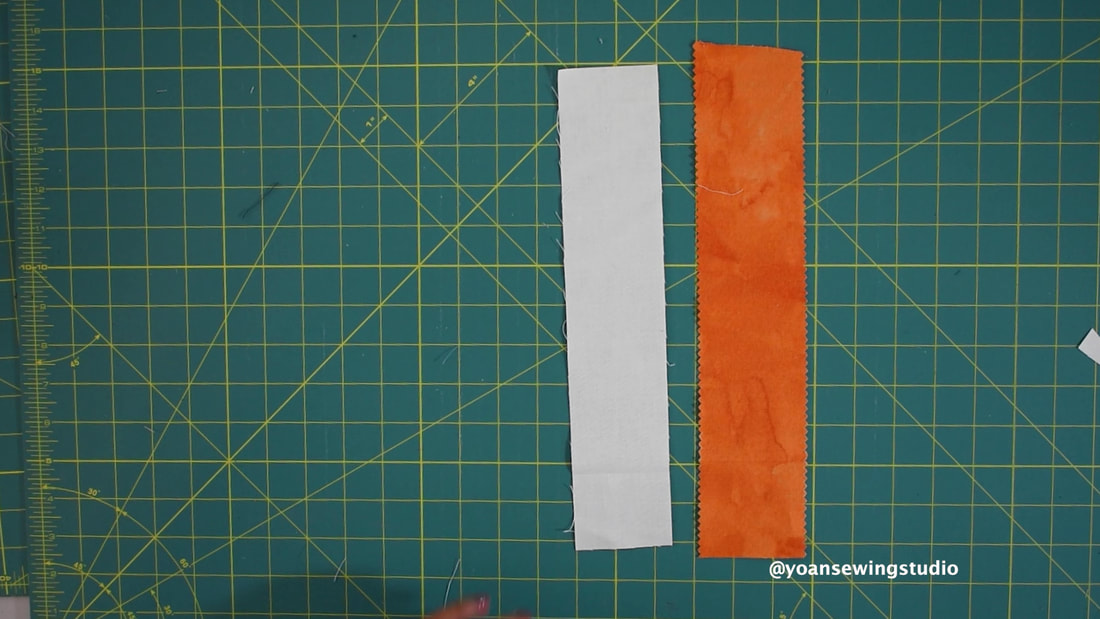
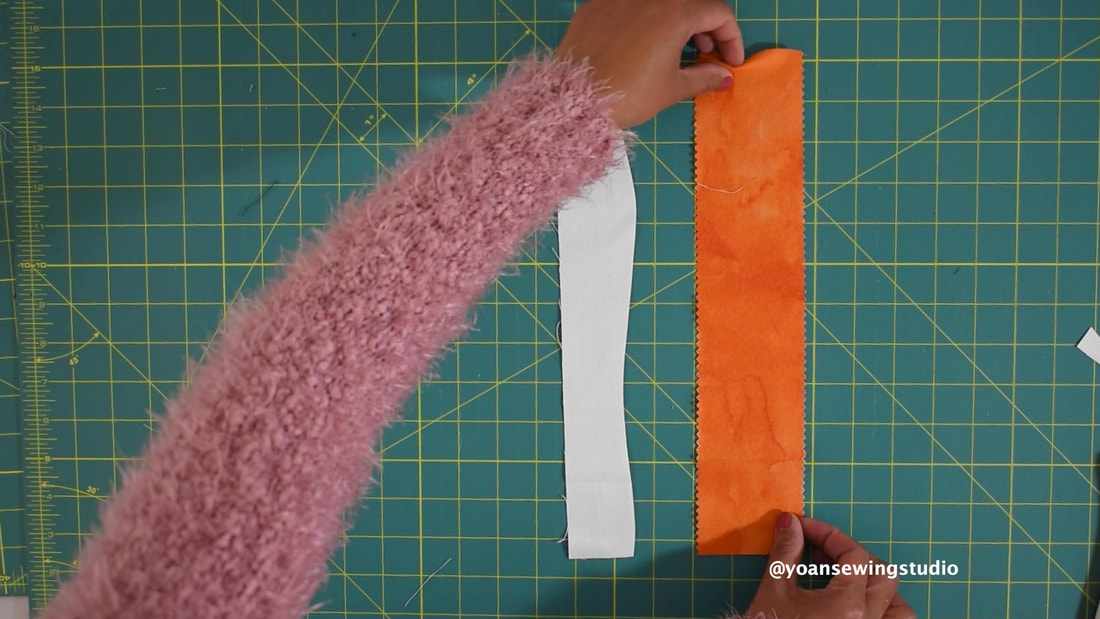
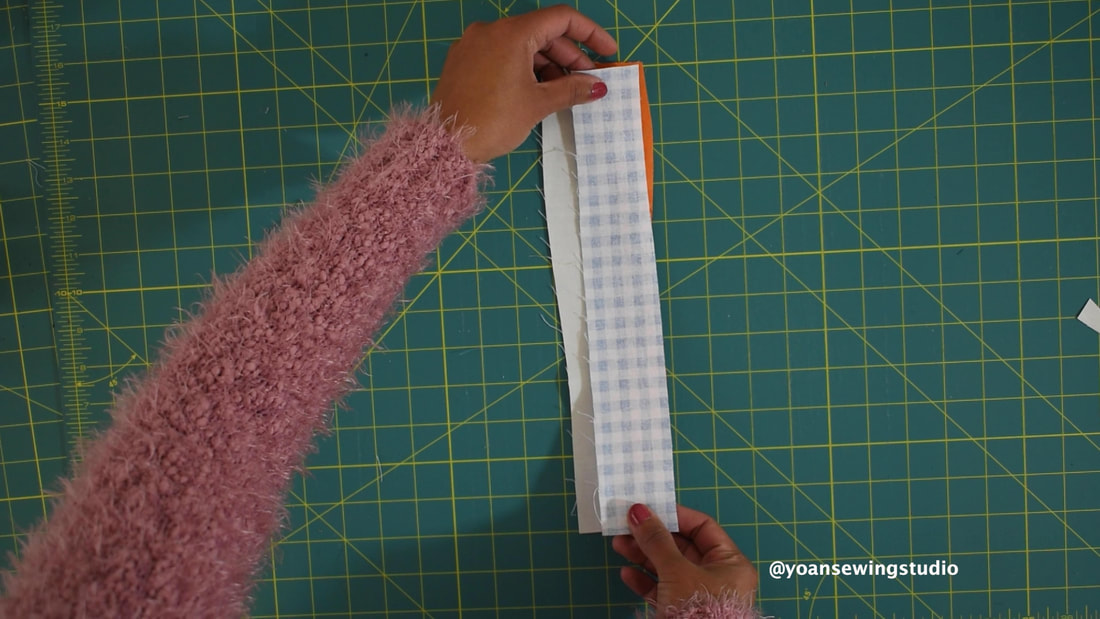
Lay the strips right side together, the straight edge strip should be on top, then sew with 1/4" of seam allowance.
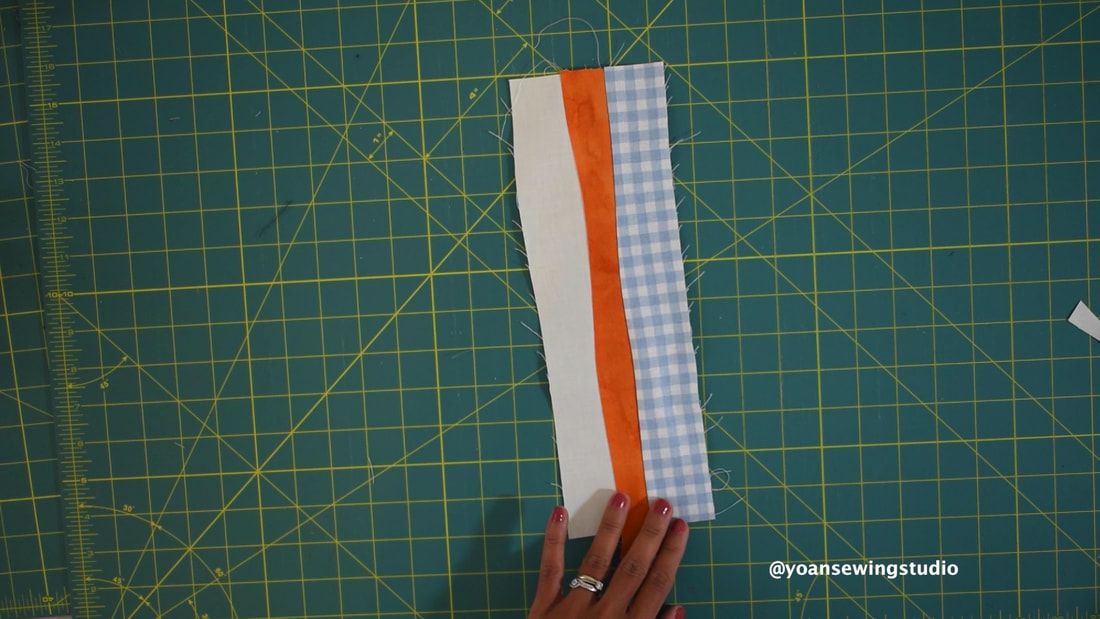
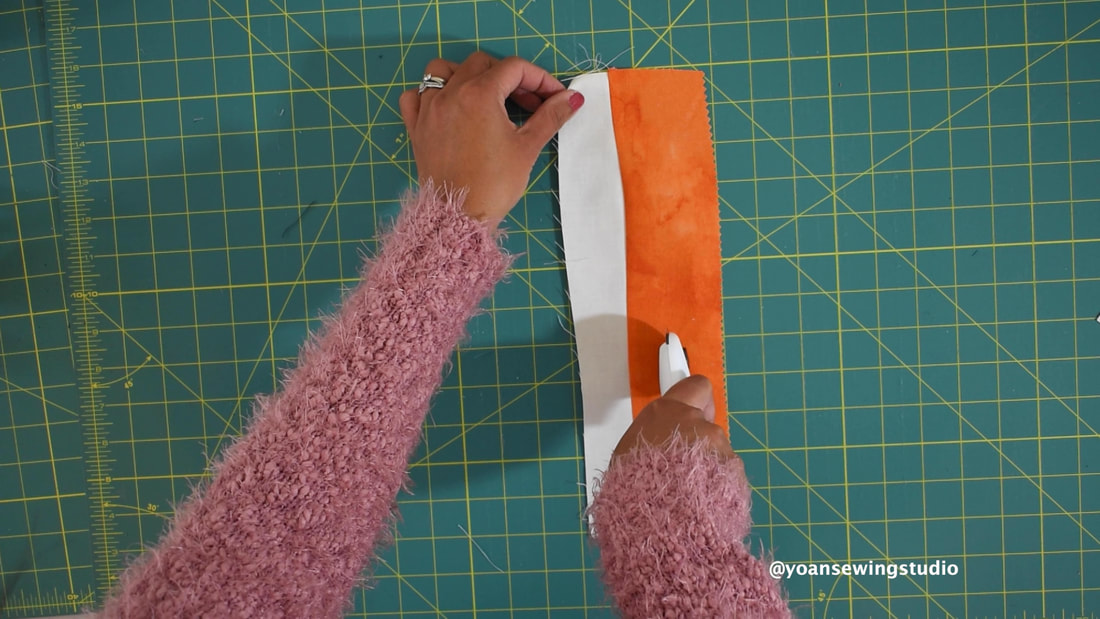
When you sew, manuever the top strip to follow the shape of the lower (curved) strip, making sure the edges are aligned (I recommend to use 1/4" presser foot, for easier piecing).  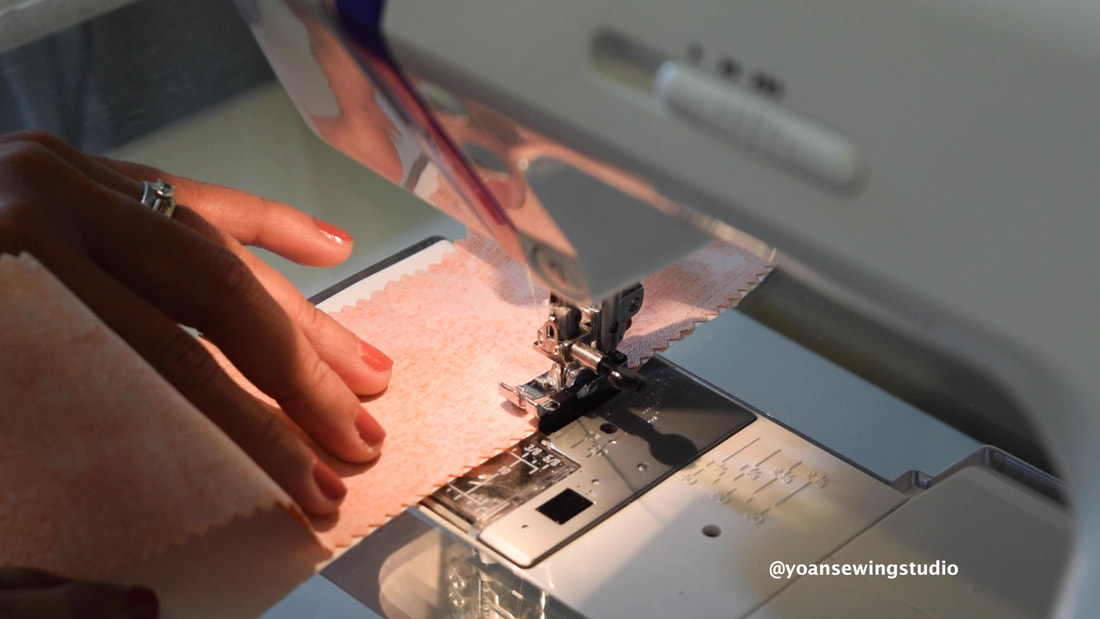 Press the seams towards one side.  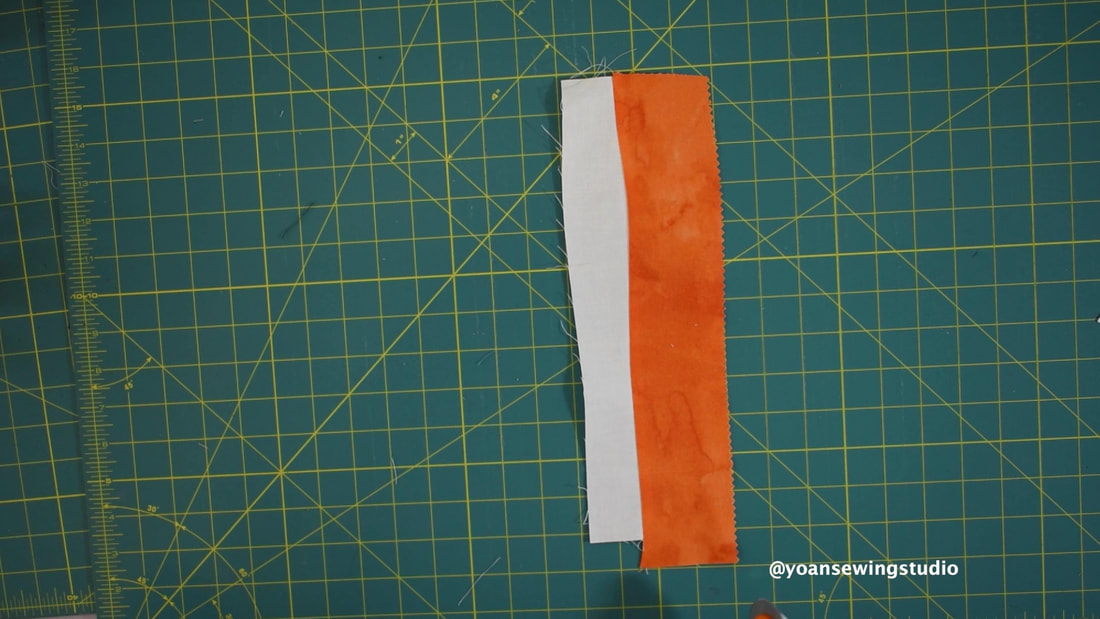 Now go ahead and make another gentle curve cut.
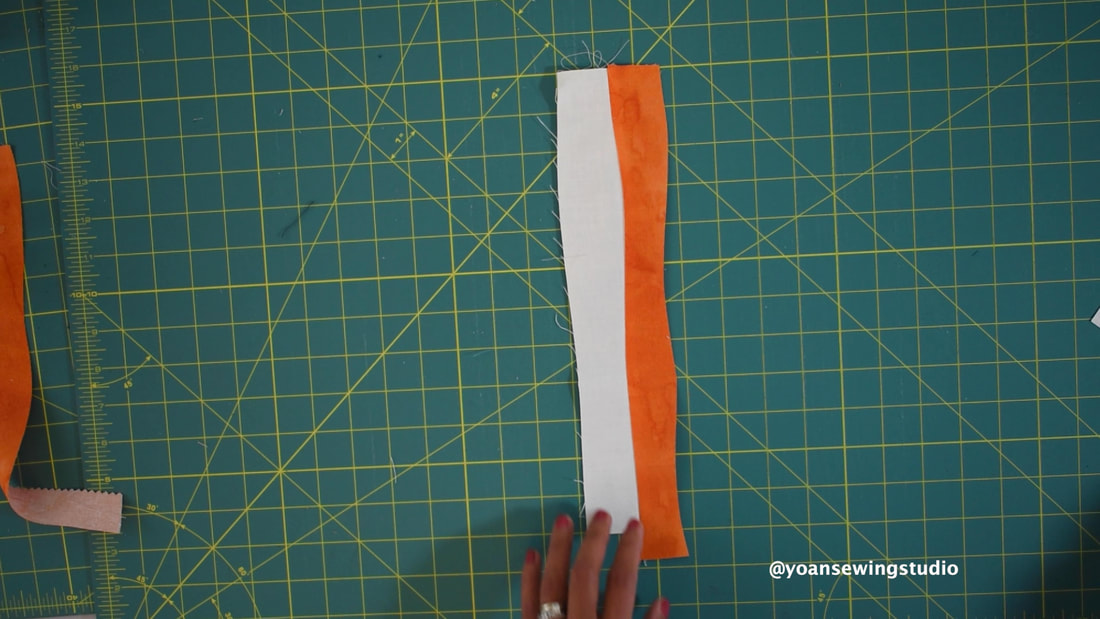
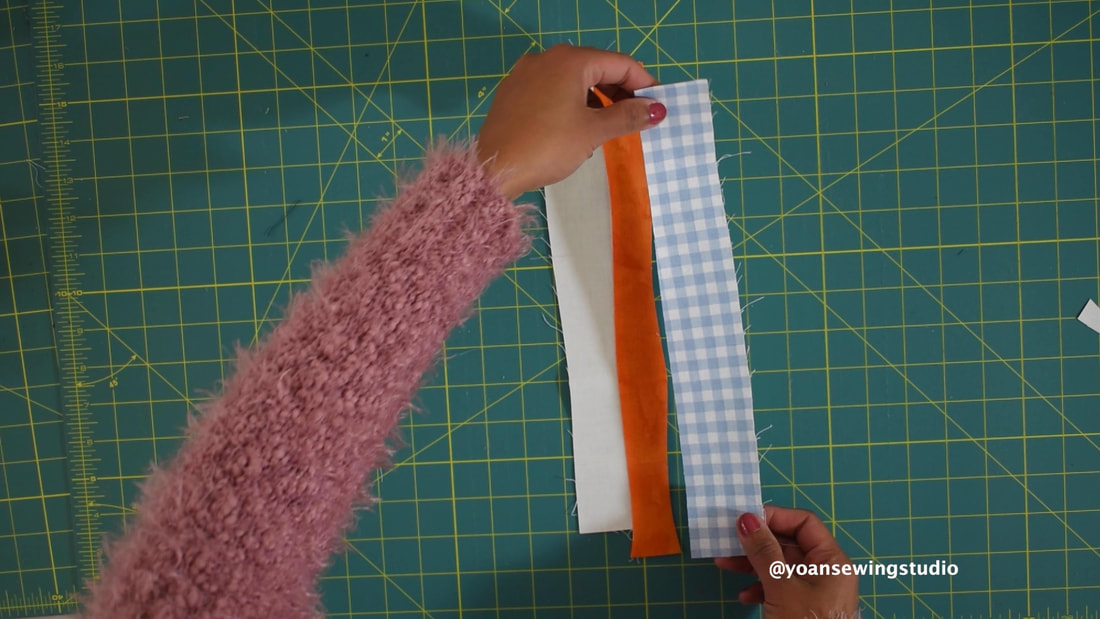
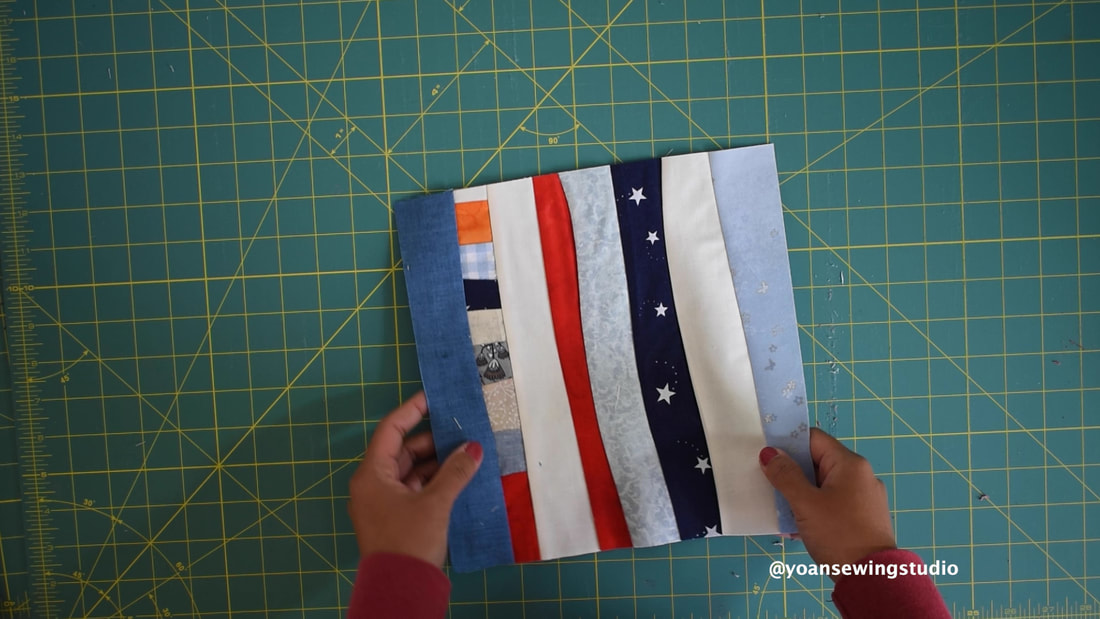
Now take another strip, and sew, the same way like before.
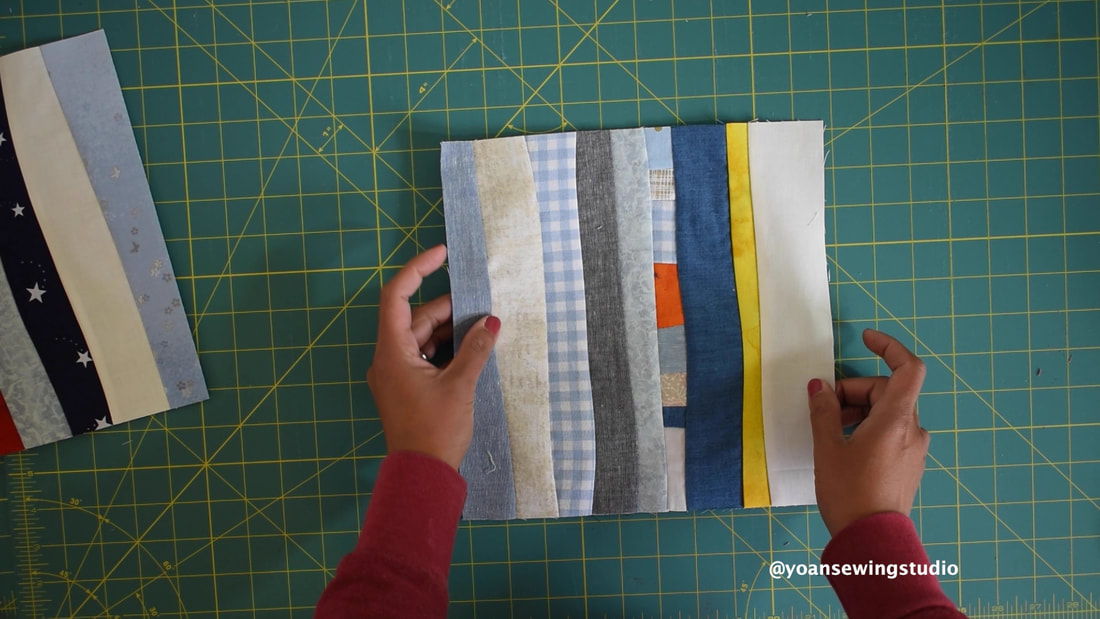
 Continue sewing and adding strips until your fabric measured a little over than 10" wide. 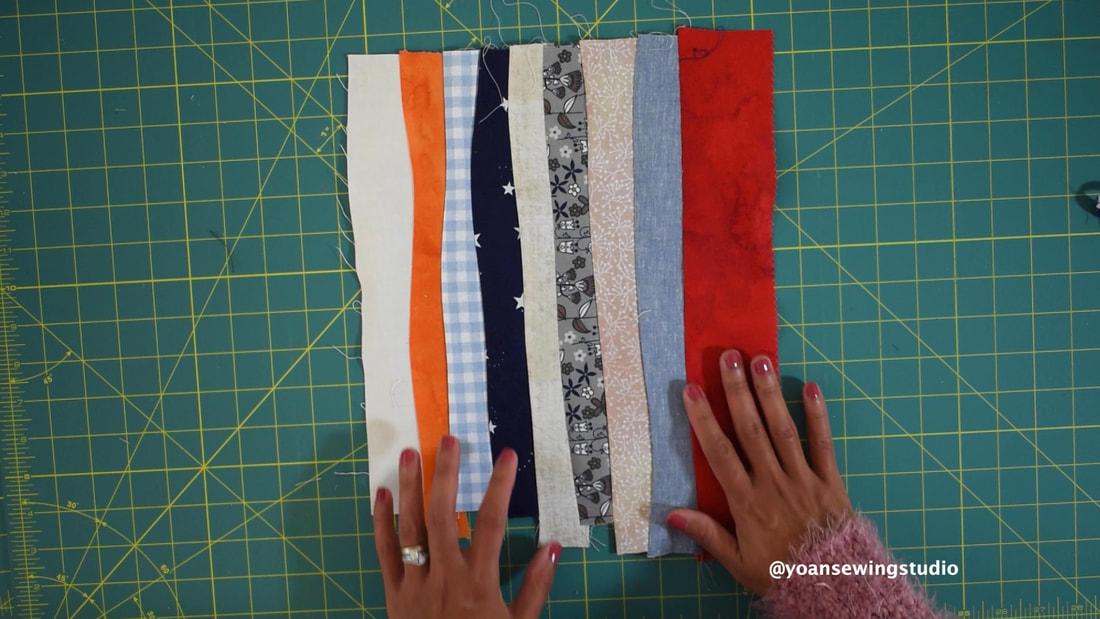 Then square your fabric to measure 10" x 10" (feel free to make larger or smaller block). 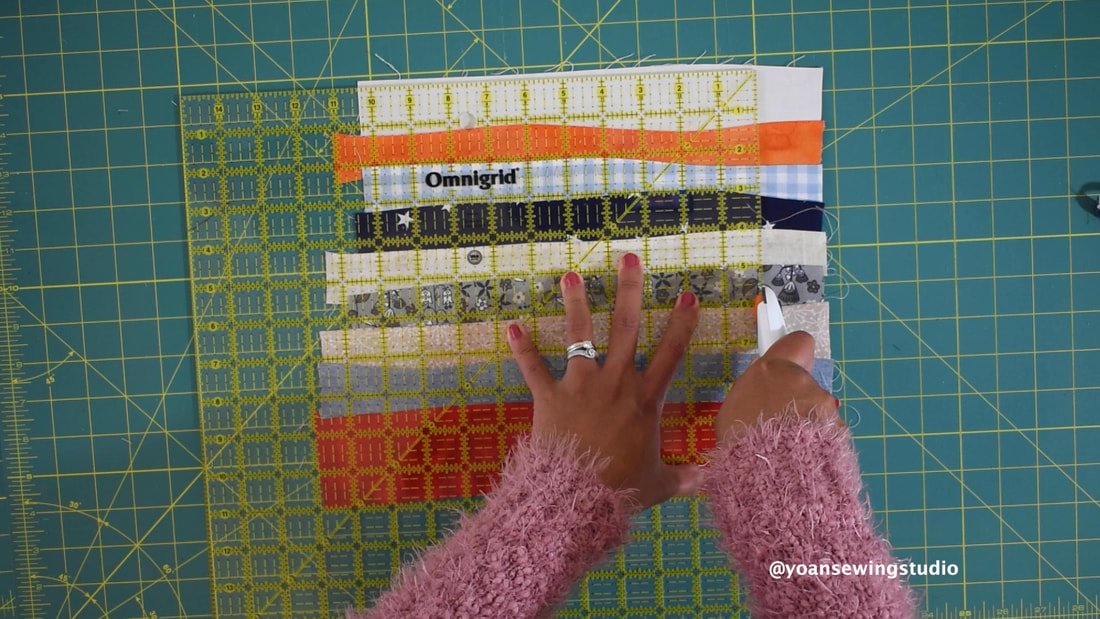 If you got a decent size strip from trimming your block (at least 1" wide and 11" long), you may set this aside, and incorporate this to another block.  Voila! The first block is done. 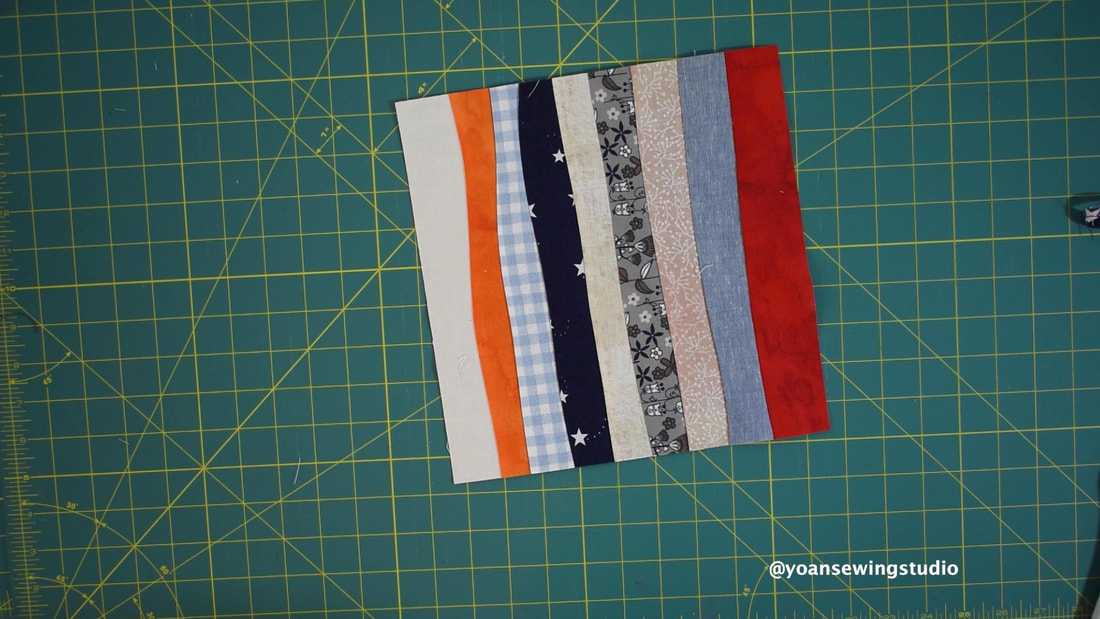 Now make 35 more blocks  Now with the scrappy strips that you got from trimming the block, you can also add them to your quilt block.
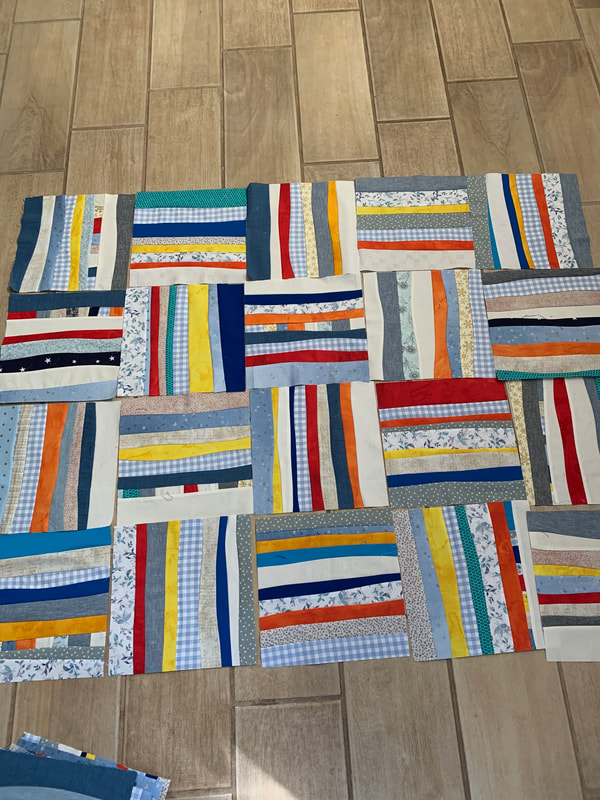
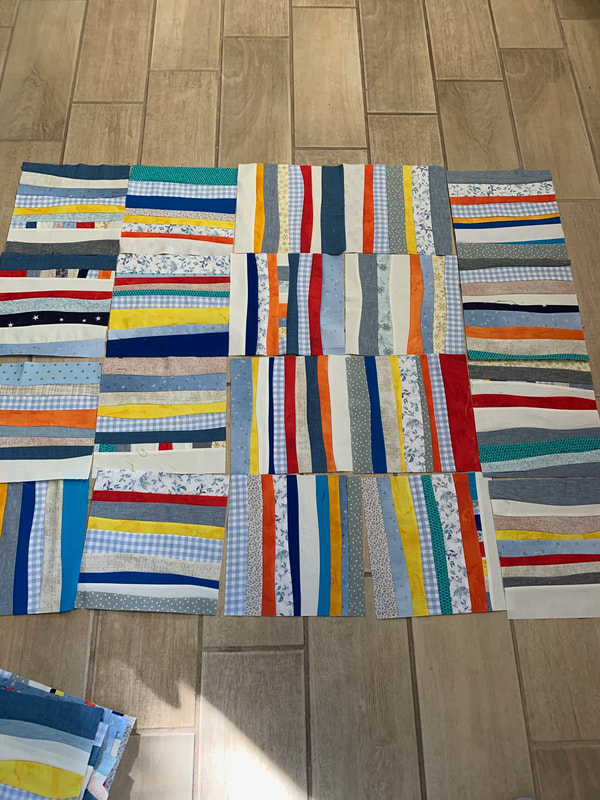
I laid out my blocks in the same vertical direction, so I made 6 rows and each row has 6 blocks. 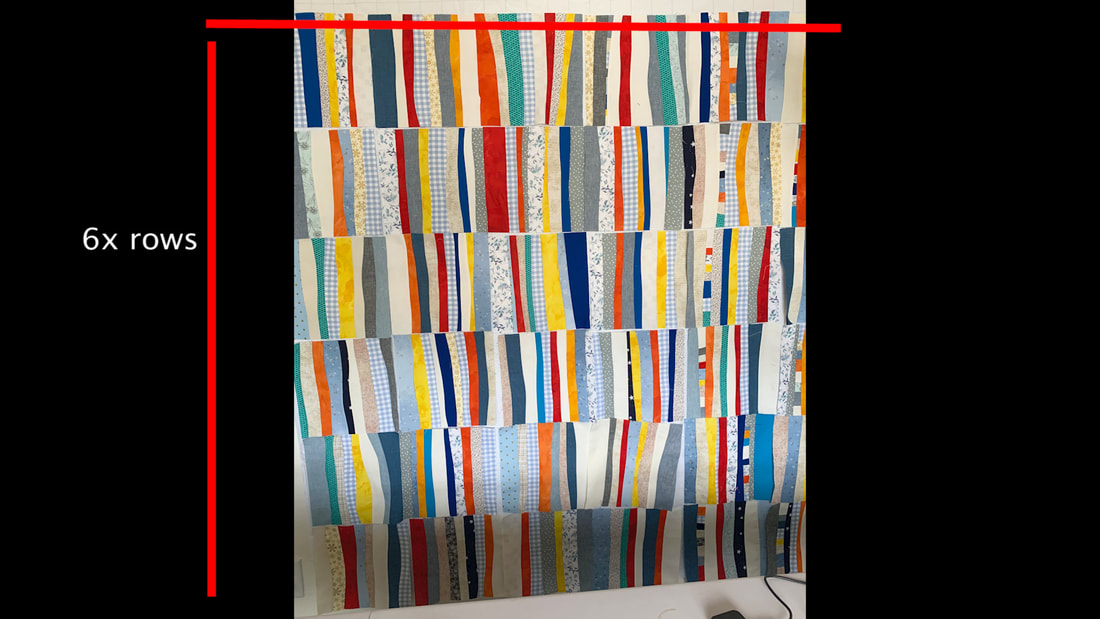 You can change the layout if you want to, check out some pictures below for different ideas
Once you're happy with the layout of your quilt, you may go ahead and sew your quilt blocks, layer, quilt, and bind. Check out the full video tutorial on my Youtube channel, and consider subscribing so you won't miss any new uploads. Happy Quilting!!
Best explanation and clear video on scrappy piecing and curves. Hopefully I will be able to make one of these soon. Think I've decided hand sewing patchwork projects isn't for me everyday,. Ok for holidays etc but too slow in a busy life. I'd like to begin completing some projects for a change. Thanks
Yoan
3/16/2020 03:28:23 pm
My pleasure Denise, hope you have fun with your project. Happy Sewing!
Lynn Dazer
3/28/2020 08:34:17 pm
Thank you. You’re quilt is very beautiful. Your instructions were perfect. 4/18/2020 01:38:30 pm
I LOVE this idea! Such very clear instructions and images, even for a novice like me. Can't wait to try it out.
Wendy
6/1/2020 06:53:28 am
Love your ideas and the simplicity. Thank you.
Valerie
6/6/2020 05:57:31 am
Thank you for your videos can’t wait to try and make this quilt thank you for your easy to follow instructions x
Georgia Graham
7/24/2020 11:24:36 am
What a wonderfully clear tutorial. I will definitely use this method. Comments are closed.
|
Categories
All
©
Yoan Sewing Studio | All Rights Reserved
Archives
March 2024
|
 RSS Feed