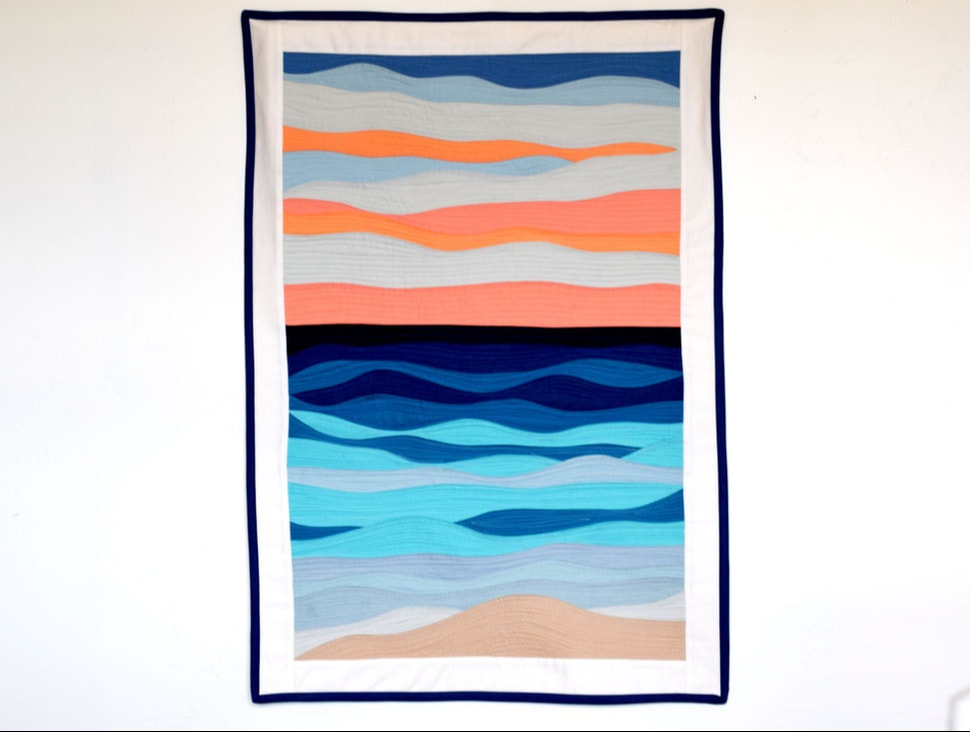
Seaside - Improv wall hanging quit by yoansewingstudio
Learn how to do freeform curve improv piecing in this fun wall hanging project, featuring the seaside with sunset sky theme.
Finished wall hanging measurements : approx. 21" x 30" (53 x 76cm).
This post may contain affiliate links. Commission earned when you make a purchase through any of these links with no additional charge. Thank you for your support.
I can never get enough of the improv quilting. It is the kind of project that I do when I'm experiencing creative block. I simply love the liberating, no hard rules, no precise measurements to follow along, and the one of a kind result of each piece, that always brings a smile on my face.
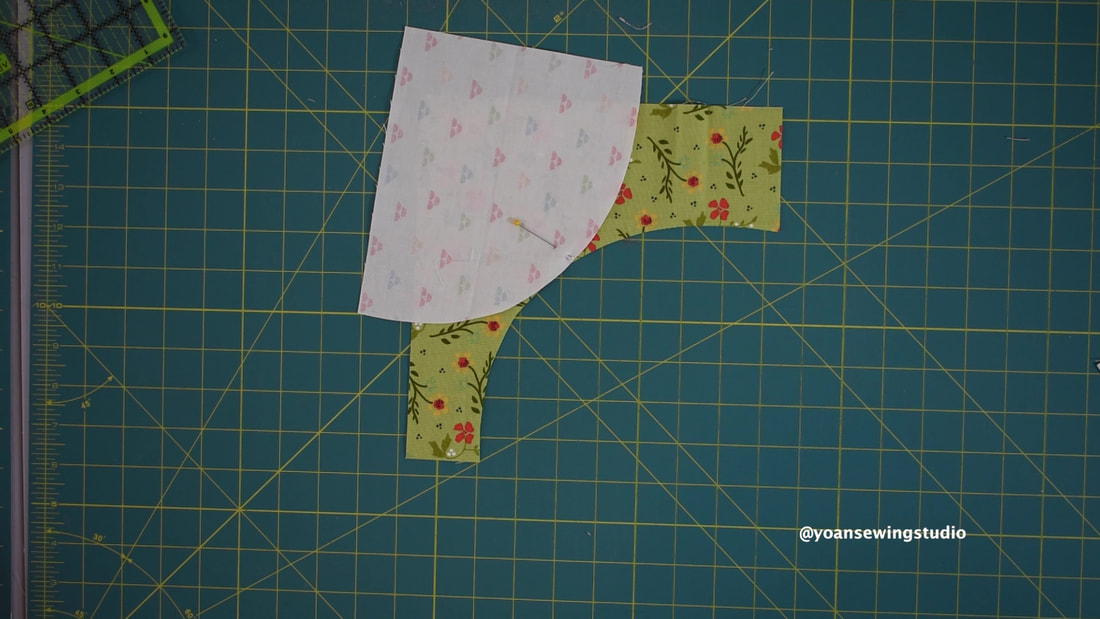
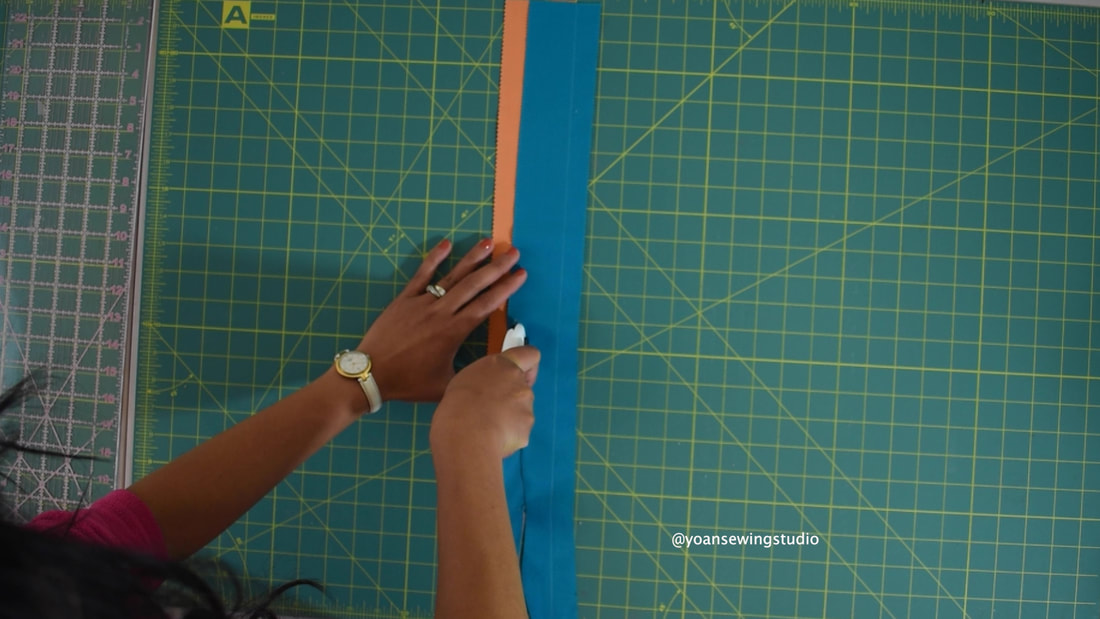
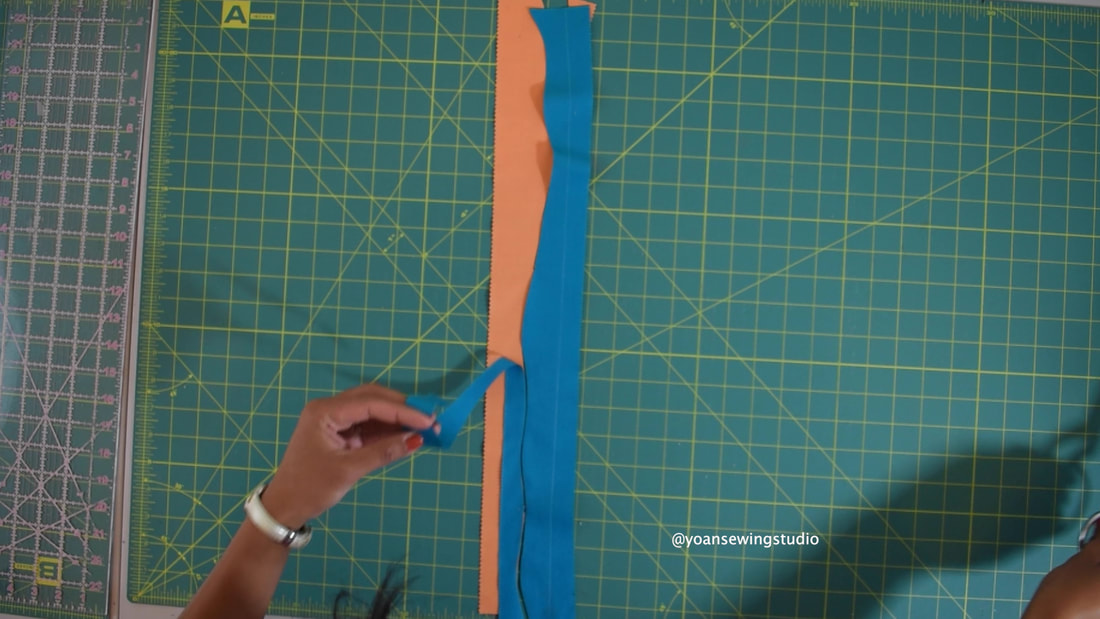
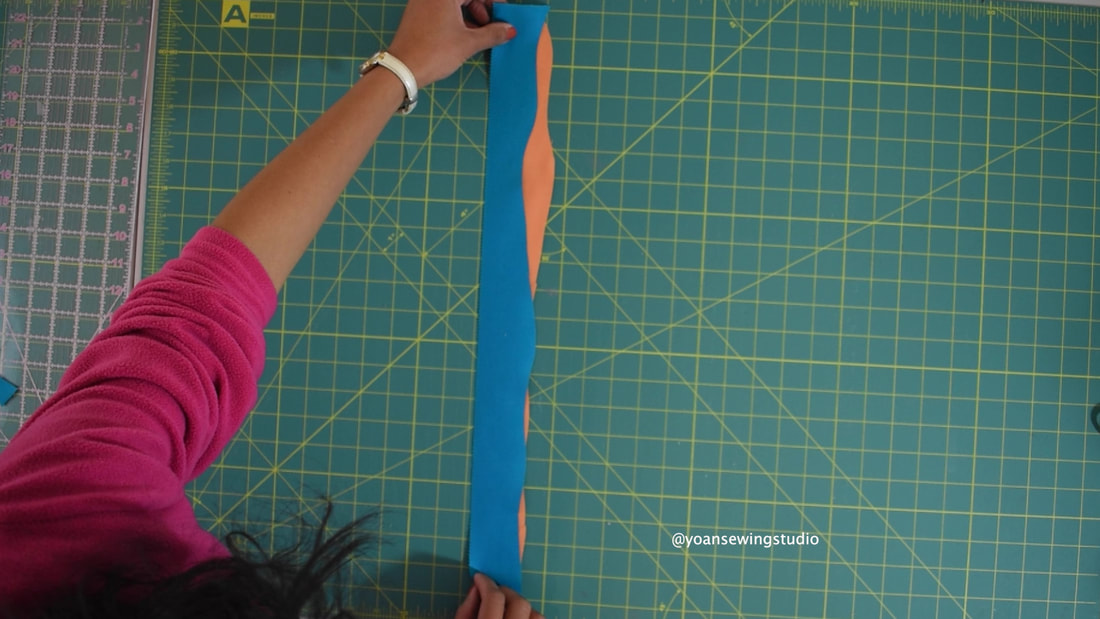
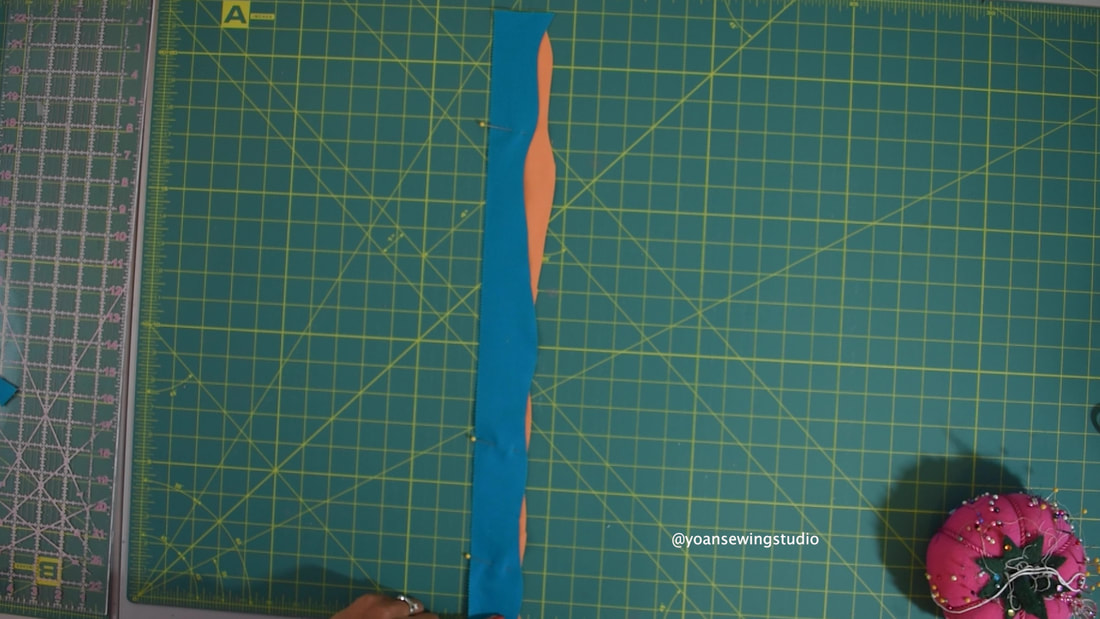
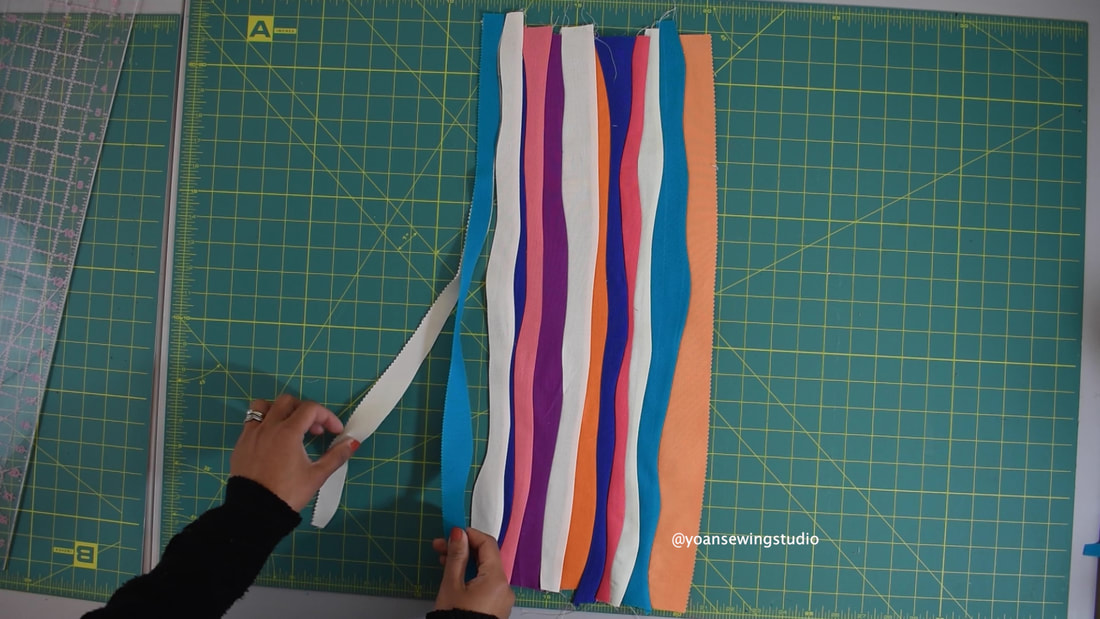
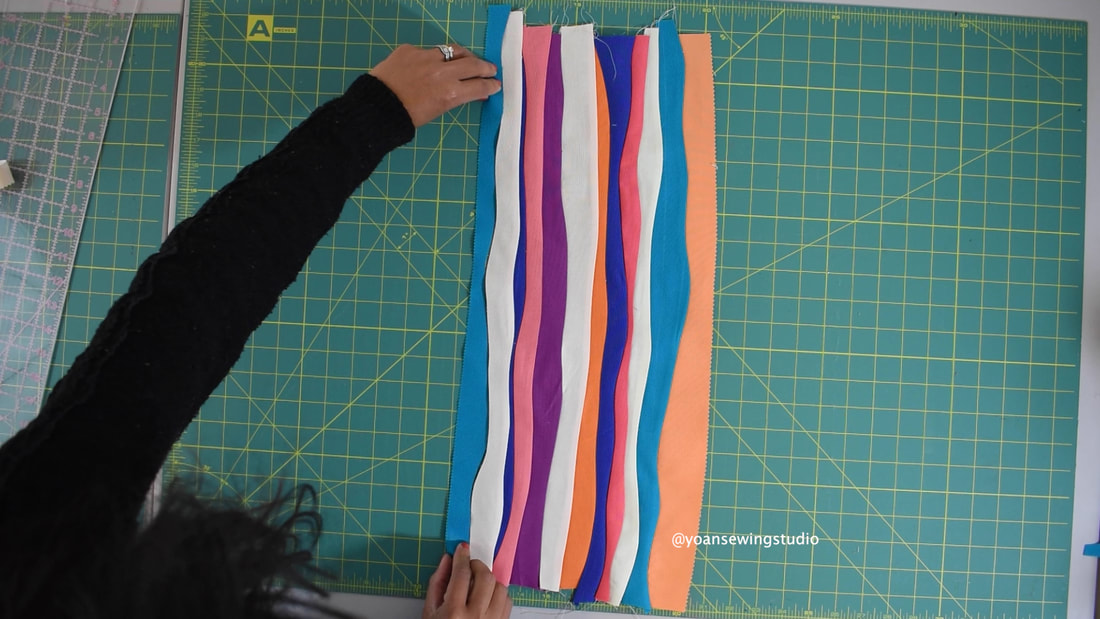
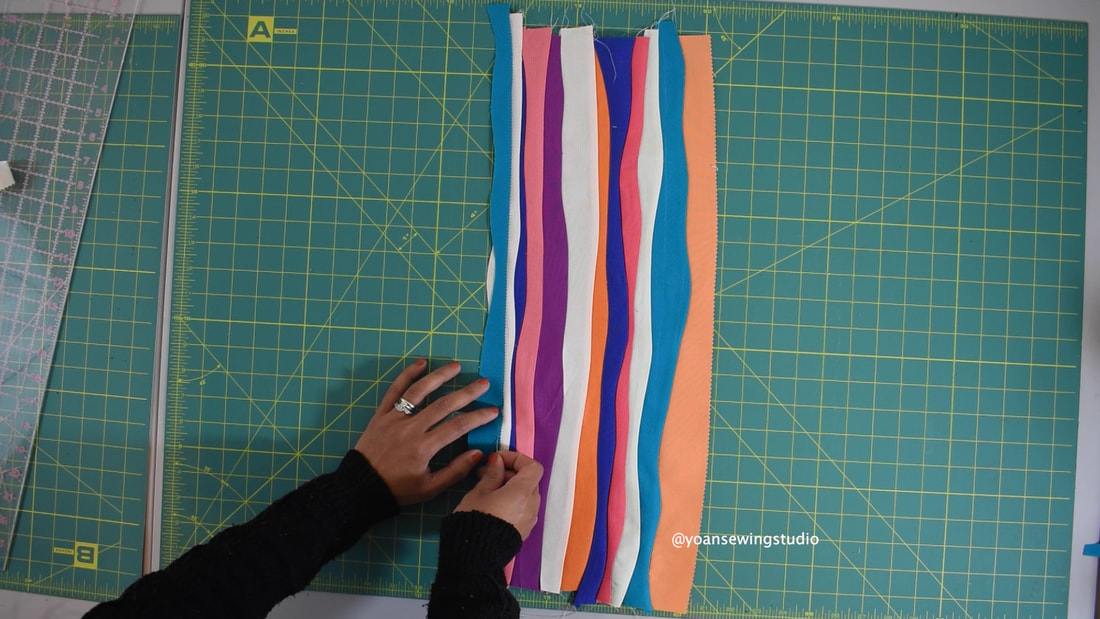
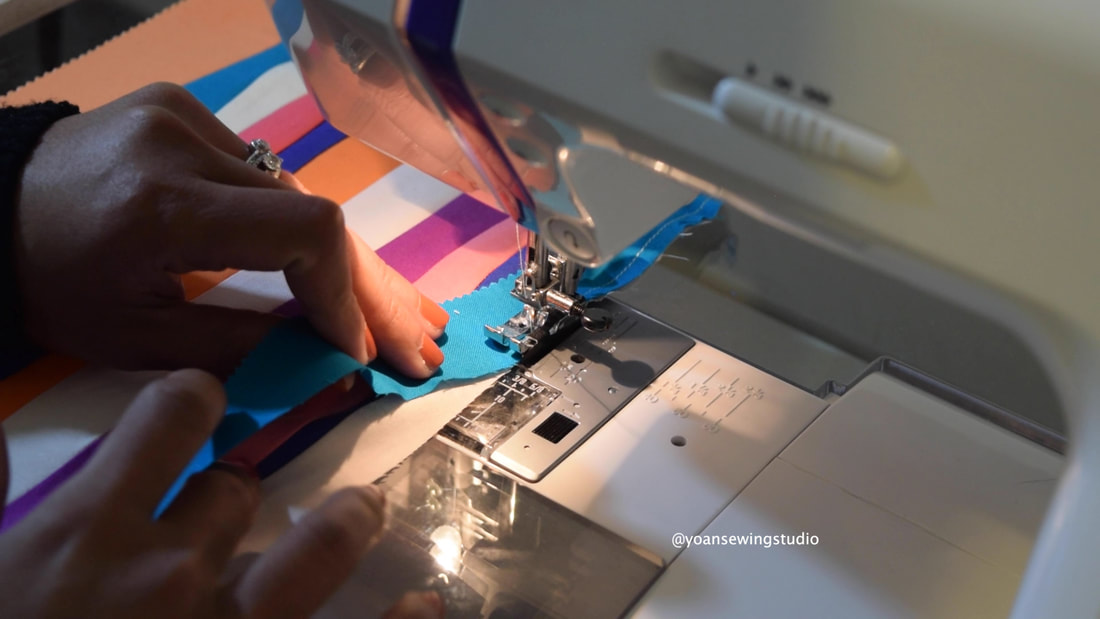
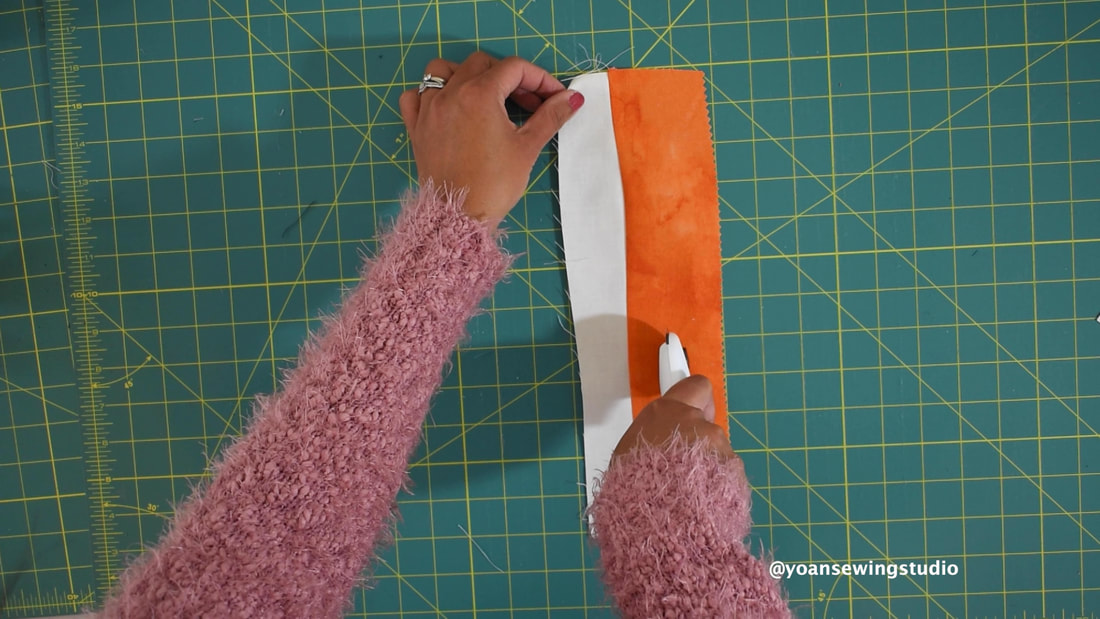
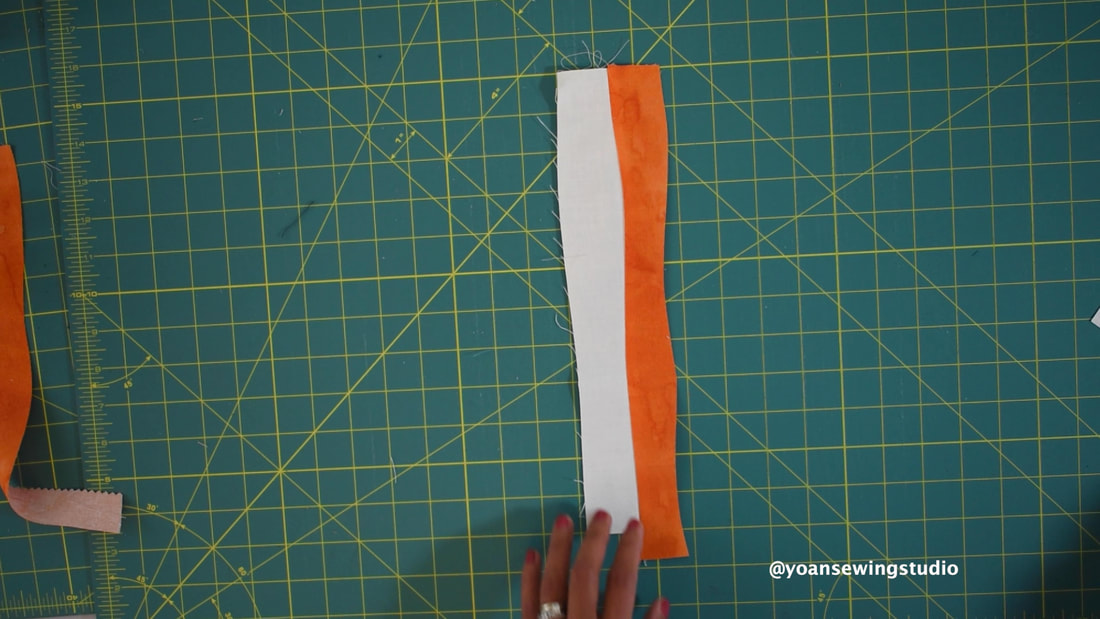
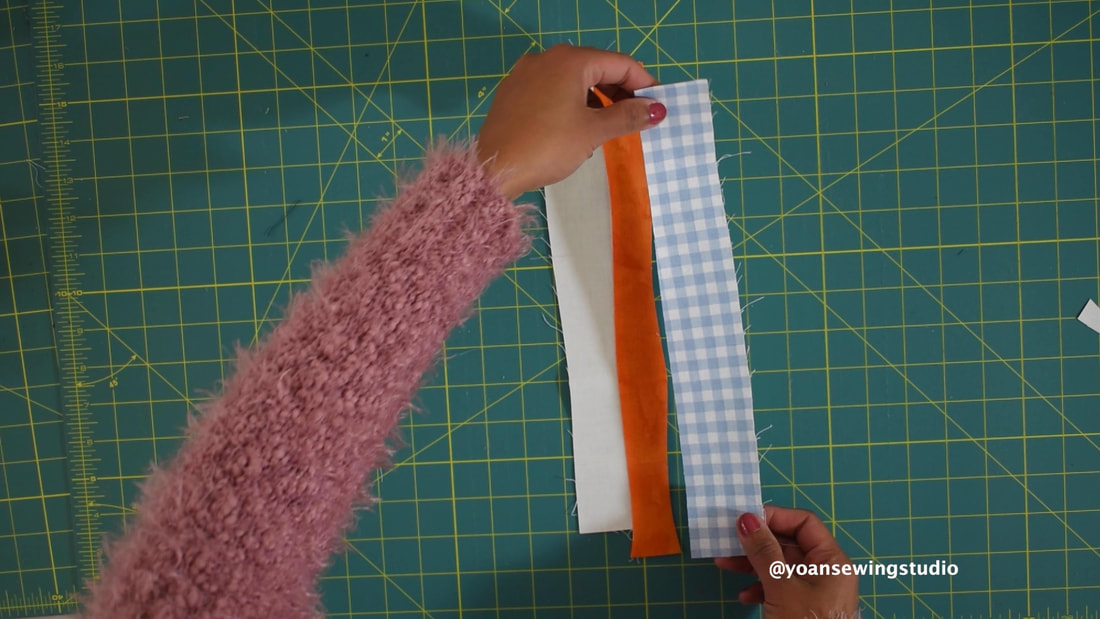
There are different kinds of improv piecing, which can be incorporated to many different projects, but what I'm going to show you today is the freeform curves. This method is similar to the modern wall hanging quilt project that I shared a couple of years ago; in that video I used some jelly roll strips, and arbitrary piece each strip without much of a planning.
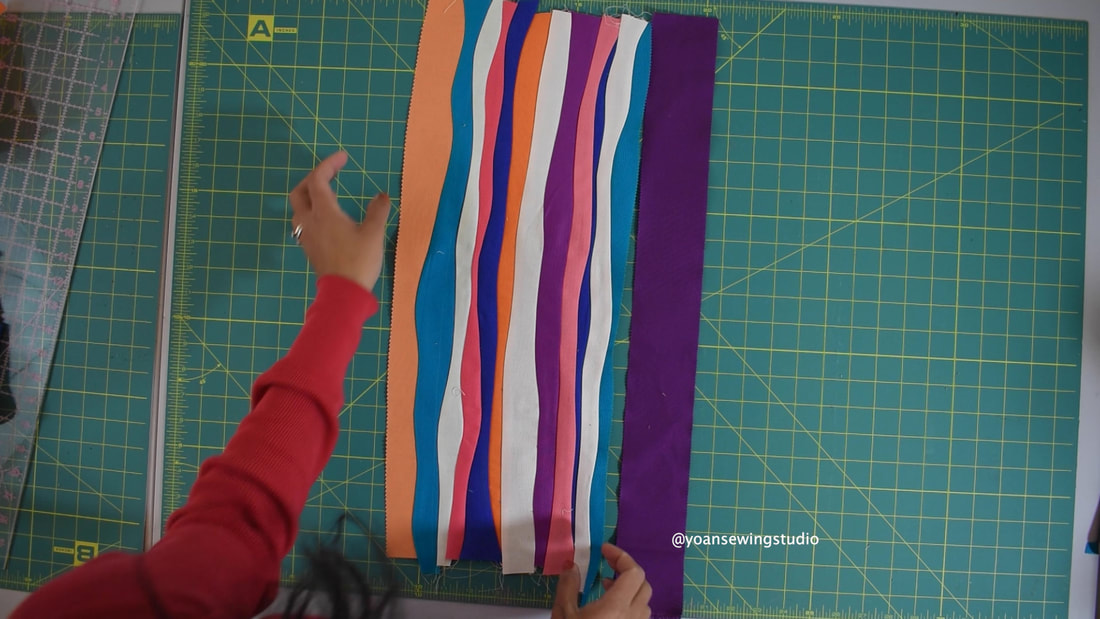
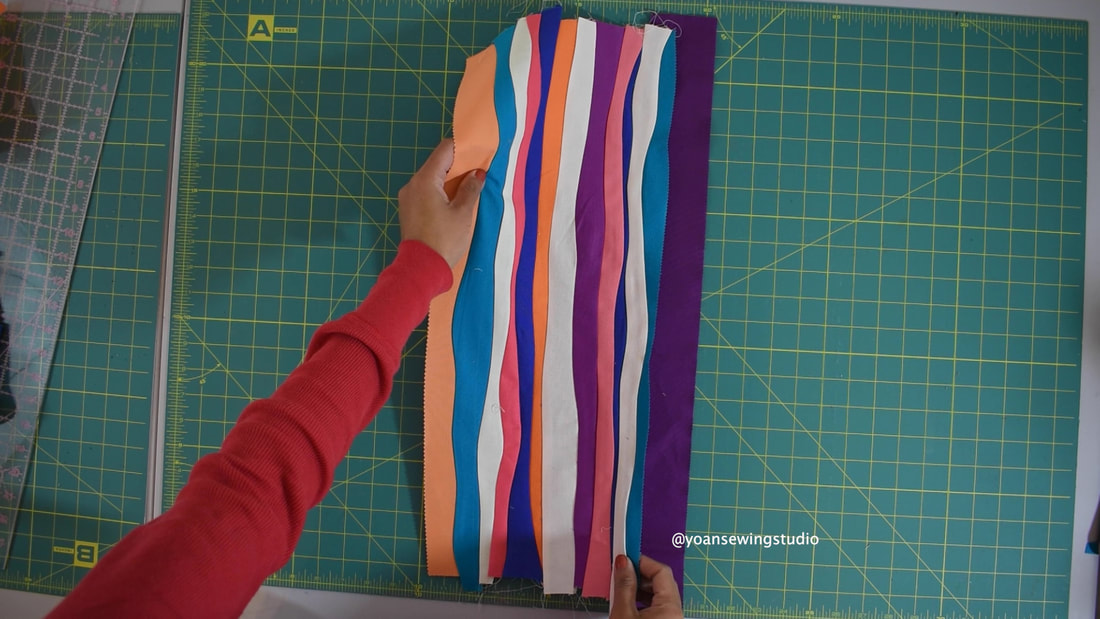
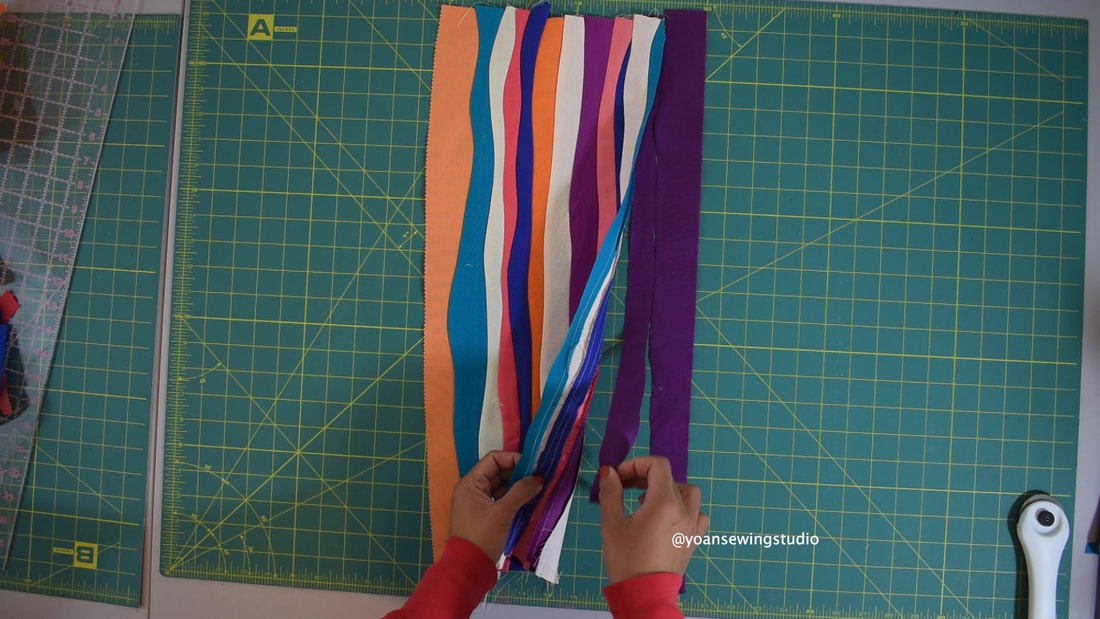
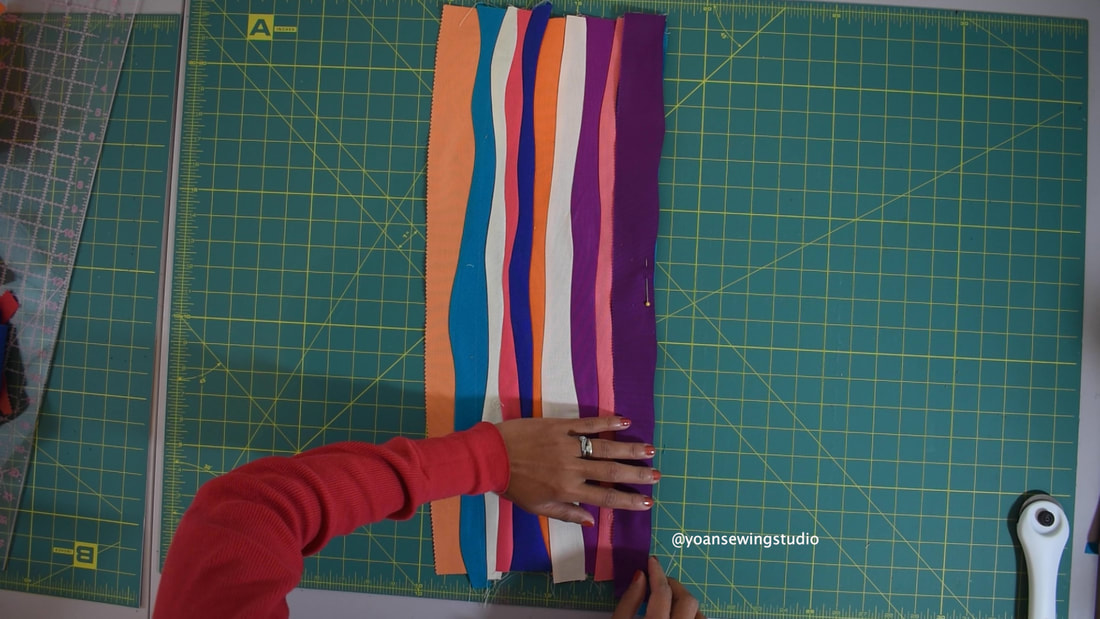
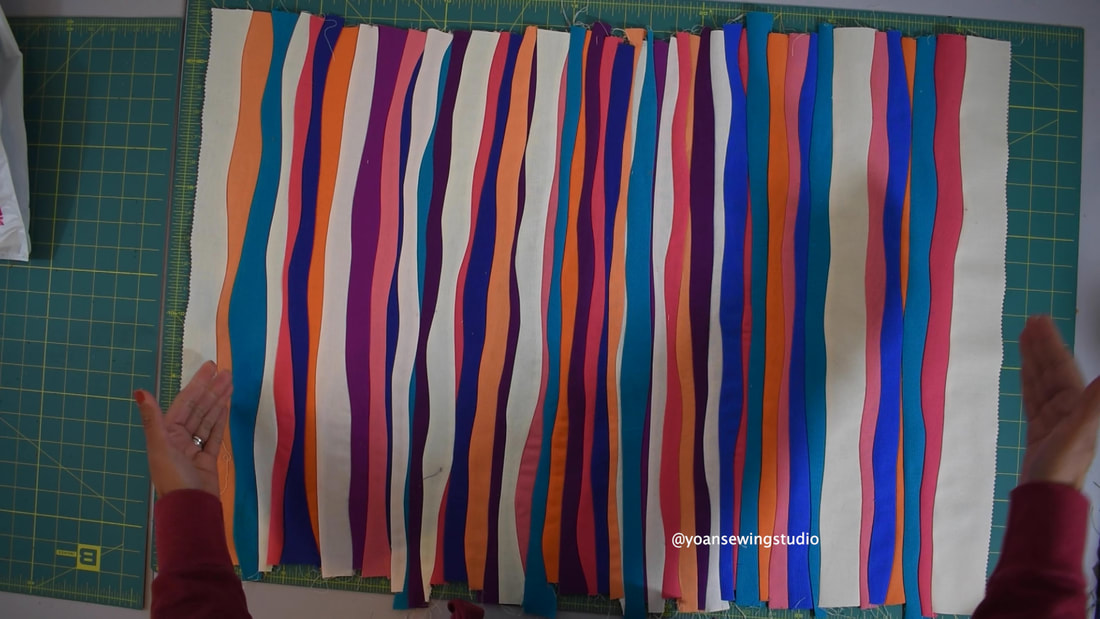
This time, we're going to stick to a theme which is the seaside or beach landscape. The choice of color shades is rather intentional, compare to the former, yet it is also so much fun. What you need to make the seaside improv wall hanging quilt
FABRIC
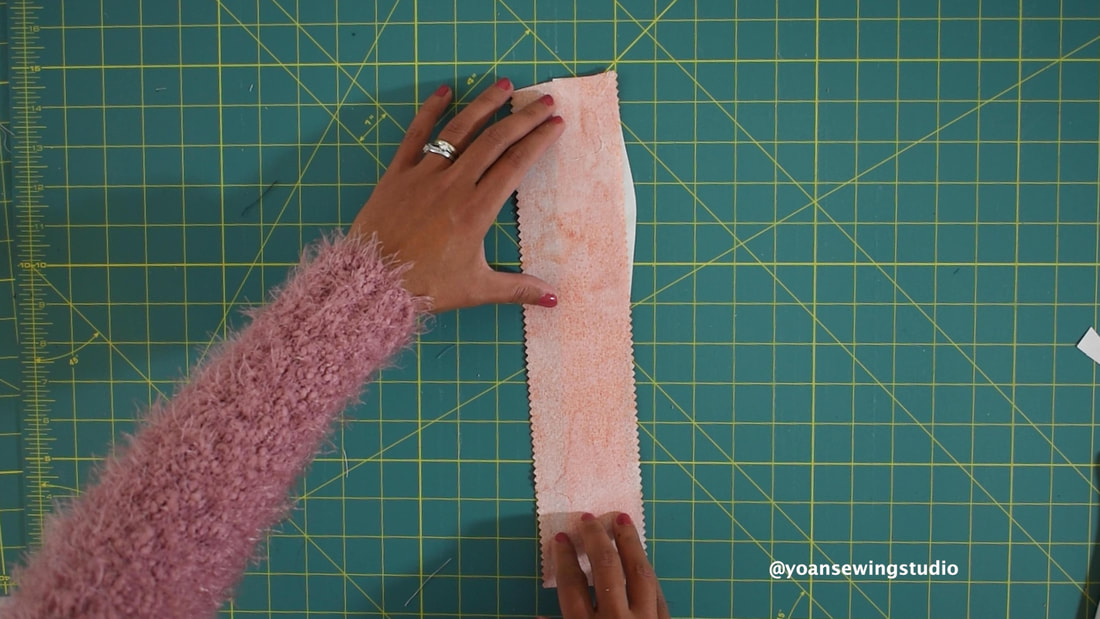
Solid fabric in various shades color to create the sunset and the water effect, about 1/8-1/4 yard each, or yo may also use fat eight. I ended up using 5 shades of color for the sky (upper section), and 8 shades of color for the water+sand (lower section). You may use less or more color shades depending on the look that you want to achieve. Beside solids, batik fabric will also work beautifully for this project. 1/6 yard of border fabric. 1/4 yard of binding fabric 23" x 32" Batting 25" x 34" Backing fabric
Watch the full video tutorial on my Youtube channel, and don't forget to subscribe so you won't miss any future upload.
Check out my other projects featuring improv piecing in this playlist.
Please enjoy, and happy sewing. 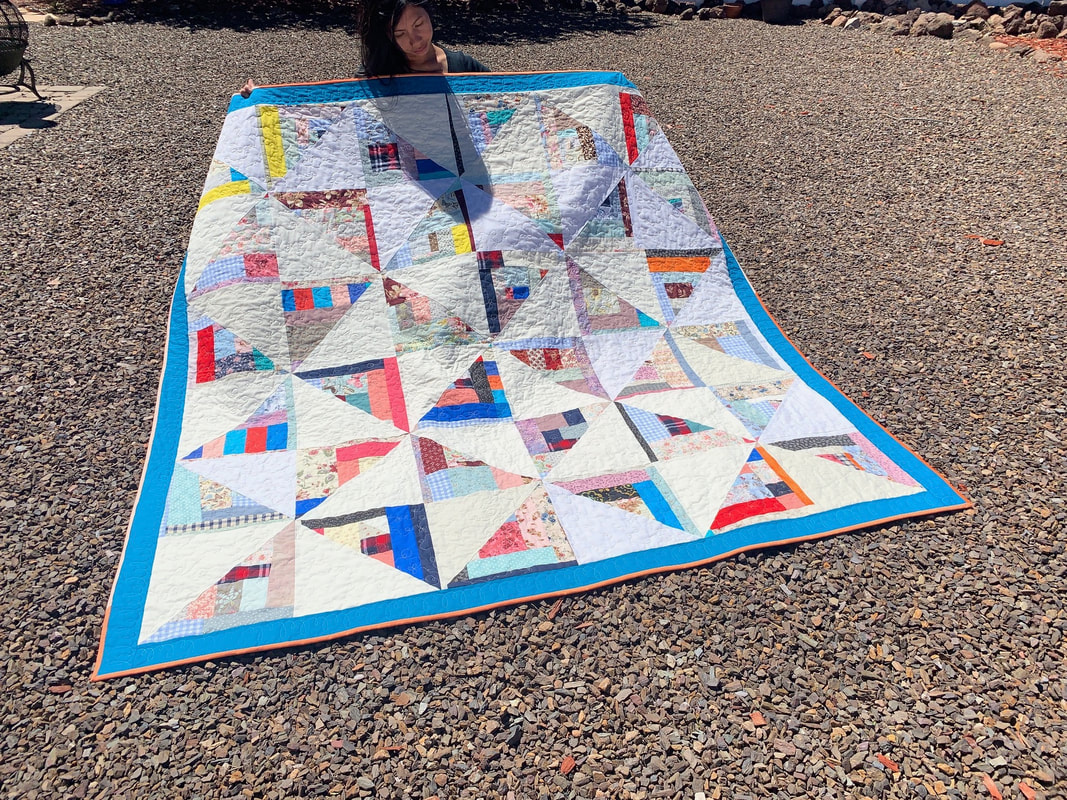
Crazy Scrap Quilt 2 - Pinwheel Edition by Yoan Sewing Studio
This quilt is a variation of the Crazy Scrap Quilt 1 project that I shared about a year ago, in this project we will do the same scrappy block piecing method, with additional half square triangle tweak.
Finished Quilt measurements : 74 1/2" x 74 1/2" Block Measurements : 12" x 12"
This is a wonderful project to use up your fabric scraps, that will yield to a generous size quilt with fresh and modern look.
I hope you enjoy this quilting project.
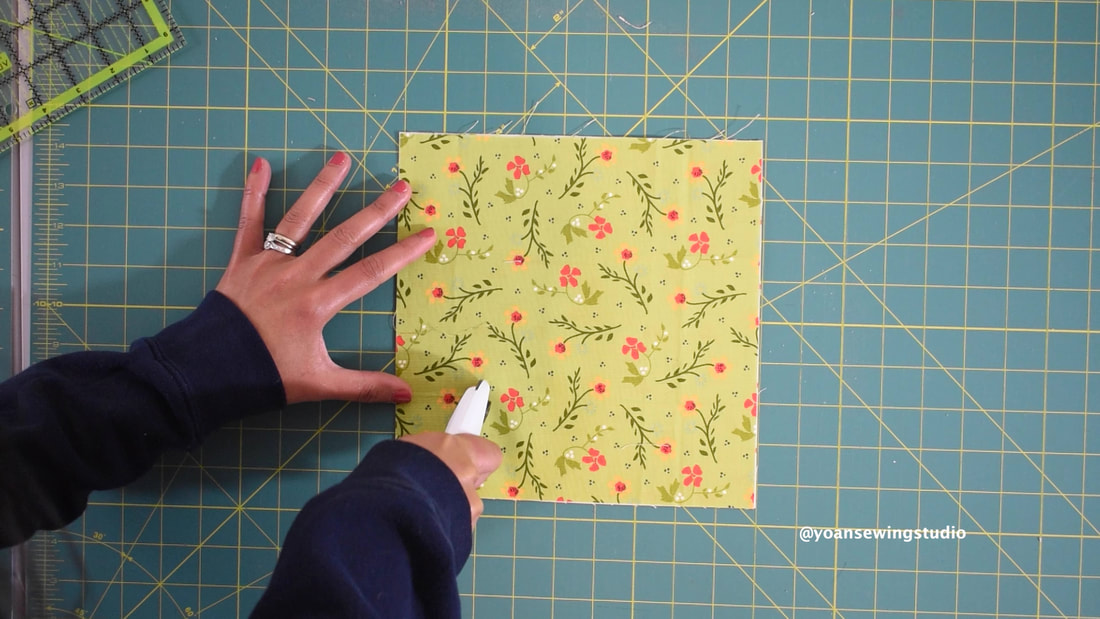
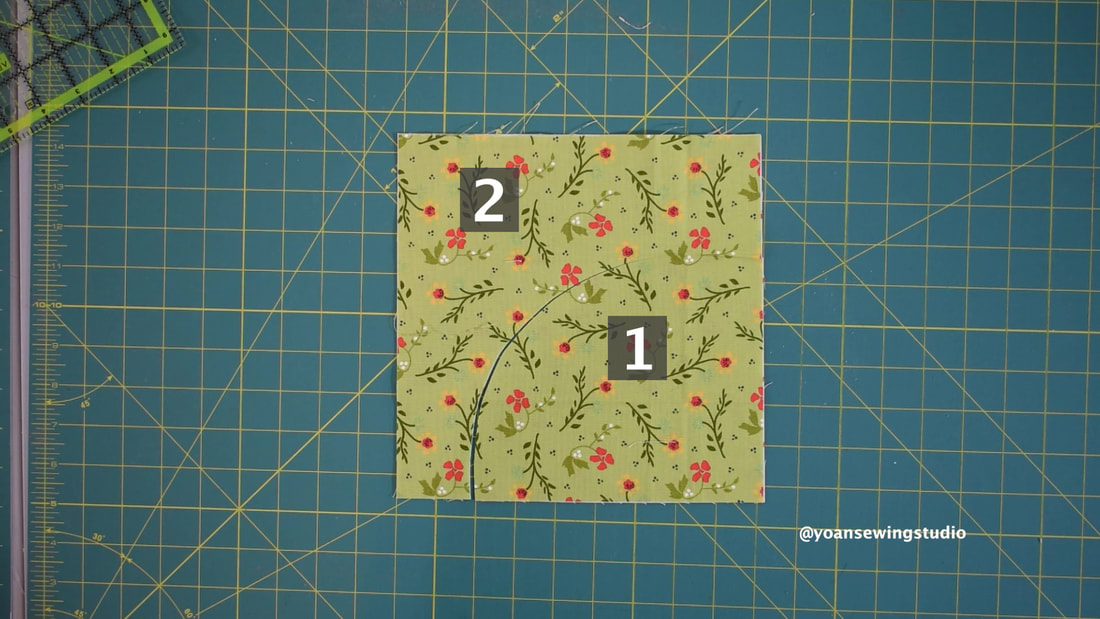
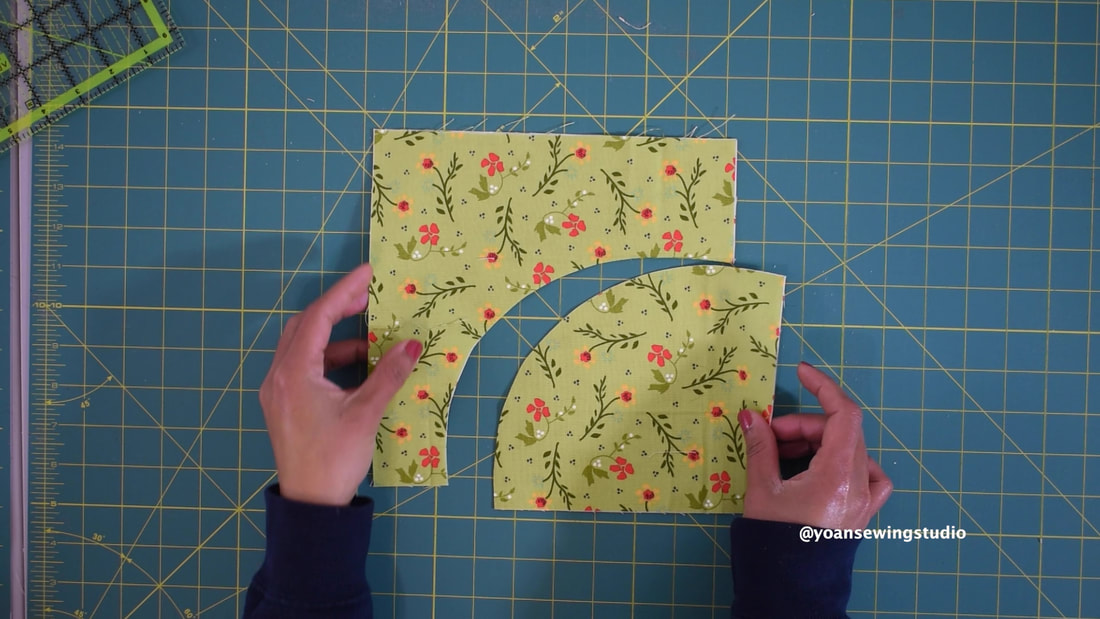
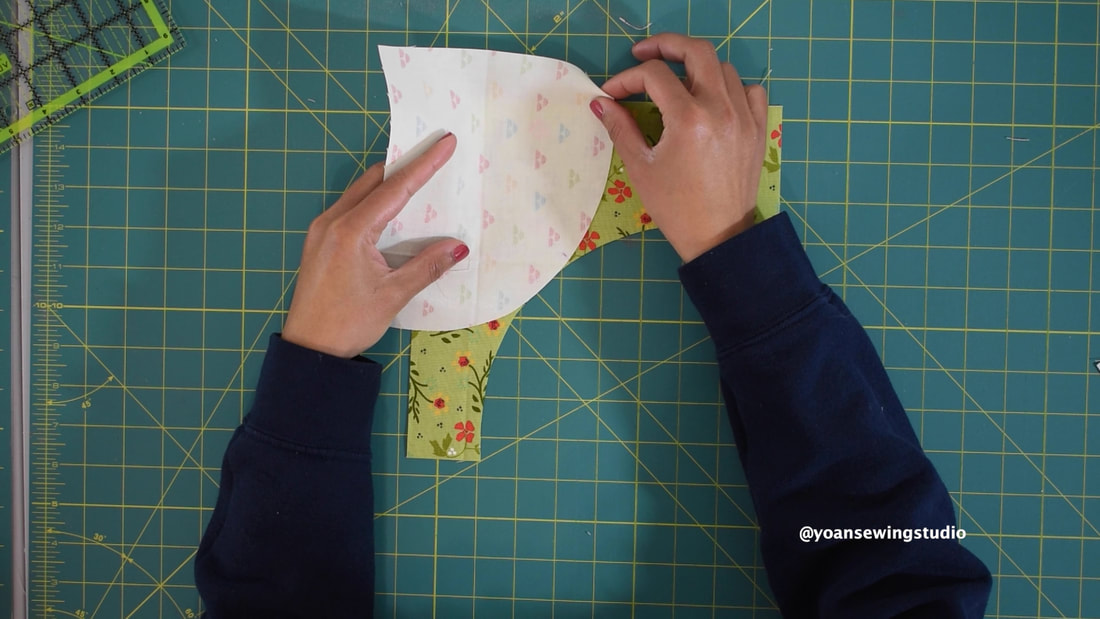
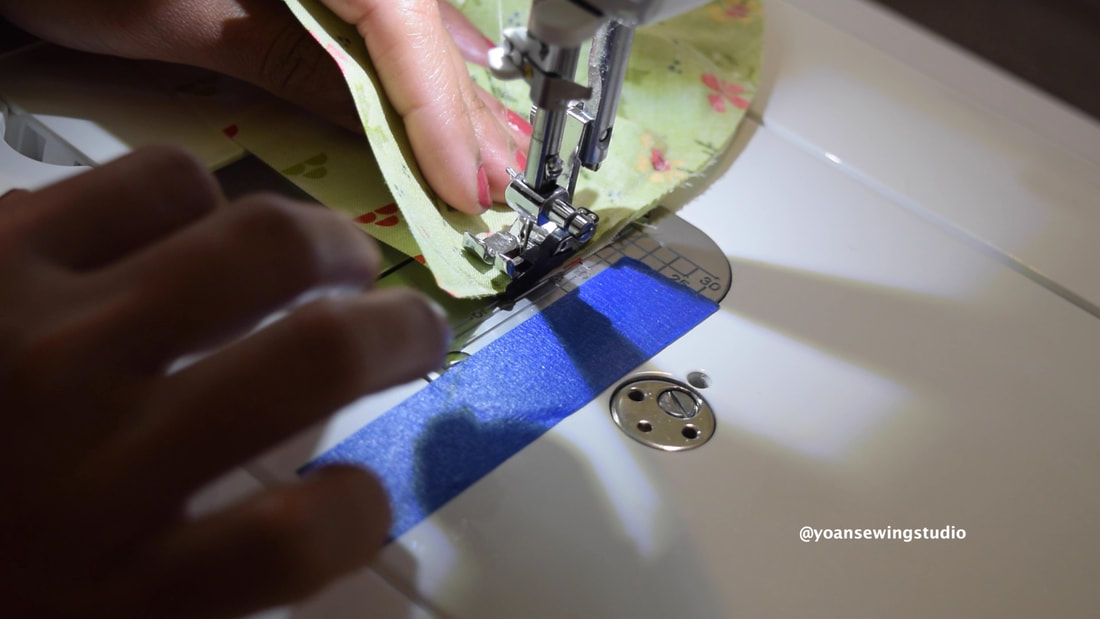
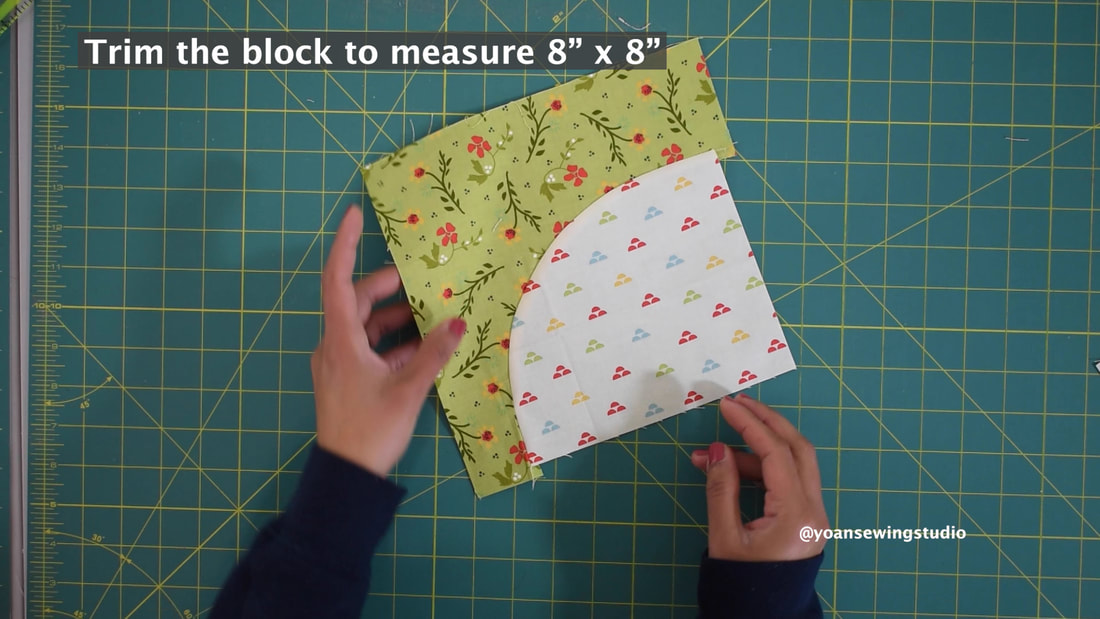
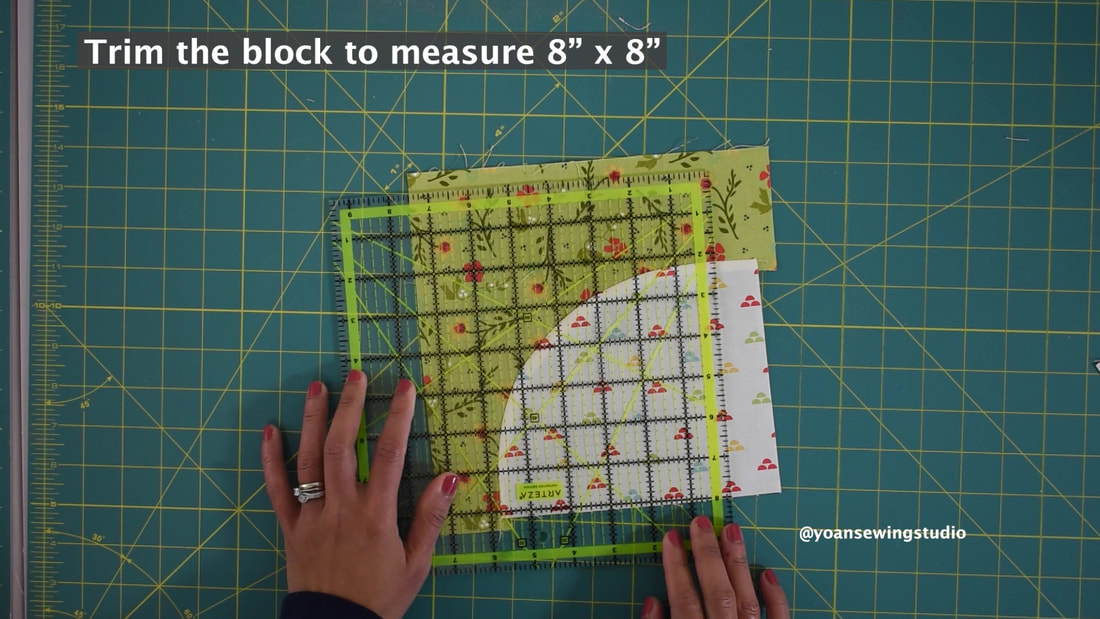
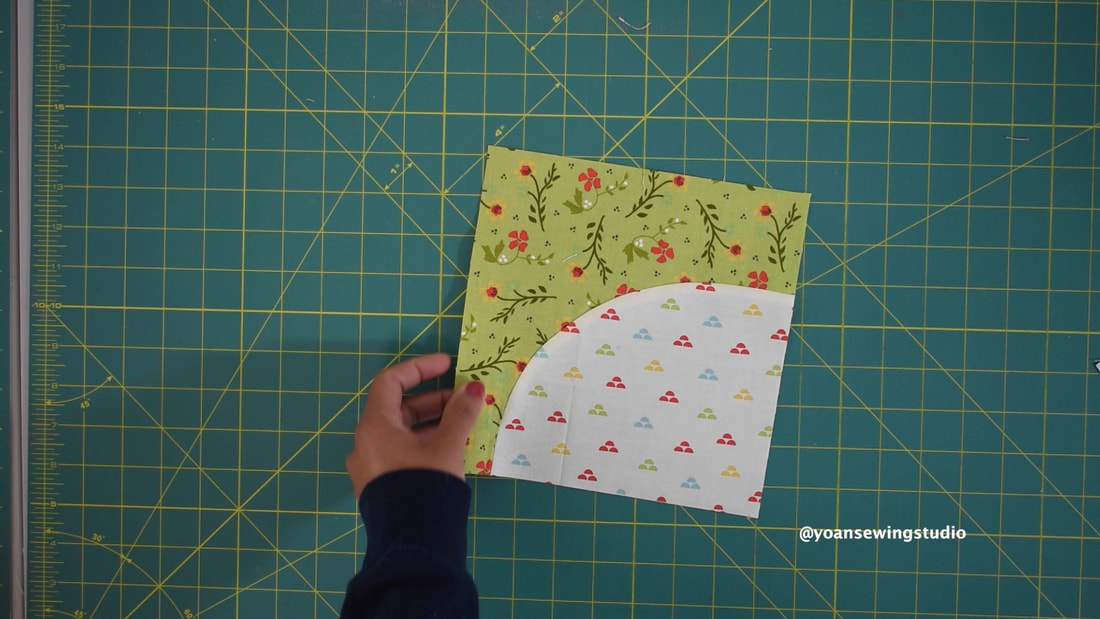
Happy Sewing!! 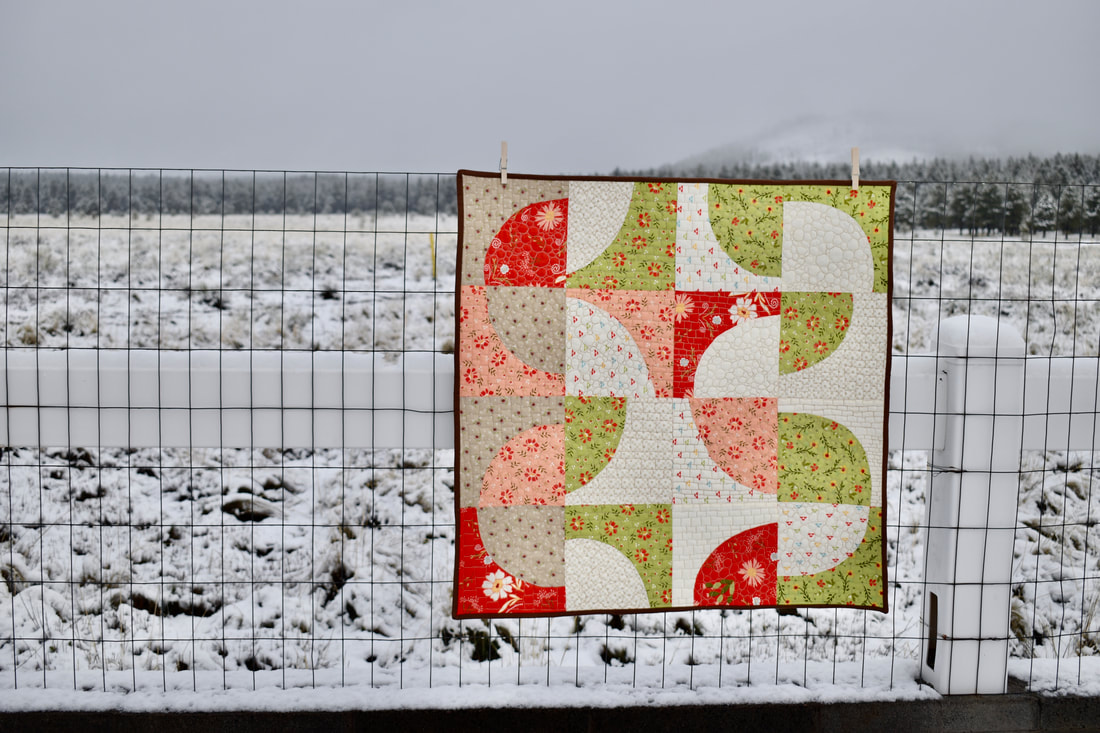 Quilt Wall Hangin | Improv Quadrant Curve Today I'd love to share with you my little quilty adventure. This wall hanging project came rather spontaneously. I was having a "creative block" moment where my brain was simply stuck and couldn't figure what to make or what my next move should be, so I stood by my cutting table, grab a couple scraps of fabric, and my rotary cutter, then started cutting, sew, and this quilt happened. In this project you'll learn how to sew improv style "Quadrant" like curves, it may look intimidating at first if you haven't done it yet, but it is actually pretty simple, and since this is an improv quilt, accuracy is not in your agenda (although yes, we still need to square up each block to make it easier to assemble) I posted the tutorial on my Youtube channel that you may watch here. or keep reading below for the list of supplies and written instruction. Let's get started!! Supplies(8x) 9" squares (medium/dark fabric) (8x) 9" squares (light fabric) Batting as needed Backing fabric as needed Basic sewing and quilting notions Directions1. Prepare your fabric as instructed in the list of supplies above. 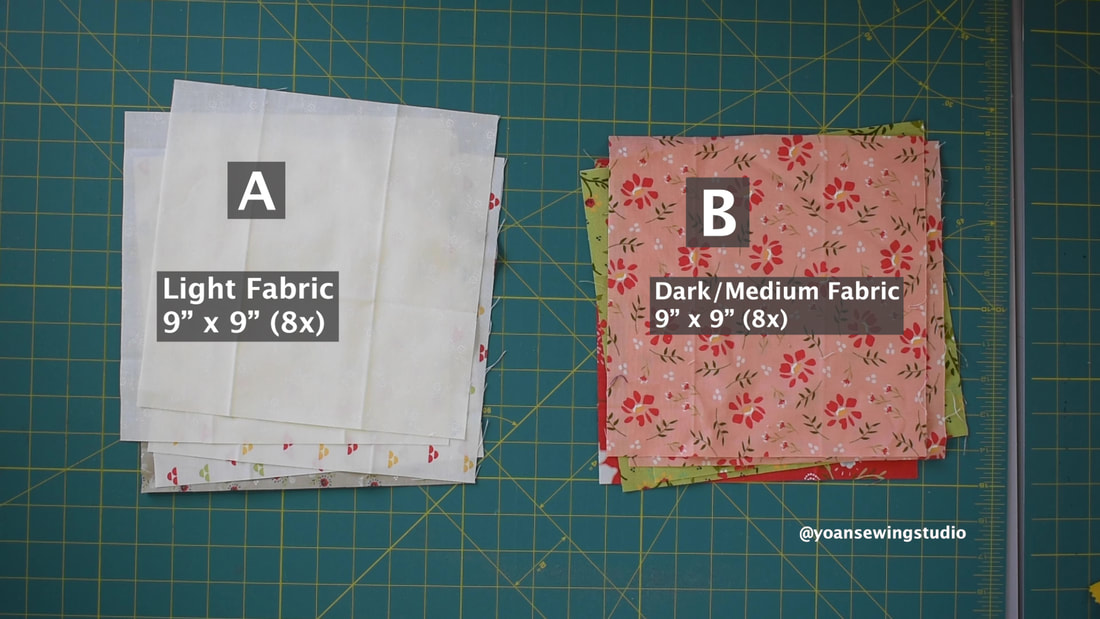 2. Lay fabric A right side up, then lay fabric B right side up. 3. With your rotary cutter, make the quadrant shape cut from lower left-ish corner to the top-ish right corner. 4. Swap the layout of the fabric just like shown below. 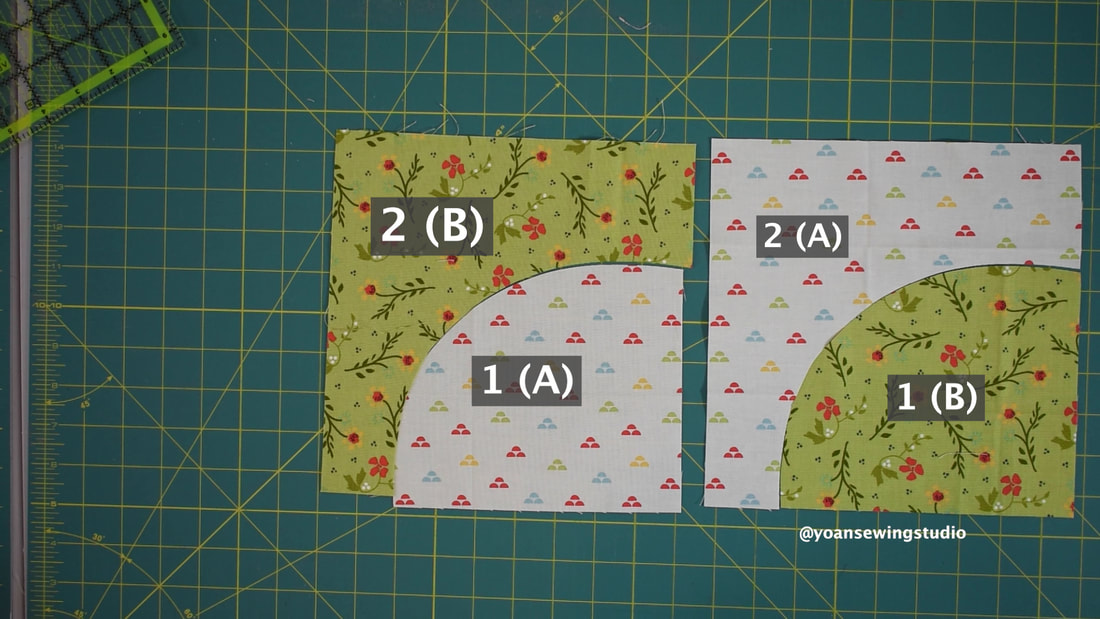 5. Mark the center point of panel 1 and panel 2 with your fabric marker (it doesn't have to be precise, just estimate).  6. Lay panel 1 and panel 2 right side together, match the center point mark, pin. 7. Sew, starting from the center point mark, down to the edge, then flip the fabric, go back to the center point mark then sew down to the opposite edge. Align the edges of the fabric as you sew, panel 1 might turn out a bit shorter, which is okay. 8. Press the seams towards panel 1 9. Trim the block to measure 8" x 8" 10. Make 15 more blocks. 11. Layout your blocks as shown here. 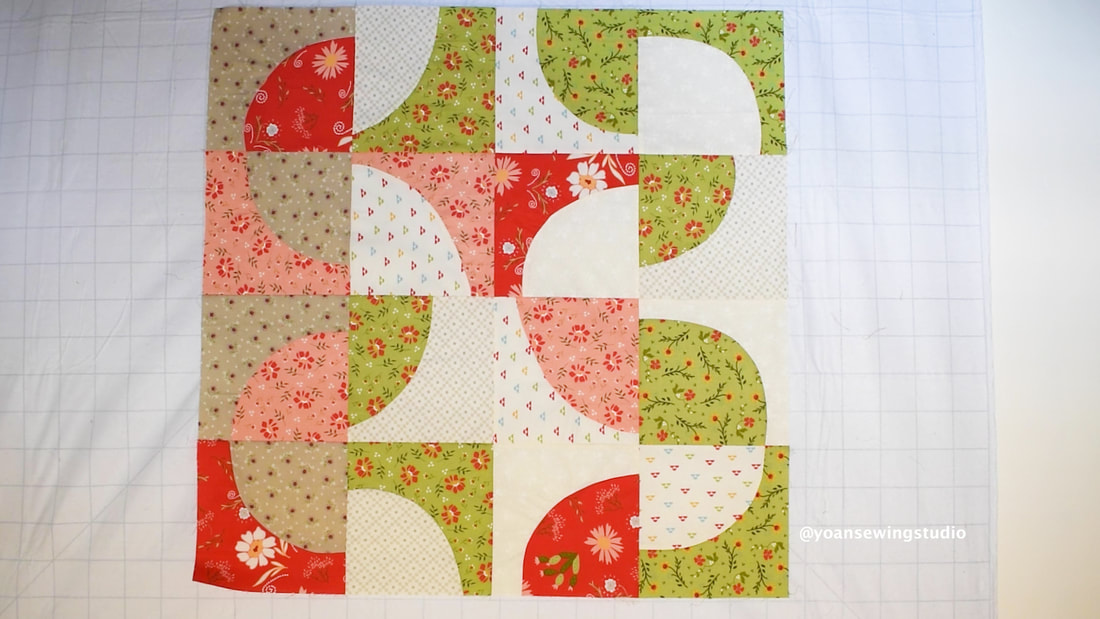 12. Sew your quilt blocks together.
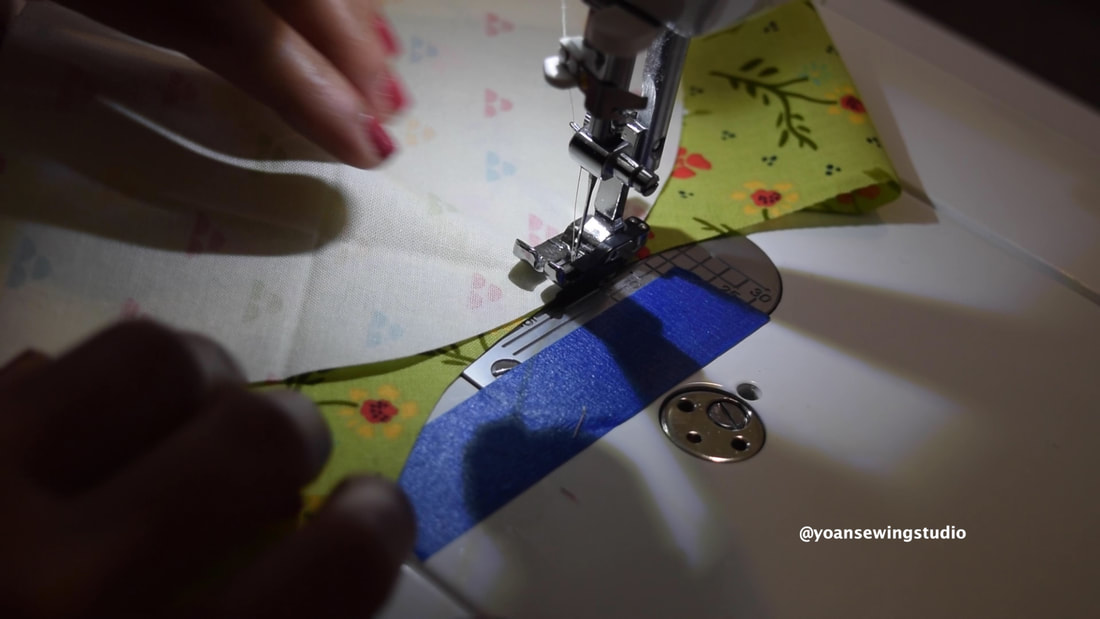
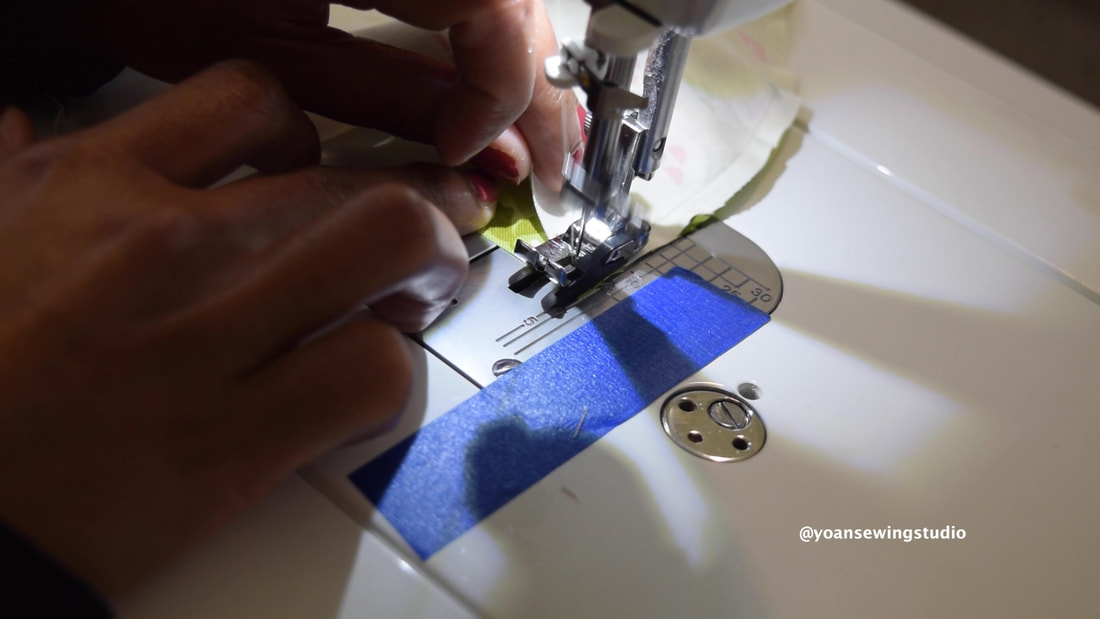
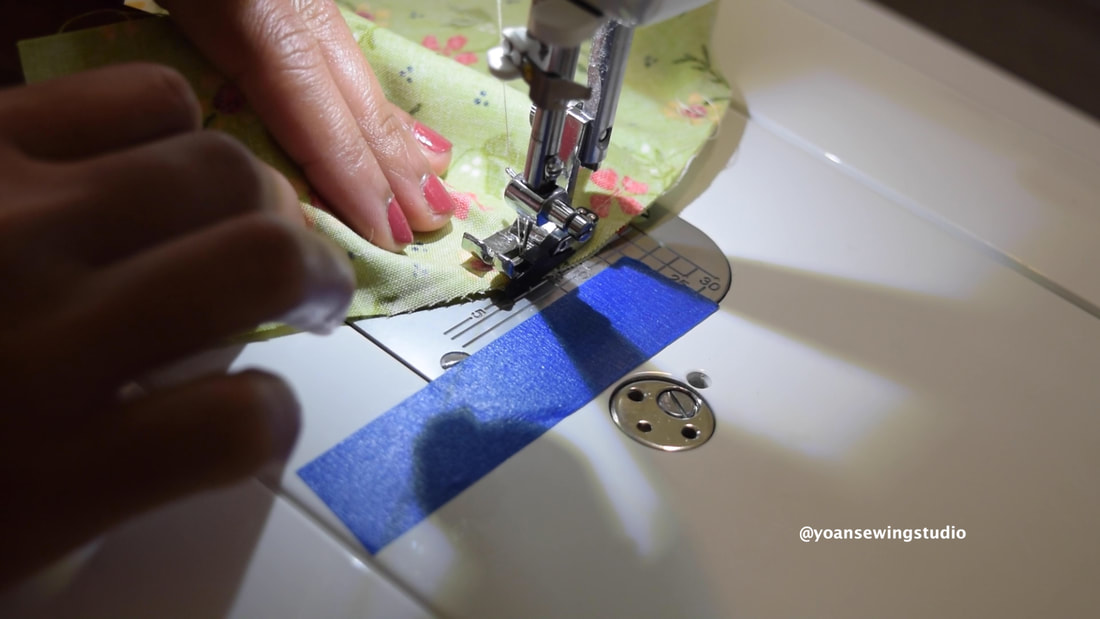
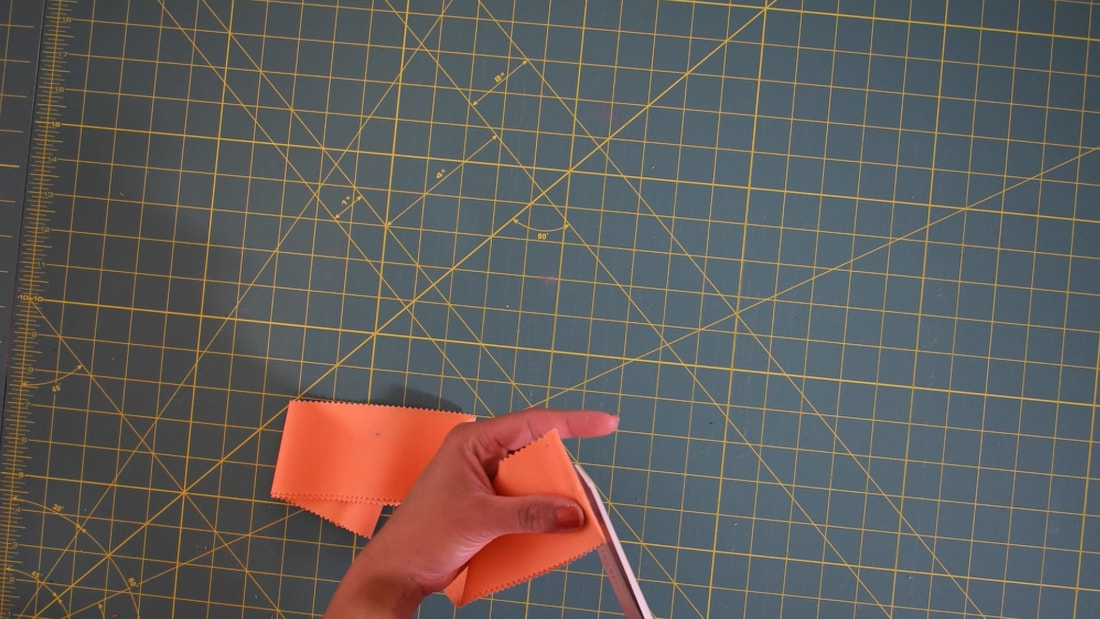
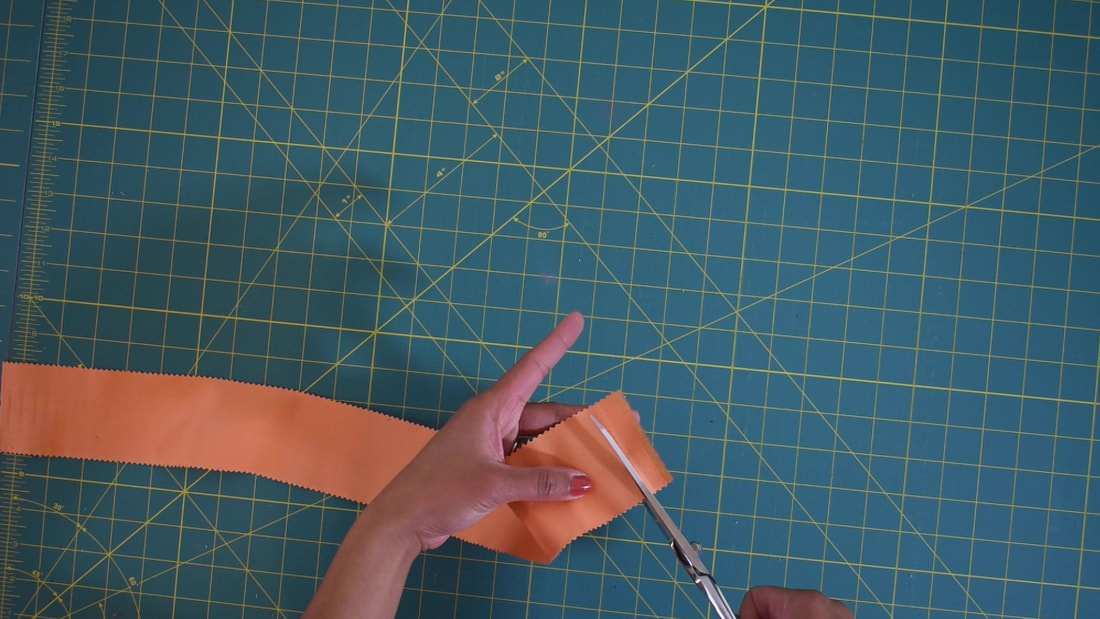
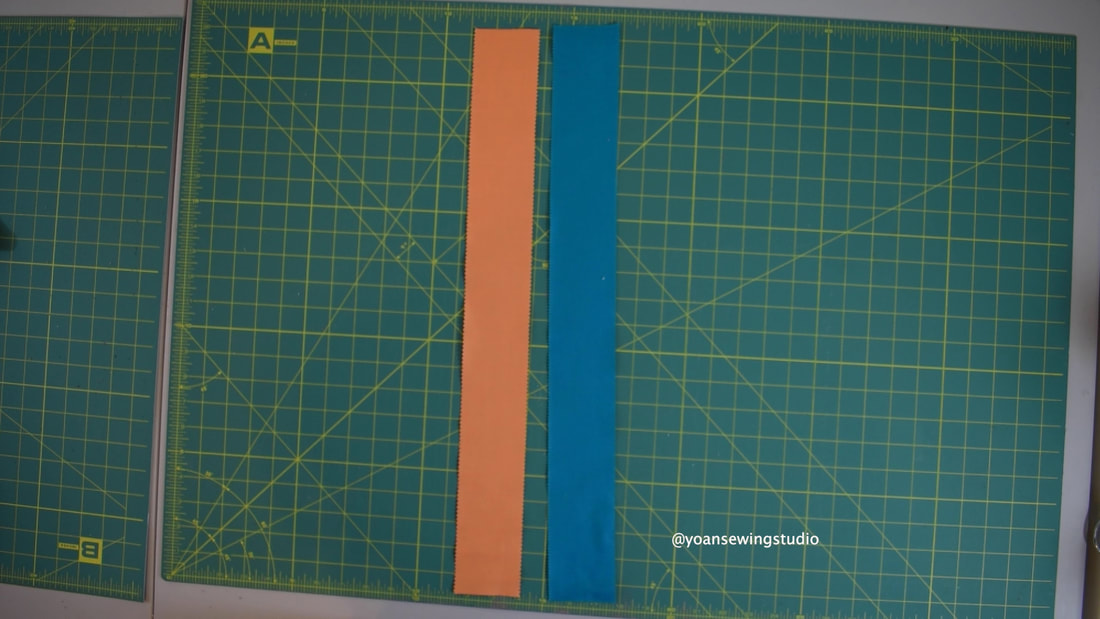
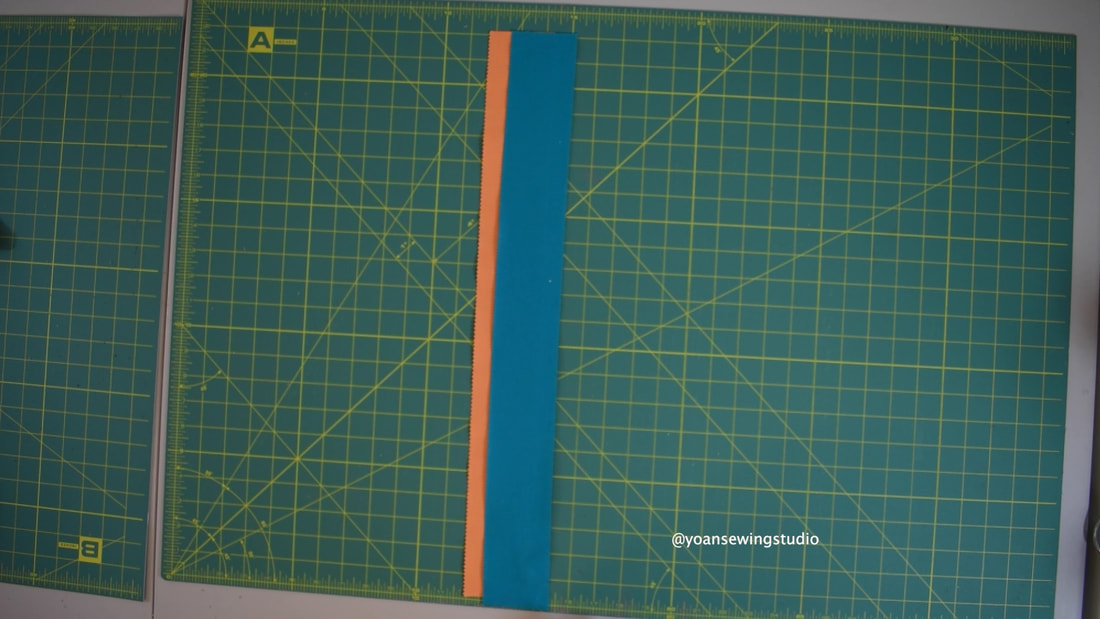
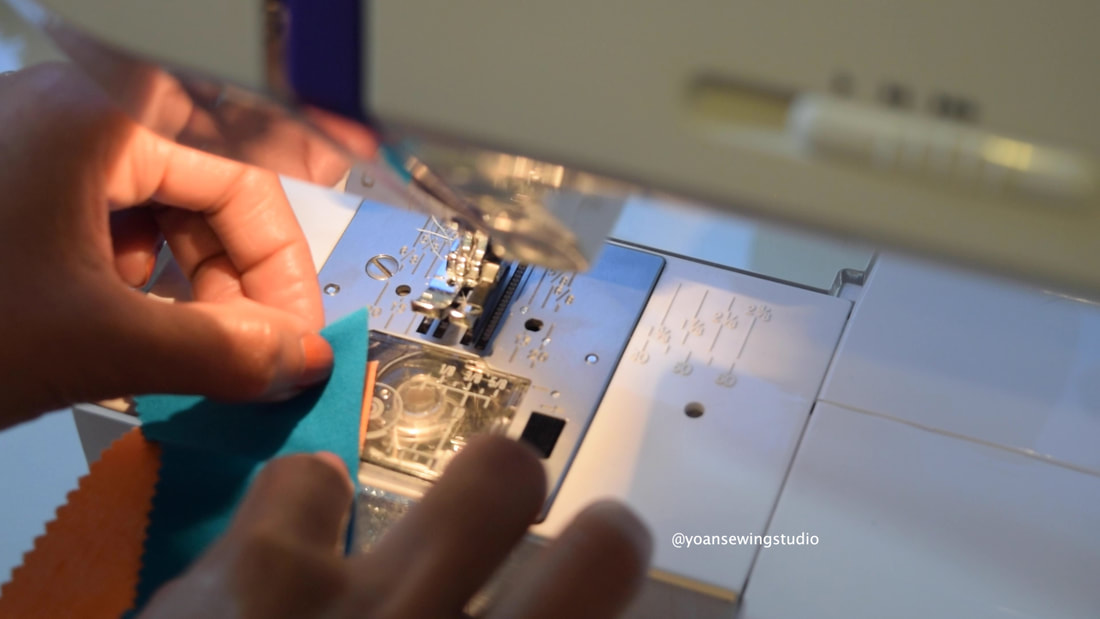
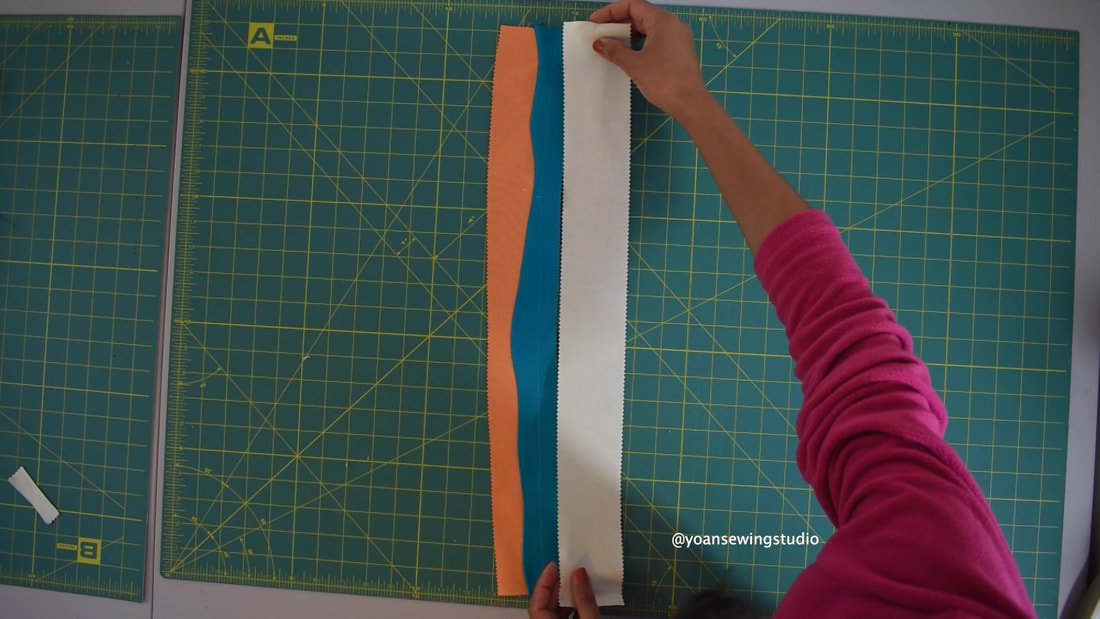
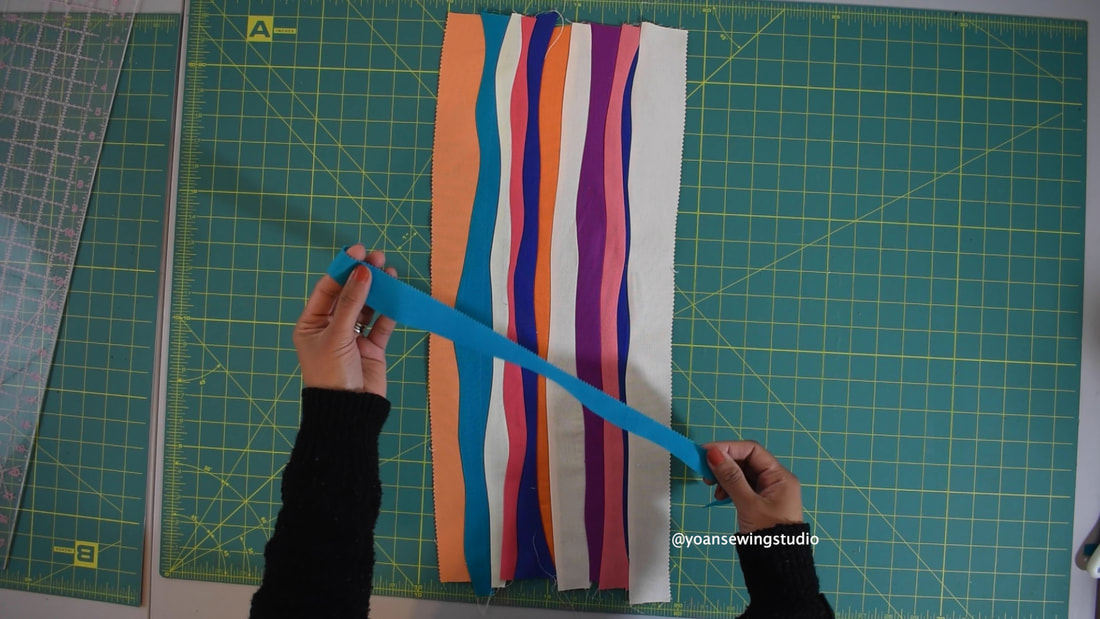
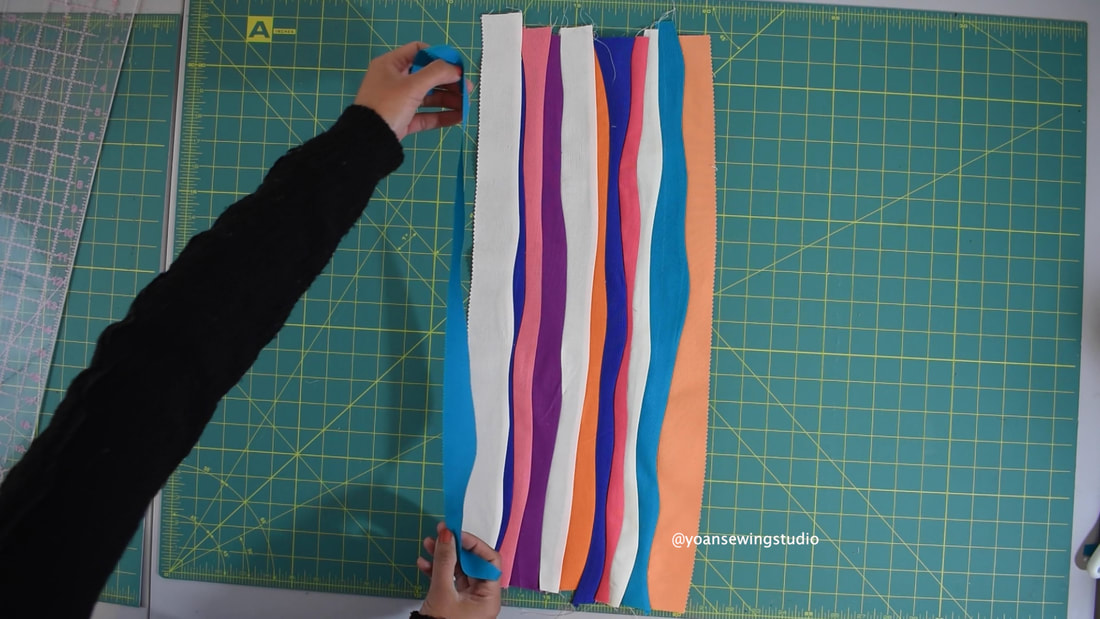
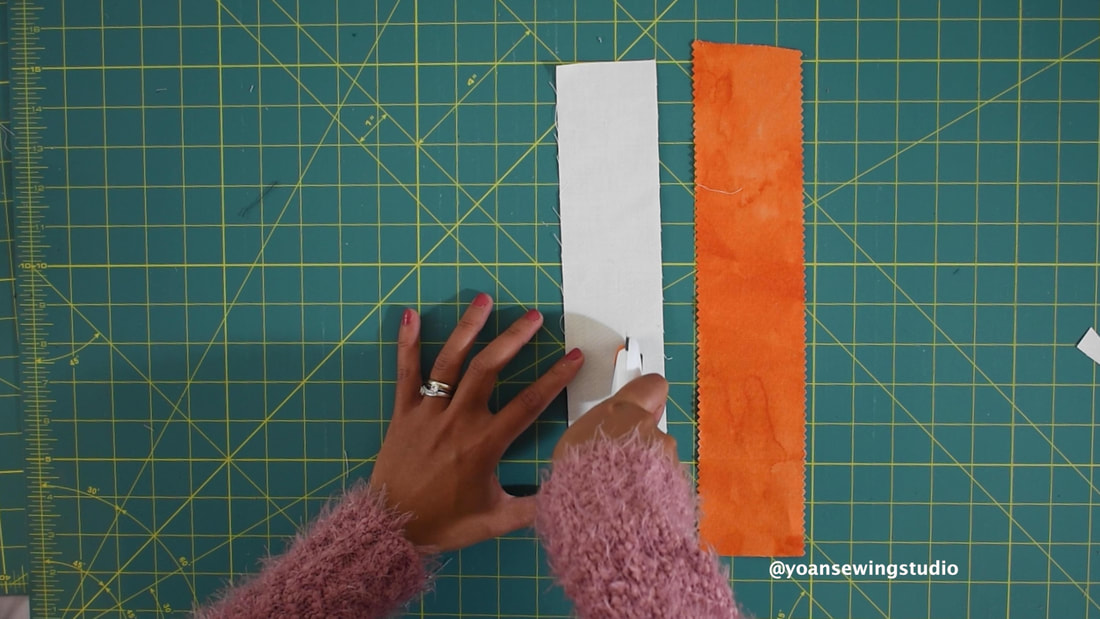
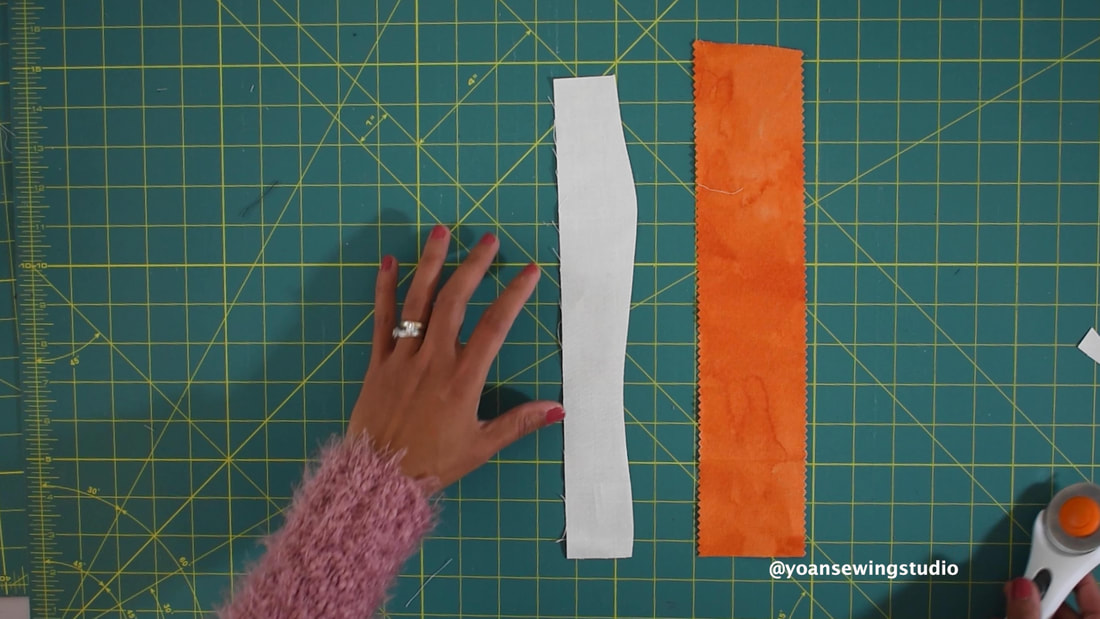
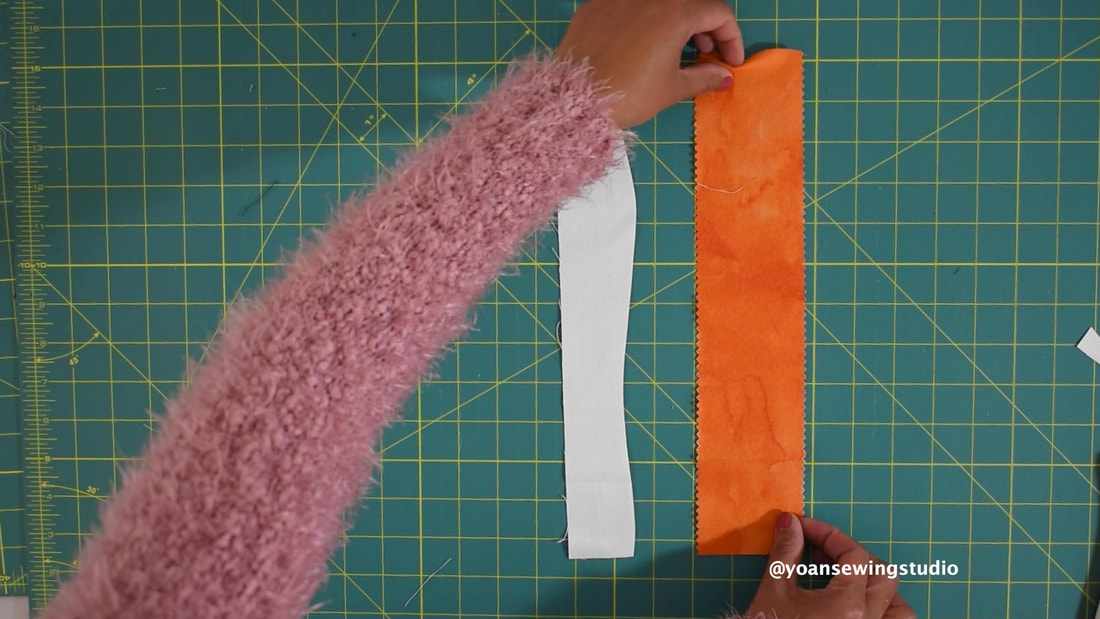
13. Layer with batting and backing fabric 14. Quilt as desired 15. Bind, add the hanging sleeve, enjoy. 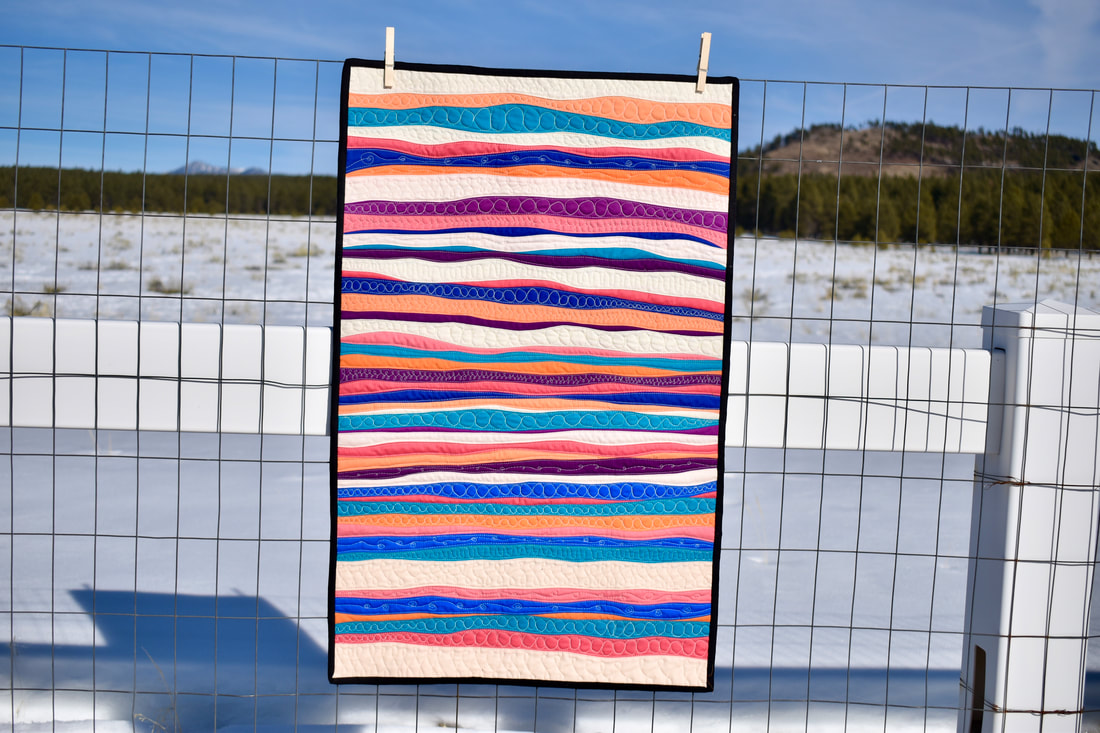 Improv wall hanging quilt - performing free form curves I have a fun little quilt project to share with you today. It's a wall hanging size modern quilt that performs free form curve piecing. In the previous quilt along episode, I shared the scrappy improv quilt project performing gentle curves. In that video, I featured the shortcut method of doing the curves, which will only work if you use shorter size strips, and performing shallow curves. Now, in this project we will do the "proper way" of doing curves. For the fabric, you will need some Jelly Roll strips, obviously you can cut from the yardage, or use left over fabrics that you might have laying around. I purposely play with many colors in this project, so you may see the the contrast, and how the curvy shapes taken place there, although you may use more subtle color, two-tone color, or any color palette that you desired. SUPPLIES 12-18 jelly roll strips Quilt batting 2/3 yard backing fabric Basic Sewing and quilting notions Disclaimer : This post contains Amazon affiliate links, thank you for your support! I posted the full quilt along video on my Youtube channel, however you may scroll down to see the written instructions. Finished quilt measurements 19" x 31" DIRECTIONS 1. Cut your jelly roll strips in halves, and trim off the selvage ends 2. Take two contrasting strips, and overlap them (the width of the overlap is totally up to you), if you fabric has right side and wrong side, you should be looking at the right sides of both fabrics right now. 3. With your rotary cutter make the curve cut. 4. Remove the top left strip, and the bottom right strip, you should end up with two matching strips 5. Lay the strips right side together, pin them place (the edges may not be aligned), and that's expected :) 6. Sew with 1/4" seam allowance, aligning the edges of the strips as you sew (maneuver the top strip to align with the edges of the bottom strip) 7. Press towards one side 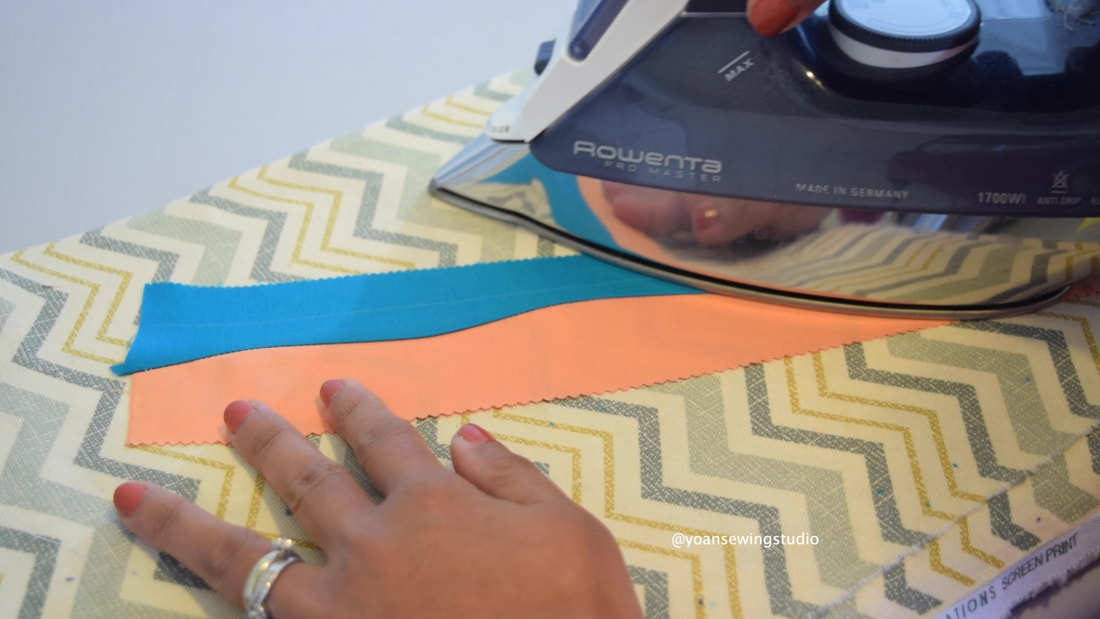 8. Sew more strips and continue building your quilt. 9. Use leftover strips from the curve cutting that are at least 1/2" wide, to make very narrow insert 10. Lay the narrow strip on top of the edge of the fabric, then cut following the curve of the narrow strip. 11. Remove the fabric underneath 12. Lay the strip and the fabric right sides together, pin, then sew with 1/4" seam allowance. 13. Press the seams towards the fabric (away from the narrow strip) 14. Take another strip, overlap that with the fabric (with the strip underneath, and the narrow strip on top) 15. Make shallow curve cut between the overlap, remove the bottom left fabric. 16. Lay the strip and the fabric right side together, pin, sew with 1/4" seam allowance. 17. Continue sewing and adding strips, until your fabric is measuring about 32" long (or as desired) 18. Trim your quilt top, straighten up the edges 19. Stay stitch along the side edges (with 1/4" seam allowance) to prevent the quilt top to stretch during the quilting and binding. 20. Layer with batting and backing fabric, quilt, bind, add hanging sleeves, and enjoy! Happy Quilting!
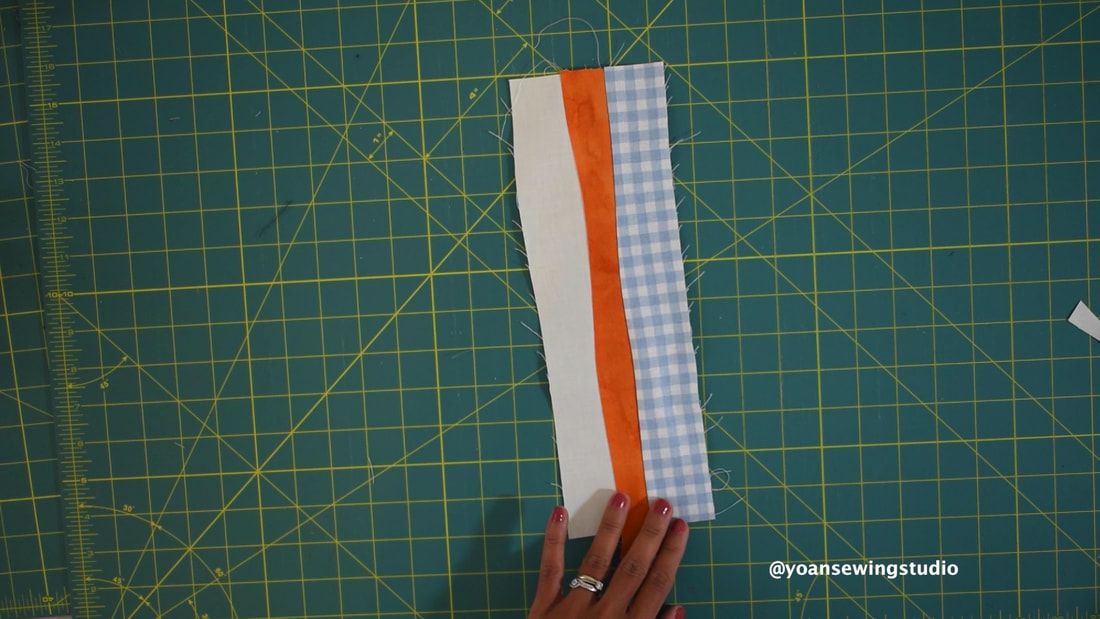
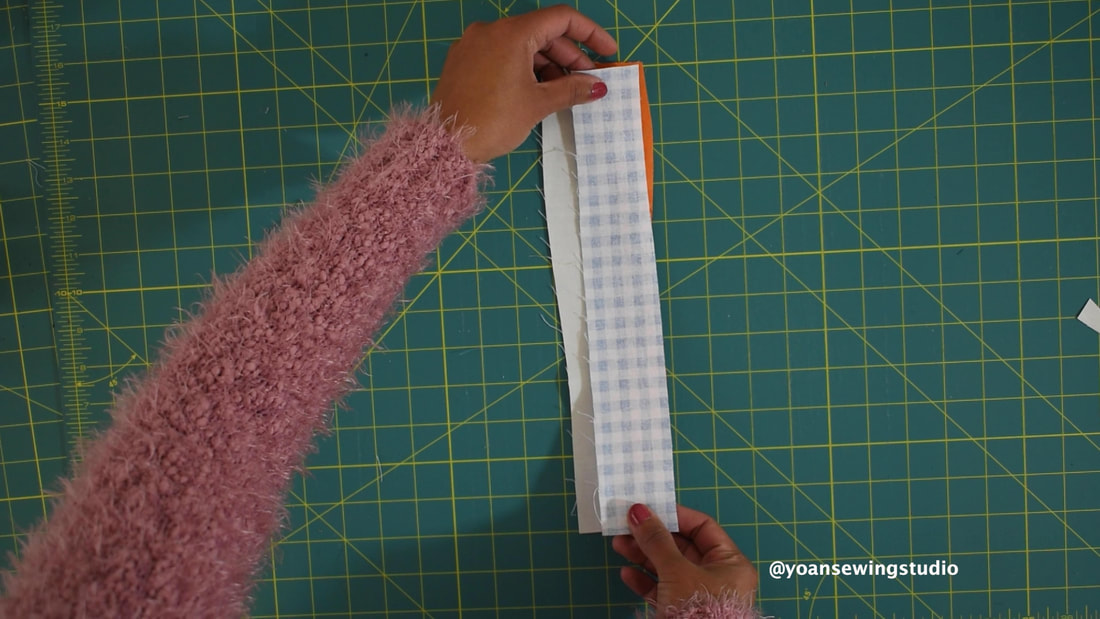
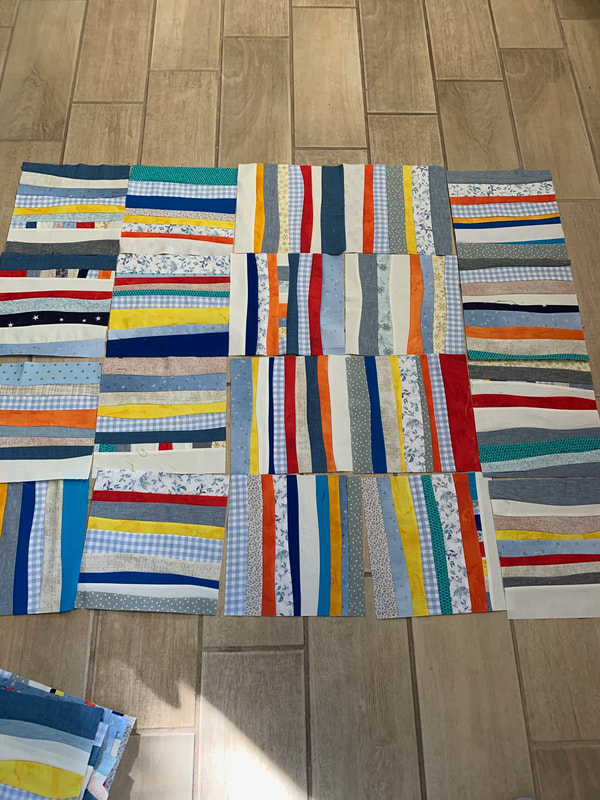
 Scrappy improvise quilt performing gentle curves Before the end of the year, I promised myself to empty up or at least get rid of some of my scraps that have been laying around in my scrap bin. Few months ago, I posted the Crazy Scrap Quilt video and got quite a positive feedback, so I figured it will be great to make another Scrap quilt episode, with different pattern, featuring different technique. This time I decided to try out the "gentle curves" free piecing, I've seen this technique performed in several blogs and Youtube videos, and decided to give this a try. Supplies: Assorted fabric strips at least 11" long (the width should be between 1" -3") Quilt Batting Backing Fabric Basic sewing and quilting notions -Machine Quilting Needle -Machine Quilting Thread -Spray Basting -Square ruler Disclaimer : The above links are affiliate links, thank you for your support! Let's Get Started! Gather your scraps and cut them into various sized strips (the width should be between 1"-3", and the length should be at least 11", I divided mine into 3 categories, light/neutral, medium, and dark. 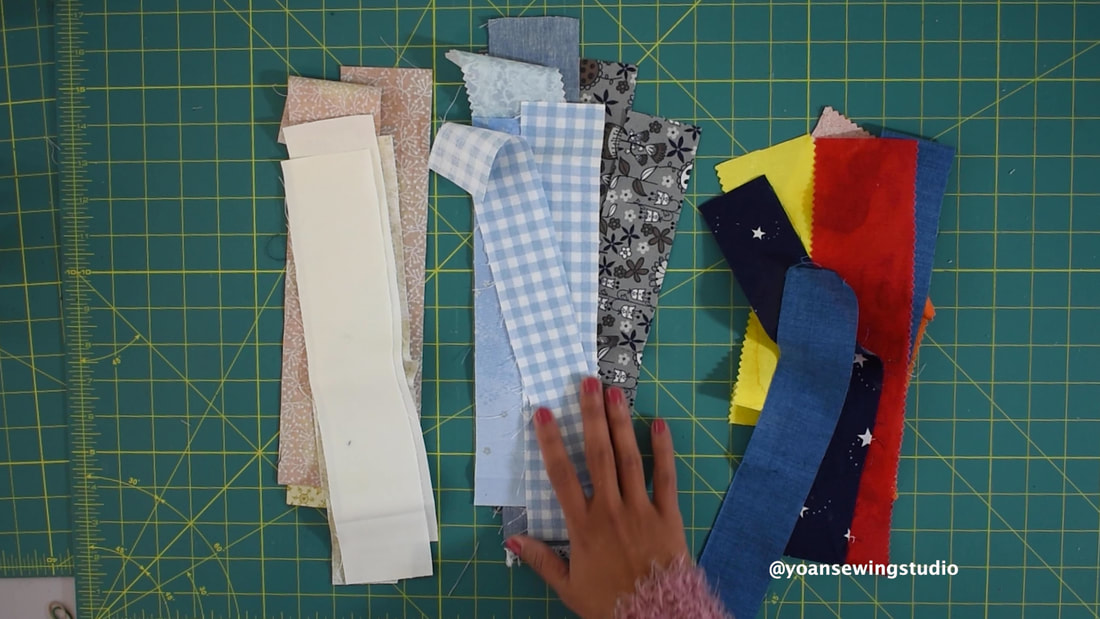 Take two strips in contrasting color, then make a gentle curve cut to one of the strip using your rotary cutter. 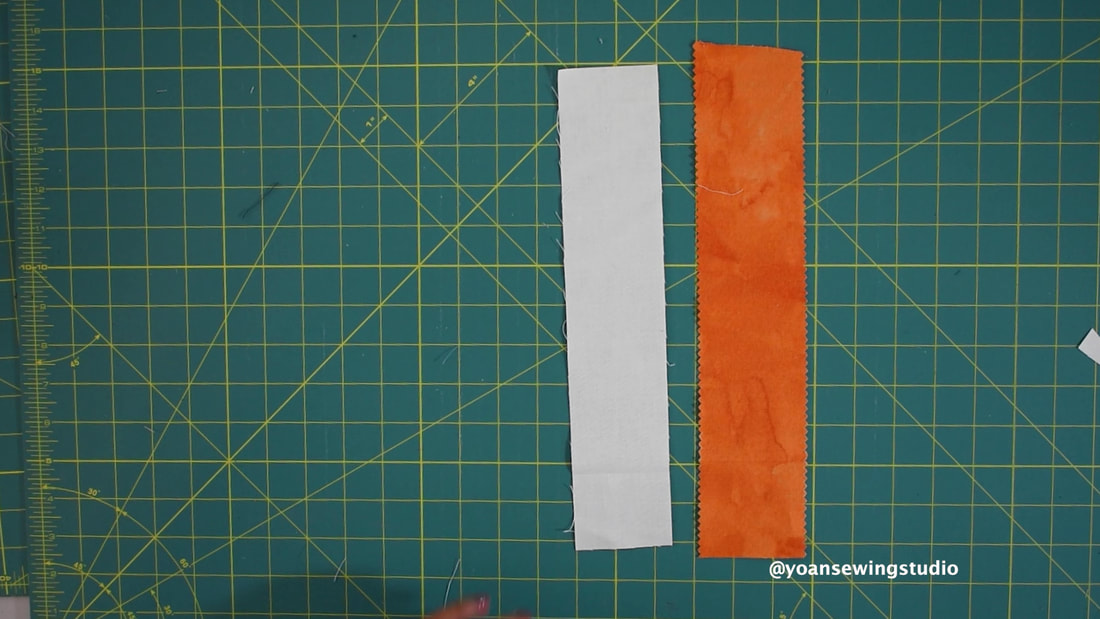
Lay the strips right side together, the straight edge strip should be on top, then sew with 1/4" of seam allowance.
When you sew, manuever the top strip to follow the shape of the lower (curved) strip, making sure the edges are aligned (I recommend to use 1/4" presser foot, for easier piecing).  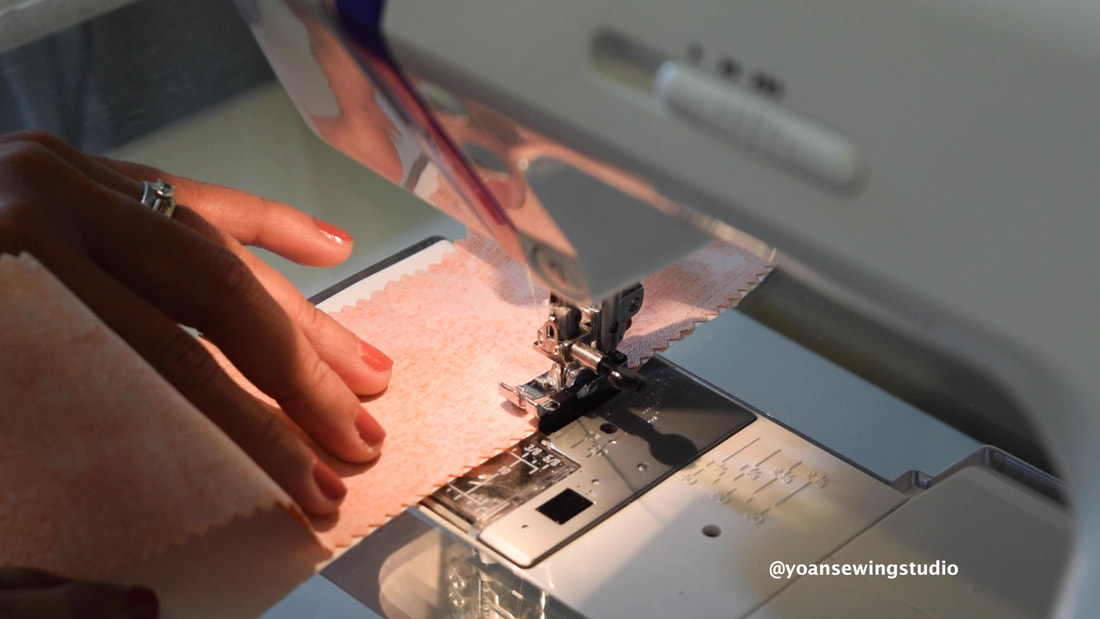 Press the seams towards one side.  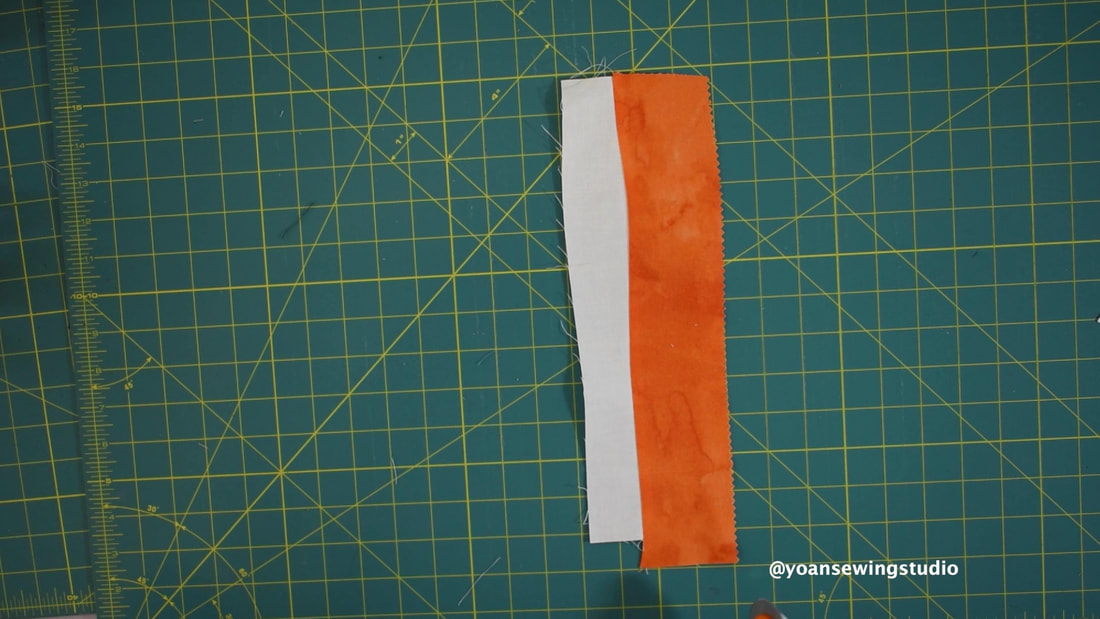 Now go ahead and make another gentle curve cut.
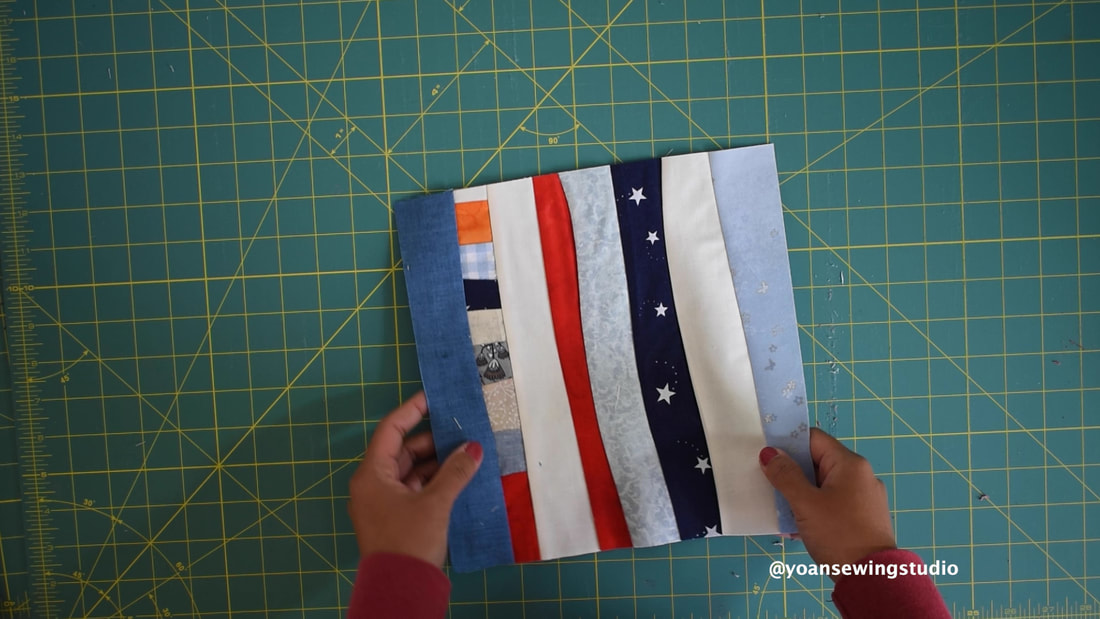
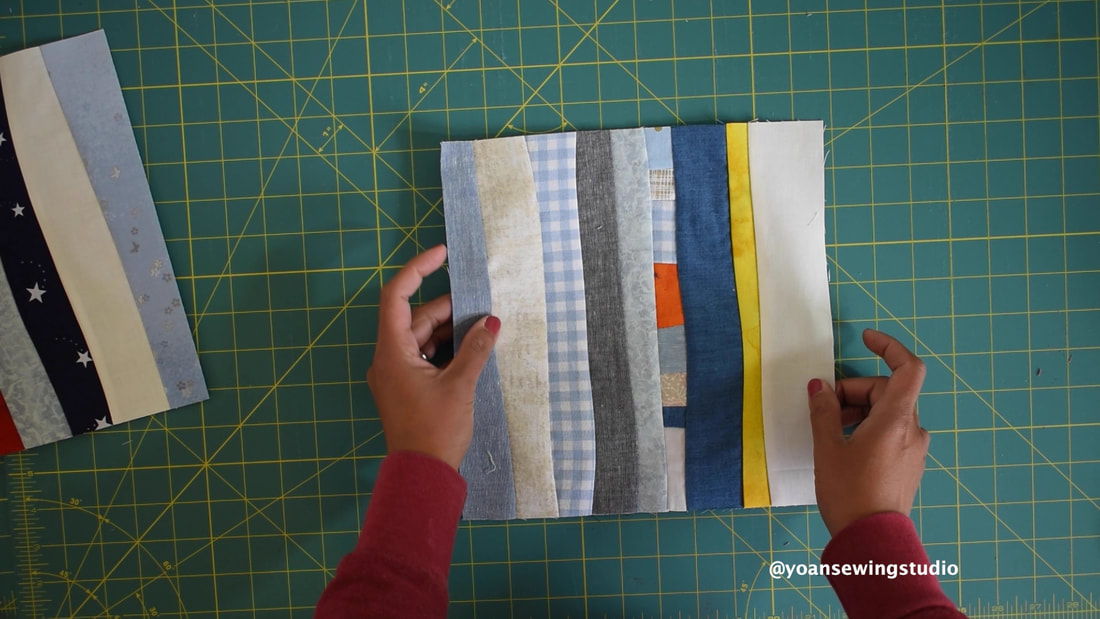
Now take another strip, and sew, the same way like before.
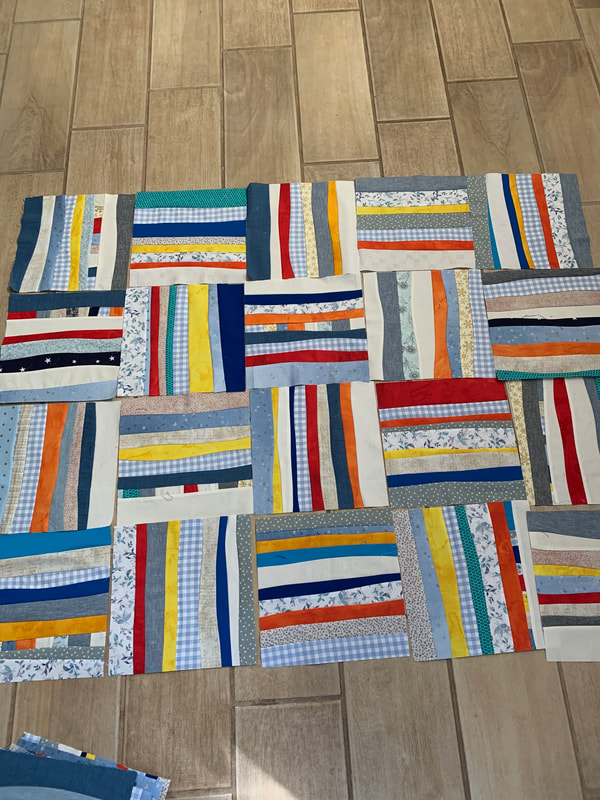
 Continue sewing and adding strips until your fabric measured a little over than 10" wide. 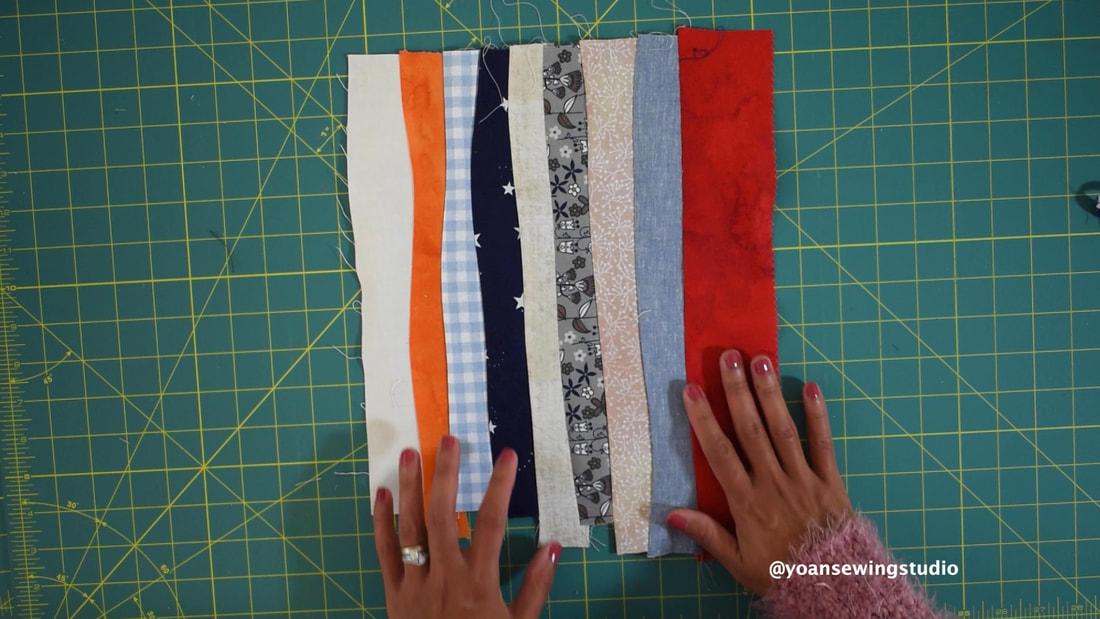 Then square your fabric to measure 10" x 10" (feel free to make larger or smaller block). 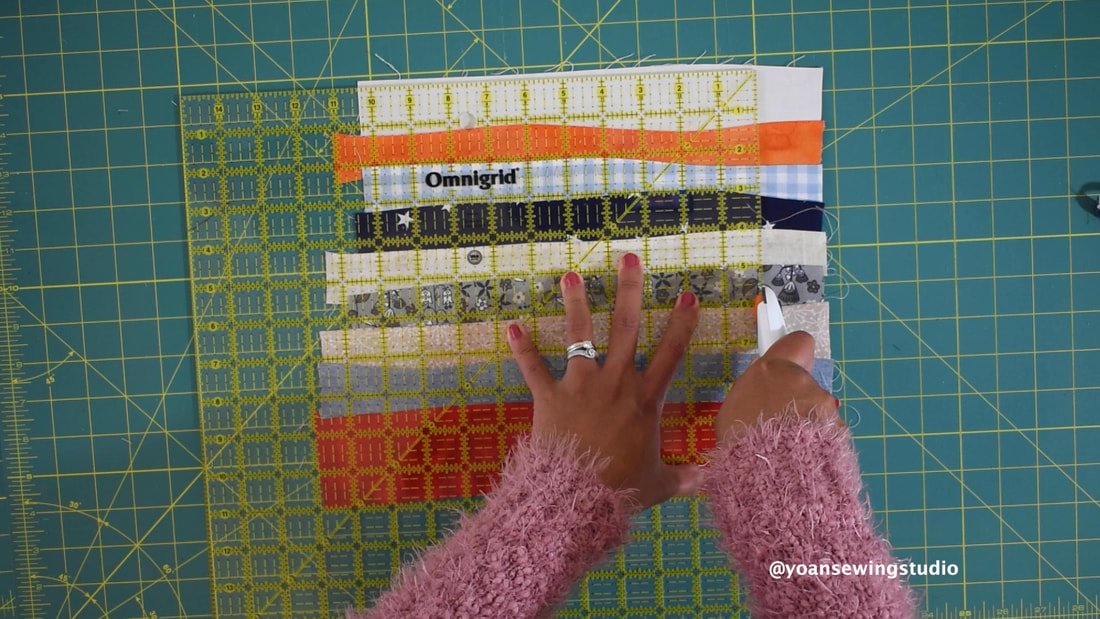 If you got a decent size strip from trimming your block (at least 1" wide and 11" long), you may set this aside, and incorporate this to another block.  Voila! The first block is done. 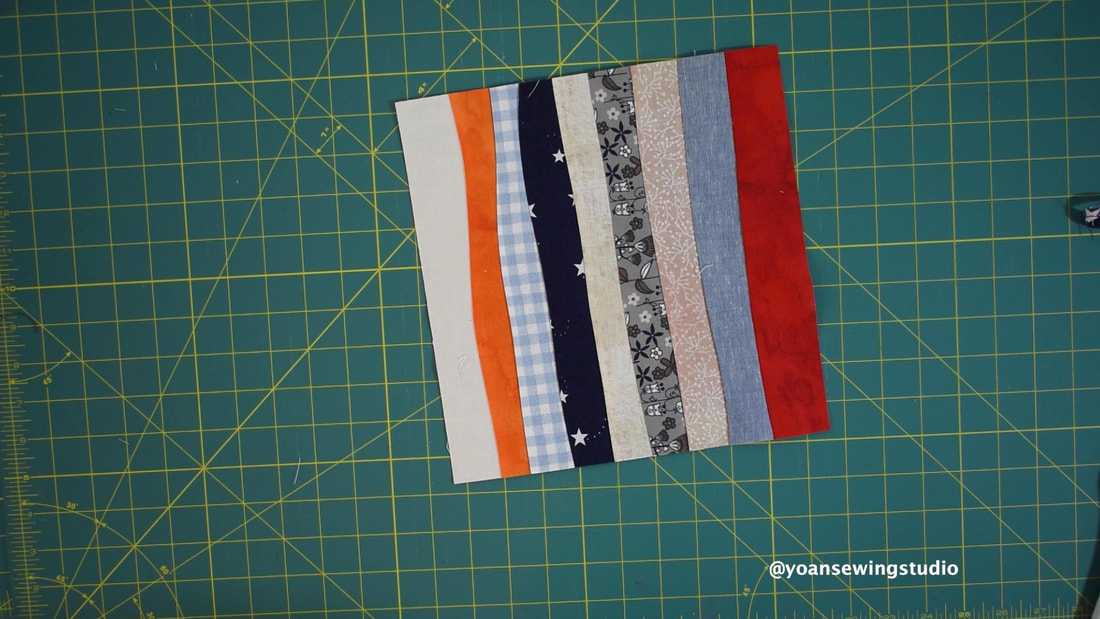 Now make 35 more blocks  Now with the scrappy strips that you got from trimming the block, you can also add them to your quilt block.
I laid out my blocks in the same vertical direction, so I made 6 rows and each row has 6 blocks. 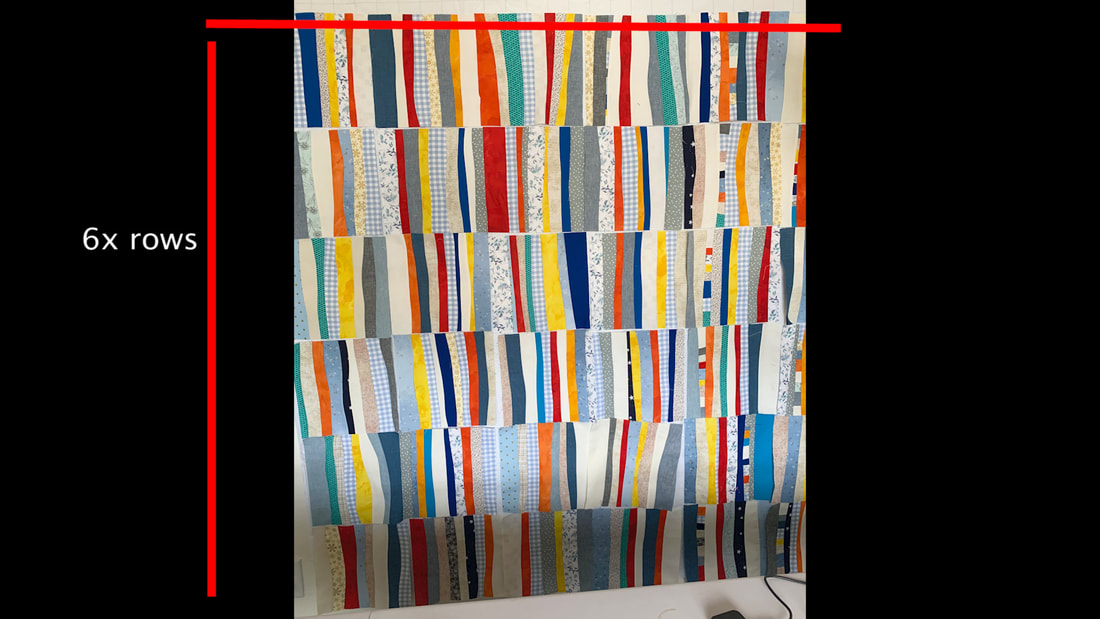 You can change the layout if you want to, check out some pictures below for different ideas
Once you're happy with the layout of your quilt, you may go ahead and sew your quilt blocks, layer, quilt, and bind. Check out the full video tutorial on my Youtube channel, and consider subscribing so you won't miss any new uploads. Happy Quilting!!
 Today I would like to take you to my crazy scrap quilt (also known as crumb quilt) adventure. I was quite overwhelmed with the amount of scraps that I have accumulated over time, and been looking for ways to get rid of them without throwing them away. After scrolling through the internet and Pinterest of course, I found what is called crazy quilt or crumb quilt and I knew this was my solution. So I took out my scraps and started sewing, and it was surprisingly fun and quite relaxing, hence I got addicted and ended up with 42x 10" squares. Check out the quilt along video to see the whole process of making this quilt on my Youtube channel below : Supplies : Assorted scraps or crumbs fabric 2 yards of wide quilt backing fabric Border fabric (optional) Quilt batting Basic sewing/ quilting notions Direction : 1. Sew your scraps as shown in video 2. Square up each block in to 10" squares (make 42 blocks) 3. Sew six blocks together to make a row (make 7 rows) 4. Add borders(optional) 5. Layer, baste, quilt, bind 6. Enjoy Happy Quilting!! |
Categories
All
©
Yoan Sewing Studio | All Rights Reserved
Archives
March 2024
|


 RSS Feed