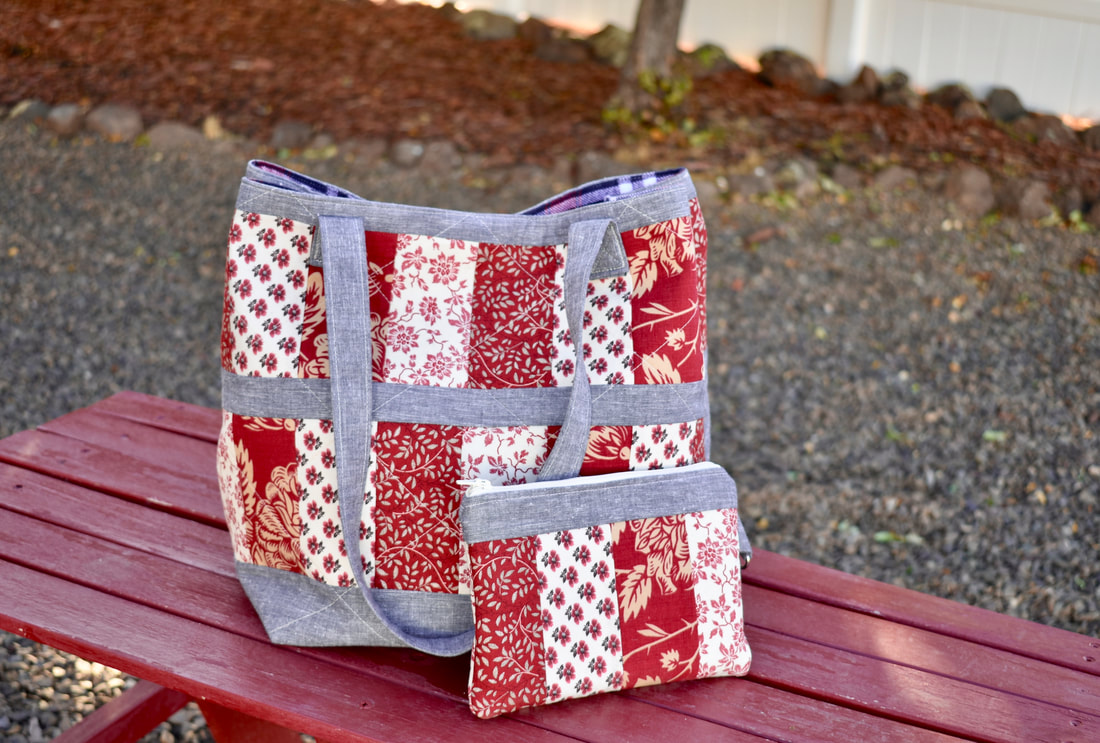
This is another fun project using the oh so versatile jelly roll strips. The Jelly Glee tote is a charming slouch tote with quite wide base hence looking bucket-ish. To make the most of the patchwork fabric, I also include a cute matching zipper pouch that is perfect to put your cellphone, case, cards, etc.
Supplies
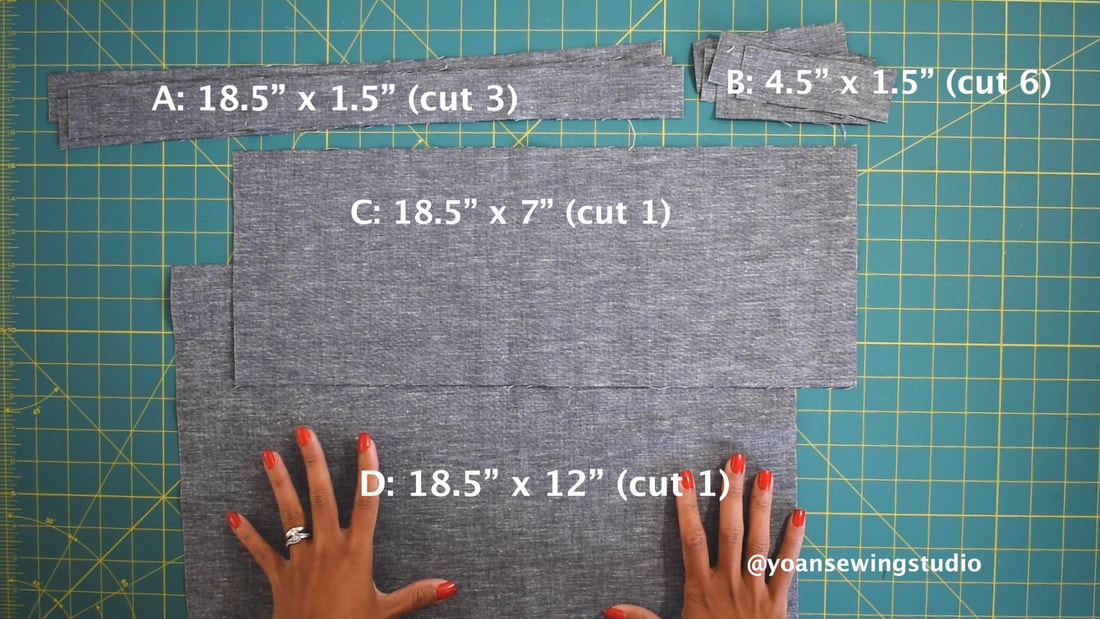
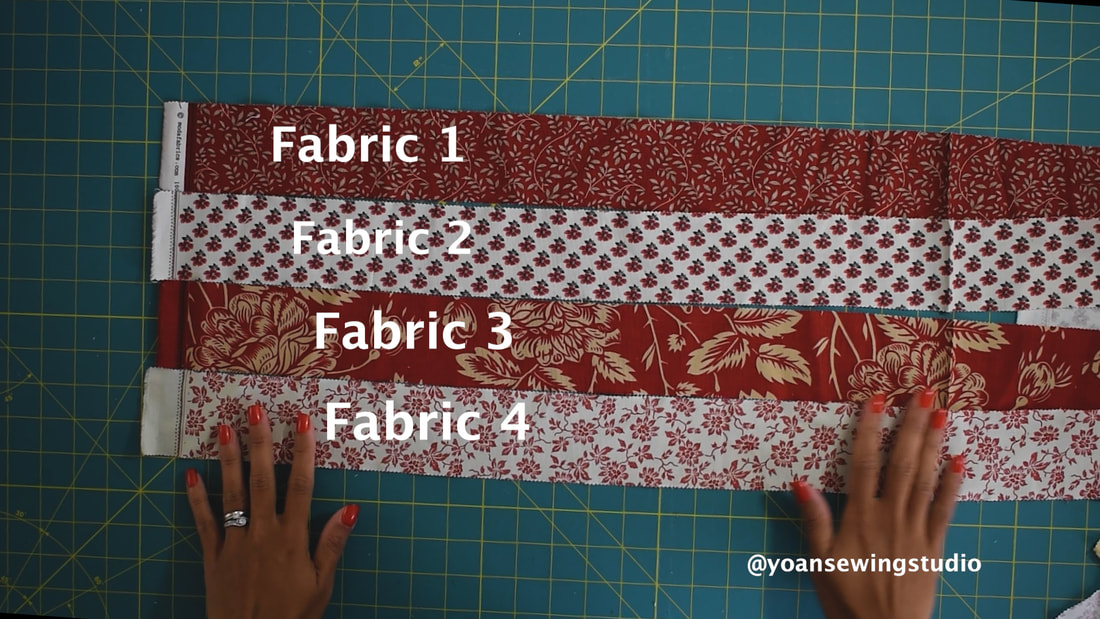
4 Jelly roll strips (2 1/2" strips) 3/4 yard main fabric Fusible woven interfacing (I use Pellon shape flex 101) Fusible Fleece (I use thermolam Pellon TP971F) 1 set of magnetic snap Nylon zipper (at least 7") - For the zipper pocket Nylon zipper at least 9" (for the pouch) Basic sewing notions Cutting Exterior Shell : See pictures below Interfacing : Cut two 18 1/2" x 17" (fusible woven interfacing) Cut two 18 1/2" x 16 1/2" (fusible fleece) Lining : Cut two 18 1/2" x 17" Slip Pockets : Cut two 10" x 7" Zipper pocket : Cut two 10" x 9" For the zipper pouch Exterior main : measure 5" from the left over jelly roll fabric and cut 2" (your fabric should measure 8 1/2" x 5") Exterior accent strip : 8 1/2" x 1 1/2" (cut two) Lining : 8 1/2" x 5" (cut two)
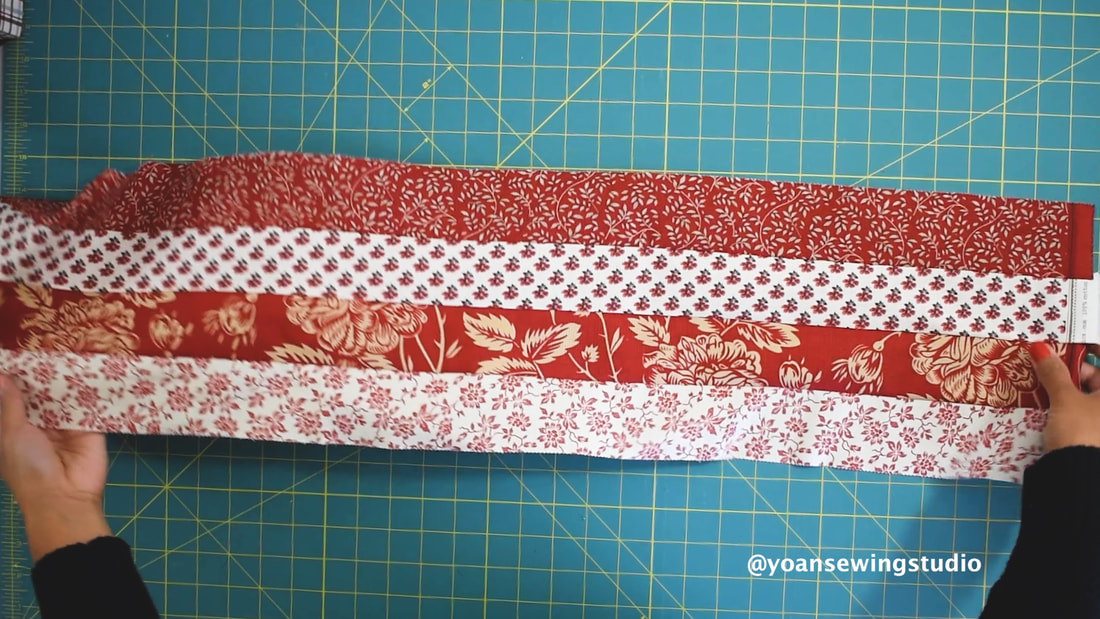
First thing first you will need to sew your Jelly roll strips together. I recommend to alternate the darker color from the lighter color, and of course you will need to sew them with 1/4" of seam allowance.
Measure 4 1/2" and cut, make 6x and you will end up with 6 rectangles measuring 8 1/2" x 4 1/2"

For the accent fabric you will need to cut as shown below
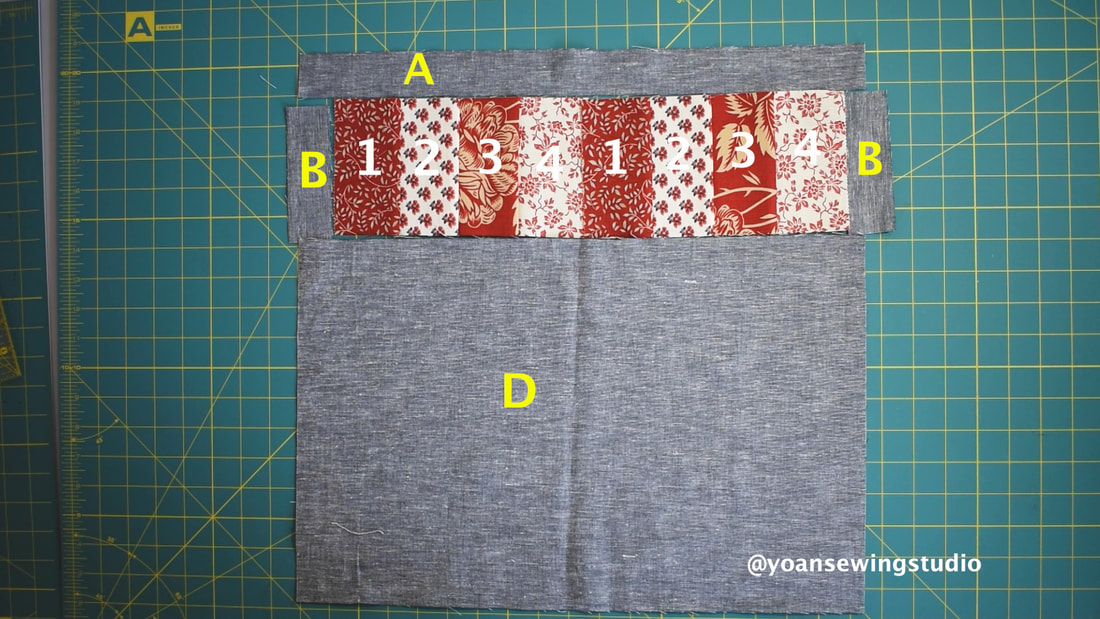
Then lay out the patchwork of the front and back exterior shell.
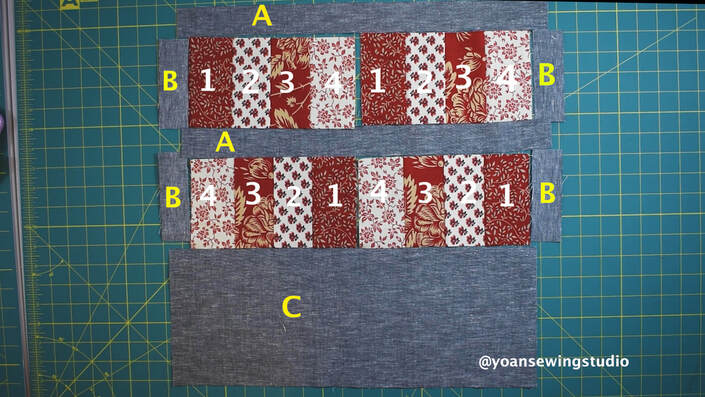
Patchwork layout front exterior
Patchwork layout Back Exterior
Piece your patchwork with 1/4" of seam allowance, and once you've done that go ahead and continue with the rest of the bag construction as shown in thevideo tutorial.
Once your bag is finished, you may go ahead and sew the zipper pouch. Disclaimer: This post contains affiliate links, thank you for your support! Happy Sewing!!
2 Comments
Joy
12/30/2021 05:38:07 pm
I am making your crossbody phone purse. This is my first time using an adjustable strap and swivel hook hardware and I was looking for the tutorial you mentioned in your video. Where can I find the tutorial?
Yoan
1/1/2022 05:31:18 am
Hi Joy, you need to watch the video from Youtube (where the video is originally uploaded from, I put the link in the video description box. I don't think I can put a link in this comment section but you can try to copy and paste this : https://youtu.be/RThBV5Hbu0Q?t=1096 Your comment will be posted after it is approved.
Leave a Reply. |
Categories
All
©
Yoan Sewing Studio | All Rights Reserved
|
 RSS Feed