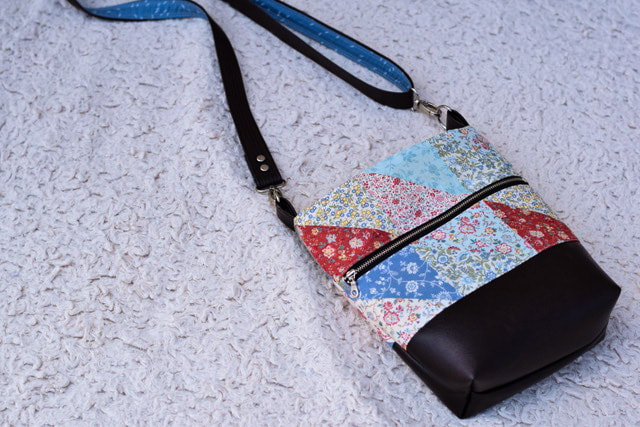
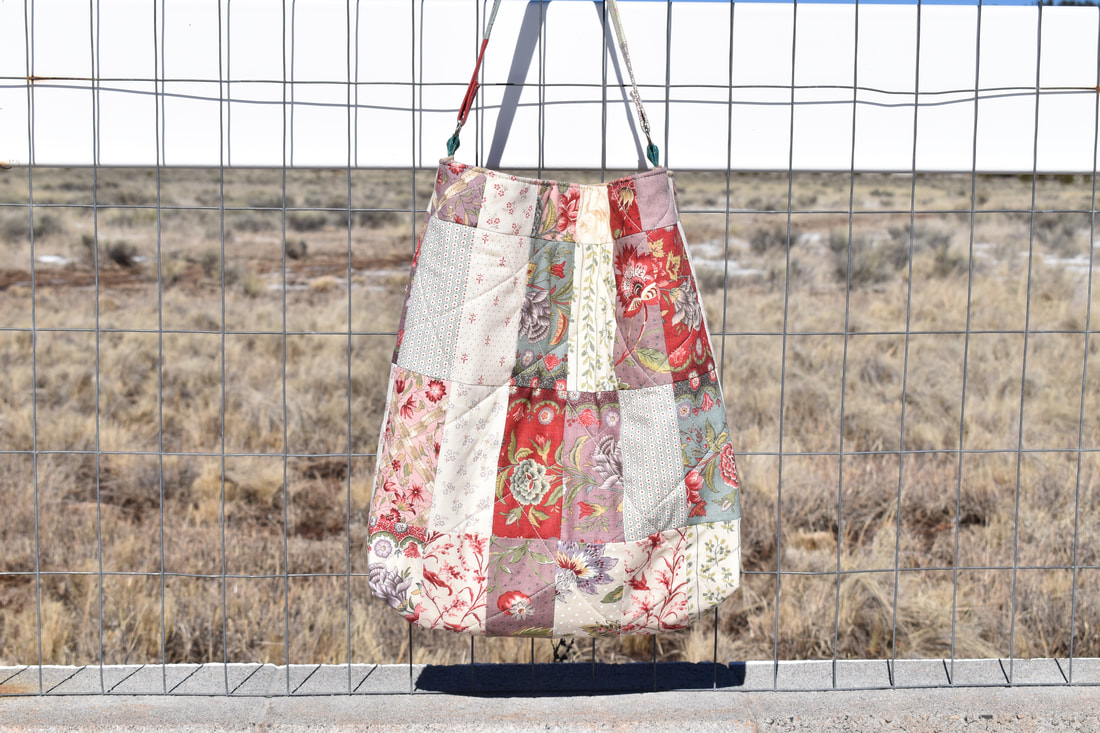
Misty Patchwork Bag Project - by Yoan Sewing Studio
The Misty Bag combines patchwork technique and faux leather accent to elevate its look. This bag can be dressed up or down, and you may play around with the patchwork, or modify the fabric choices according to your own taste.
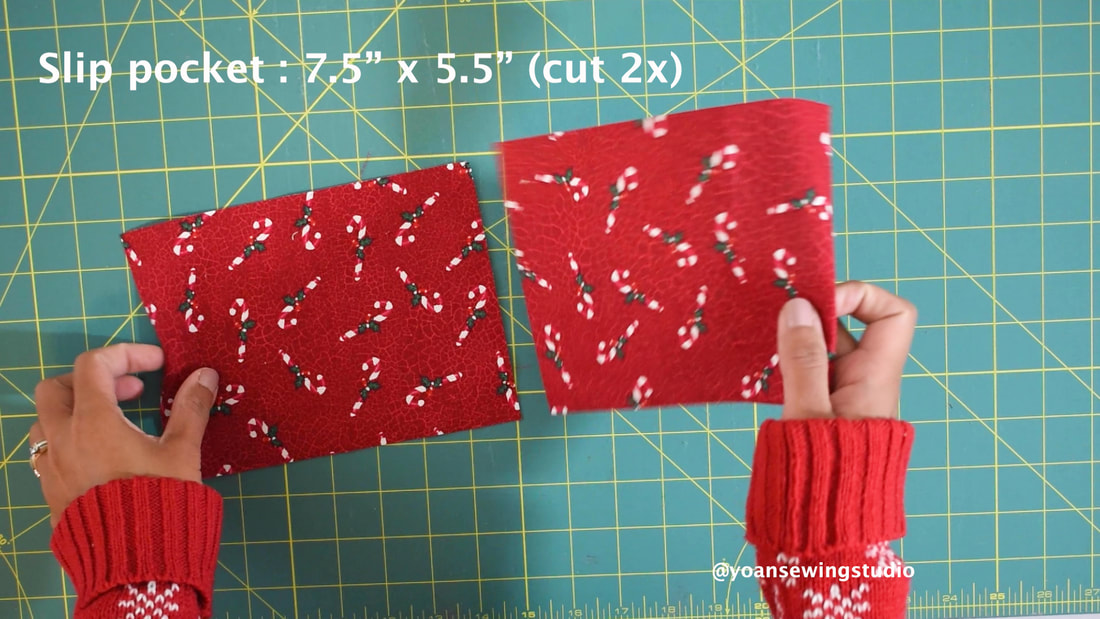
Finished bag Measurements : Approximately 10" x 10" x 3" (25.4 x 25.4 x 7.6 cm) Features: Front Zipper Pocket Zipper closure 2x internal slip pockets 1x internal zipper pocket Adjustable strap
I hope you enjoy this project. Happy Sewing!
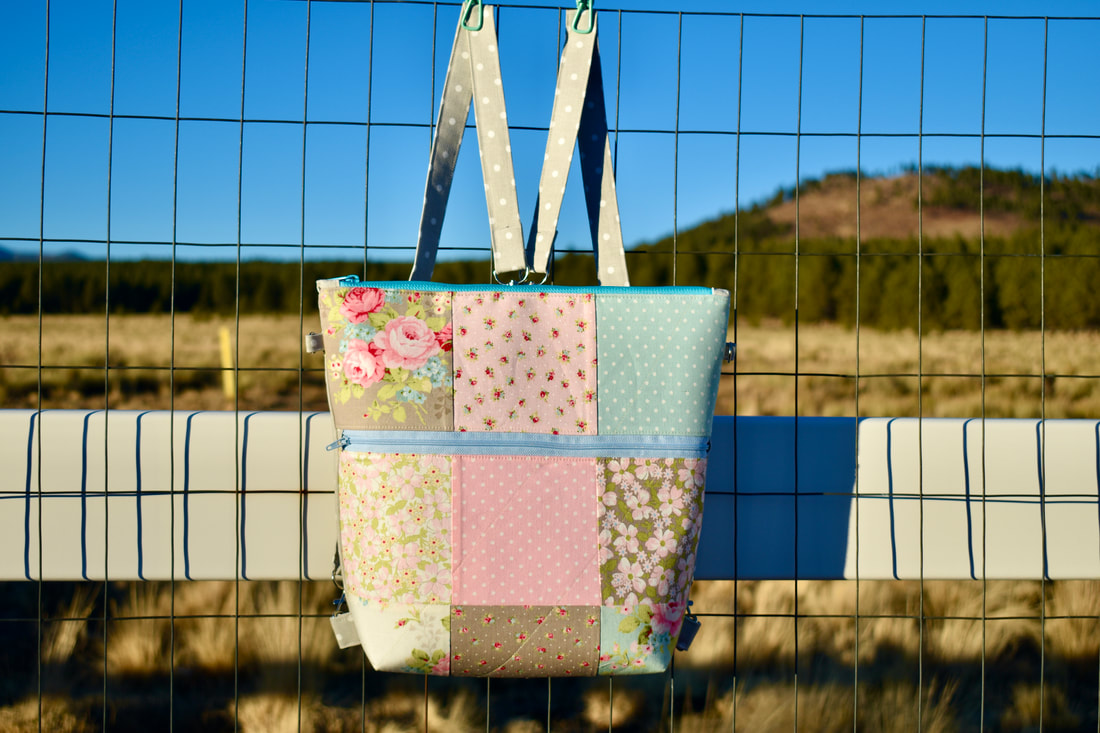
the nine patch convertible backpack by Yoan Sewing Studio
The Nine Patch convertible backpack is a simple, stylish and functional backpack that is perfect for your daily adventures from running errands, work/school, going out for a walk, etc. I love the convertible feature that allows you to switch from backpack to a shoulder bag at ease.
This is also a great project to use up some of your leftover charm packs or favorite scraps. You can purchase some beautiful charm pack fabric collection from various designers here. Finished bag measurements approx. 13" x 12" x 4"
Disclosure : This post may contain affiliate links; I receive a small percentage of commission when you make a purchase of qualifying items through those links with no additional costs. Thank you for your support.
Happy Sewing!
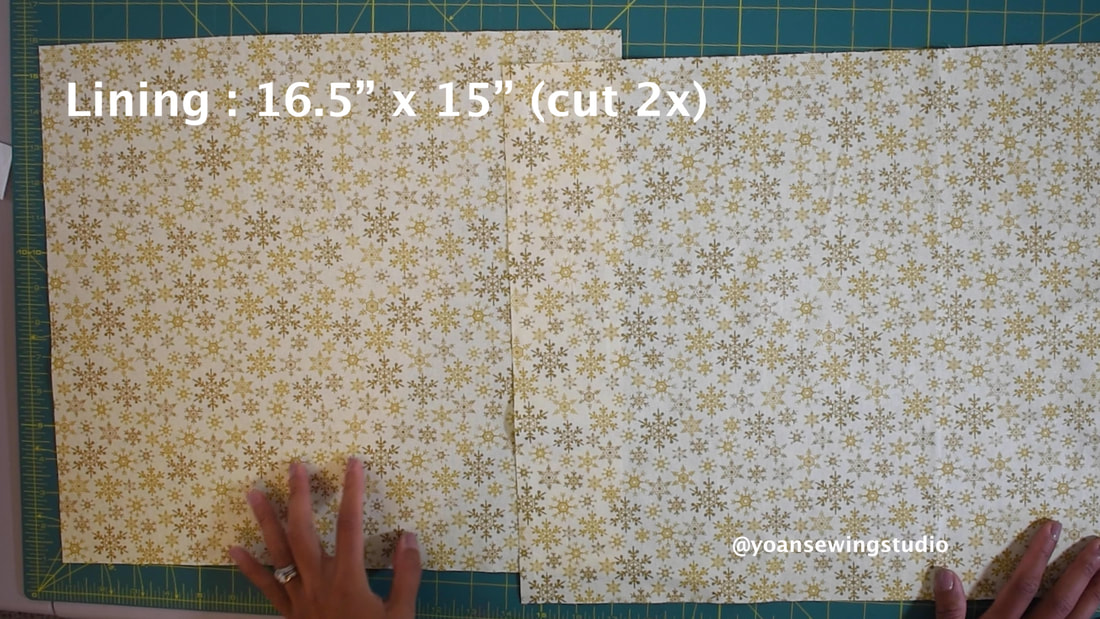
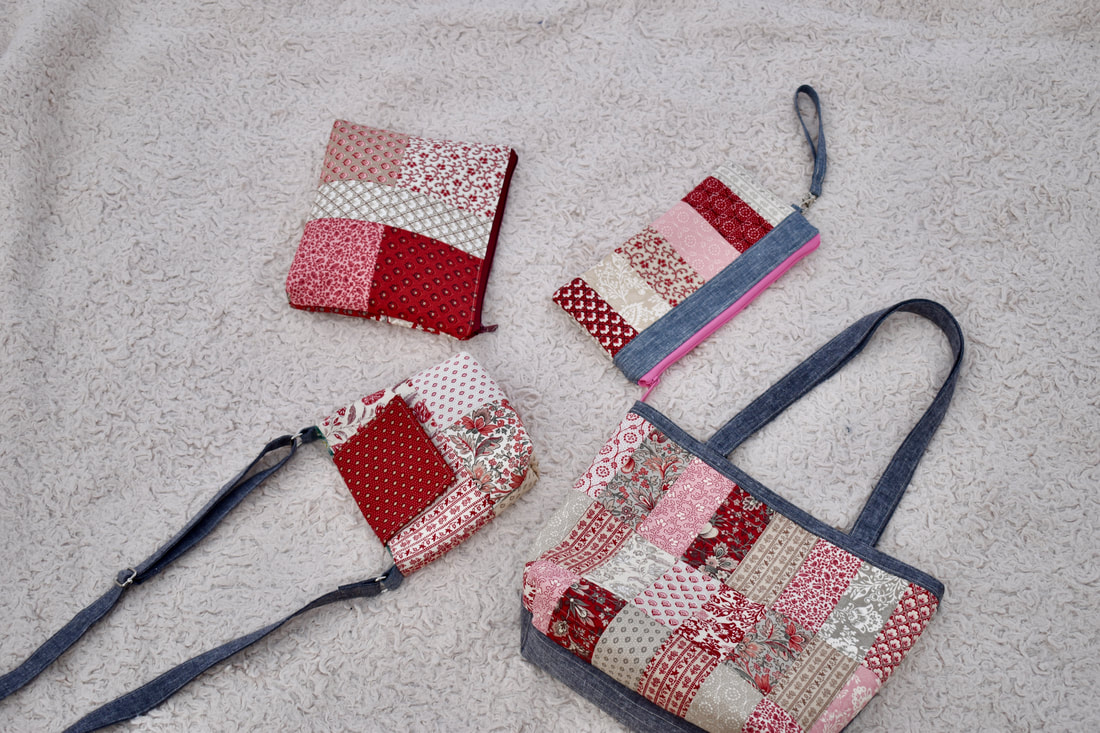 Four Charming Projects with one Charm Pack This is the 3rd project for the Charming Project series, and in this post I'm going to share this beautiful tote bag project with you. 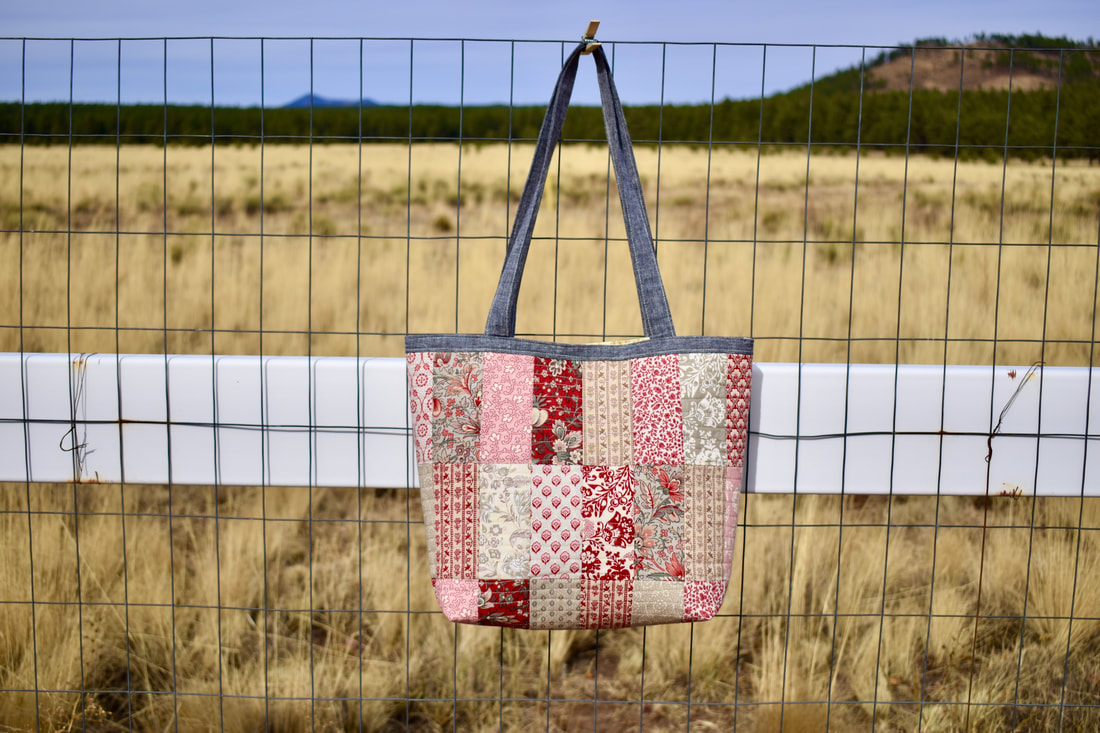 The finished measurement of this tote is about 14" x 11.5", a nice mid size tote, that is not only adorable but also very functional. Supplies 16 pcs of Charm Pack 1/3 yard of fabric (for the accent and straps) Fusible woven interfacing (I use Pellon shape flex 101) Fusible Fleece (I use thermolam Pellon TP971F) *Feel free to use interfacing of your choice 1 Set of magnetic snap closure 1 Nylon zipper (at least 7" long) **Disclaimer : This post contains affiliate links, which means I earn a small percentage of commission when you make a purchase through those links with no additional cost. Thank you for your support! ==Cutting== *Front Exterior Top accent strip 16.5" x 1.5" *Back Exterior Top accent strip 16.5" x 1.5" Lower accent 16.5" x 9.5" *Lining 16.5" x 15" (Cut 2x) *Pockets Slip pockets 16.5" x 8" (cut 2x) Zipper pocket 10" x 9" (cut 2x) *Interfacing Fusible woven interfacing 16.5" x 15" (cut 2x for front and bag exterior) Fusible Fleece 16.5" x 14.5" (cut 2x for front and bag exterior) To start with, cut all 16x of the charm packs in halves
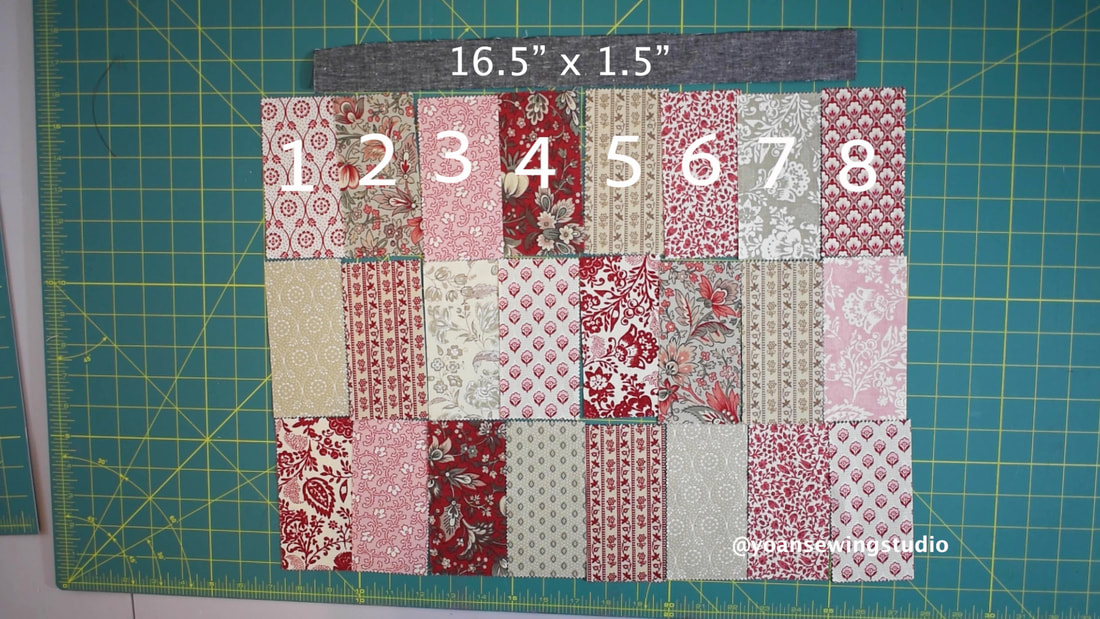 Front Patchwork Layout - The Charming Tote 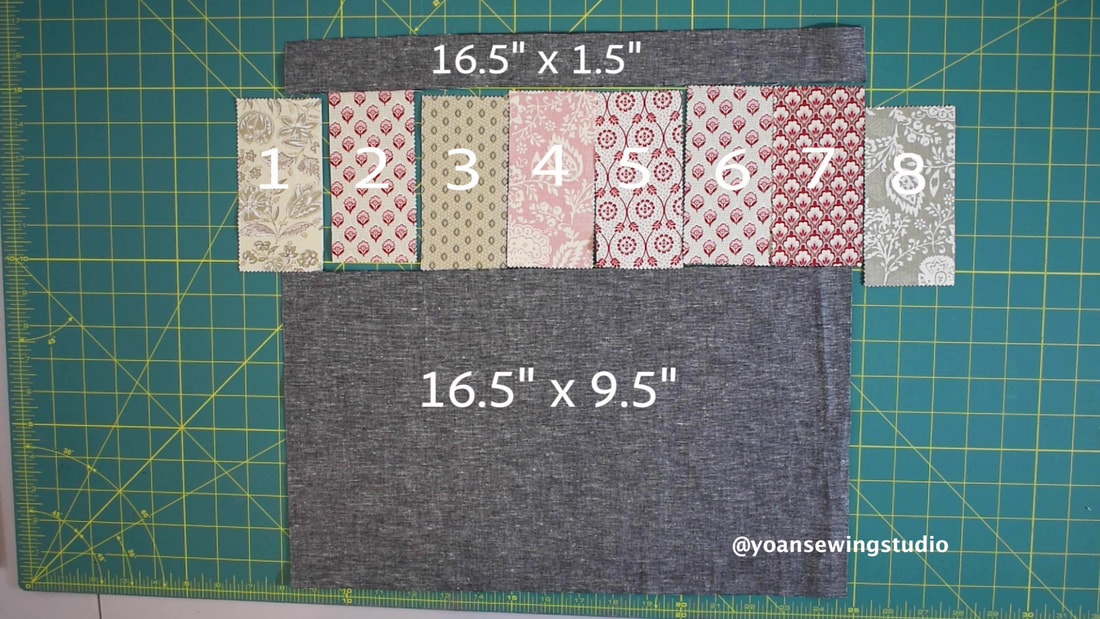 Back Patchwork Layout - The Charming Tote Piece them together with 1/4" of seam allowance 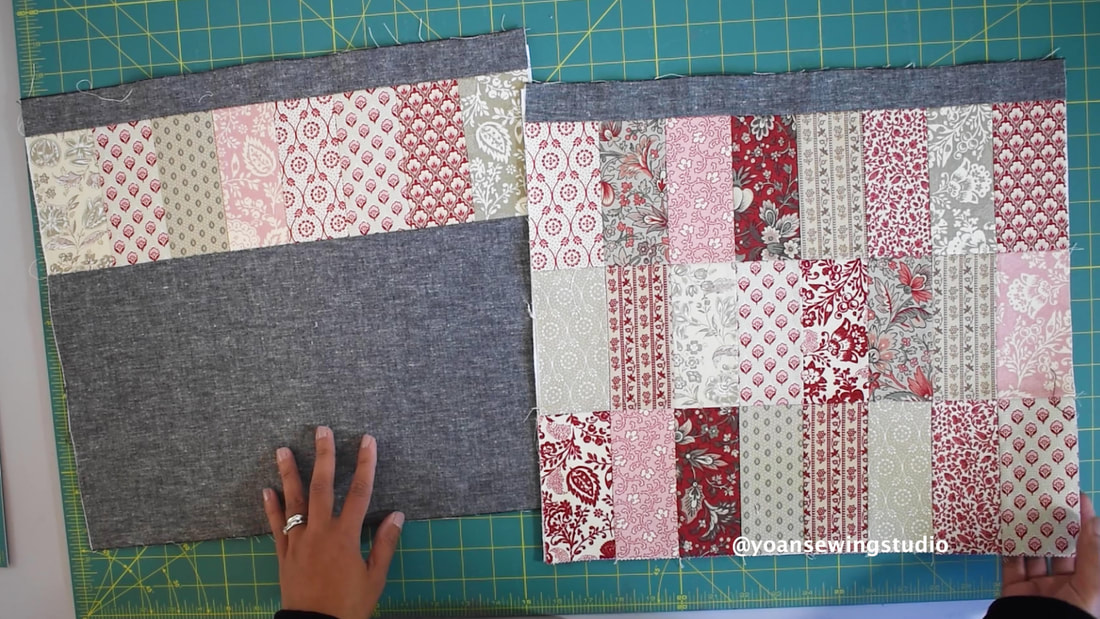 Sew the straps 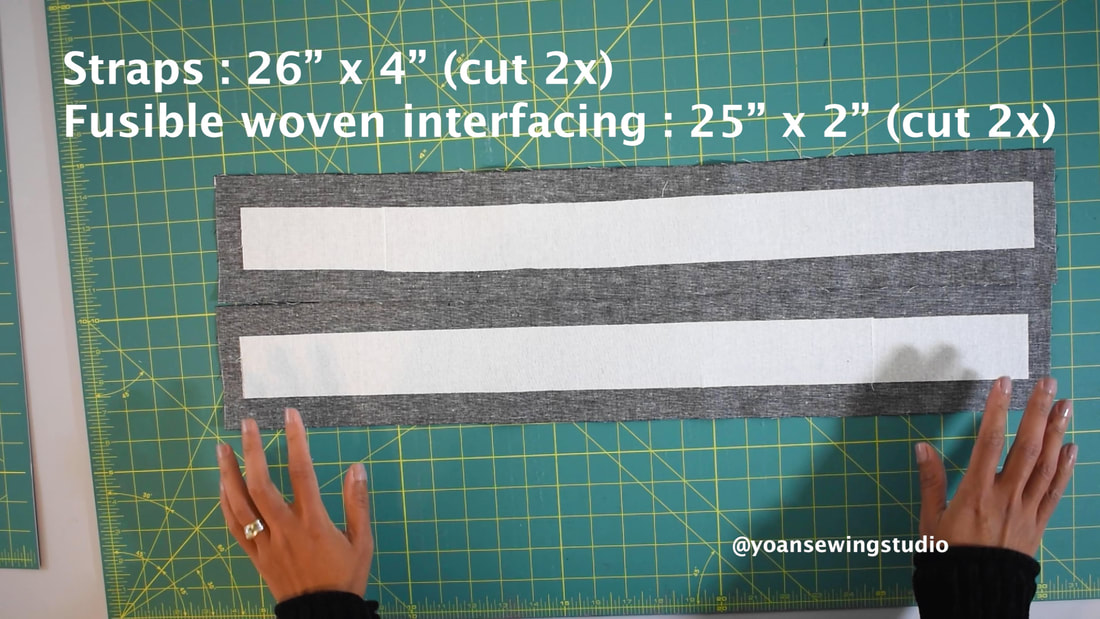 Attach the straps to the bag exterior pieces 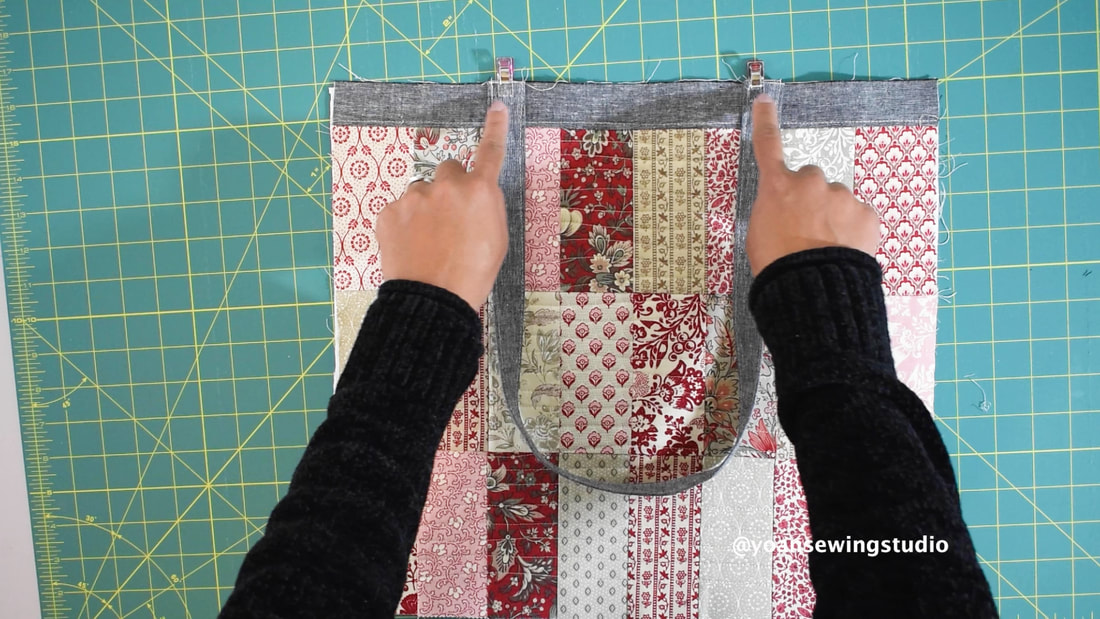 Now work on the lining and the pockets
For detailed instructions, watch the video tutorial on my Youtube channel Happy Sewing!
 This is the 2nd project of the Charming Projects series, where I share with you four charming stuffs to make for this gifting season (although you can certainly make them for yourself ;) 1. The Charming Crossbody Purse 2. The Charming Pouch 3. The Charming Tote 4. The Charming Wristlet Clutch In this post we will make this charming multi purpose pouch. 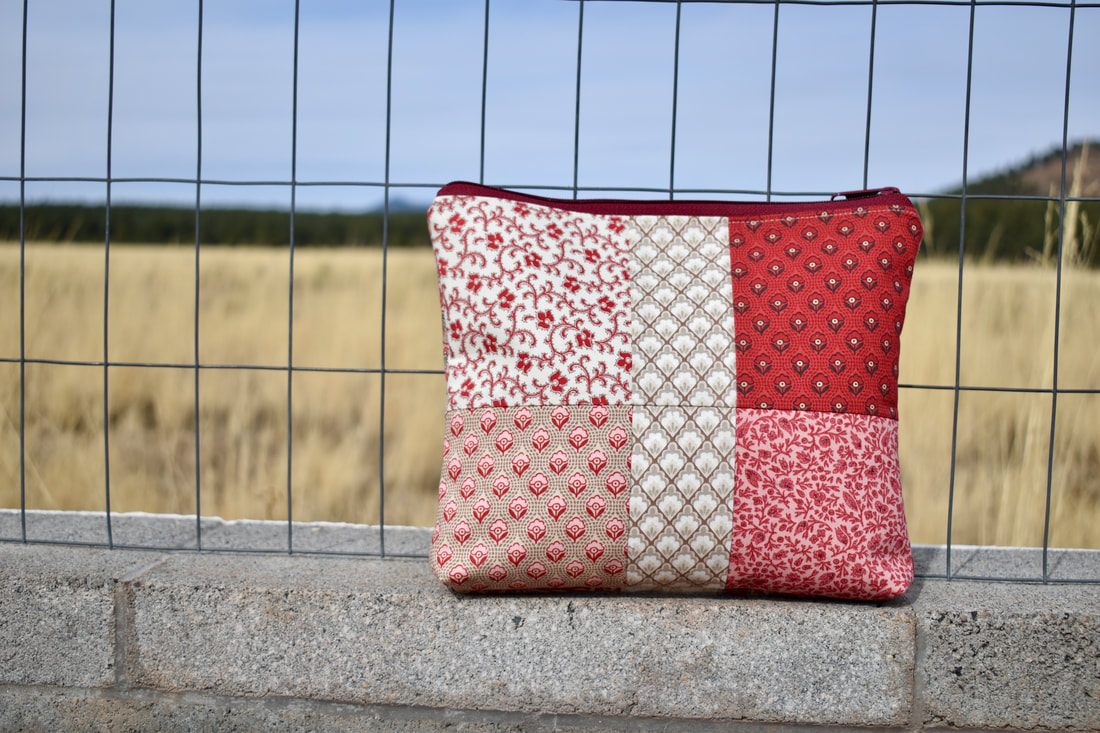 The finished measurements of this pouch is about 10" x 9" Supplies 10x pcs Charm Pack 1/3 yard lining fabric Fusible Woven Interfacing Fusible Fleece Nylon zipper (at least 12" long) Cutting Lining 11.5" x 9.5" (cut 2x) Fusible woven Interfacing 11.5" x 9.5" (cut 2x) Fusible Fleece 11.5" x 9" *Disclaimer : This post contains affiliate links, thank you for your support! Cut 2x pieces of Charm Pack in halves
Lay out the patchwork for both exterior pieces.
Piece them together with 1/4" of seam allowance 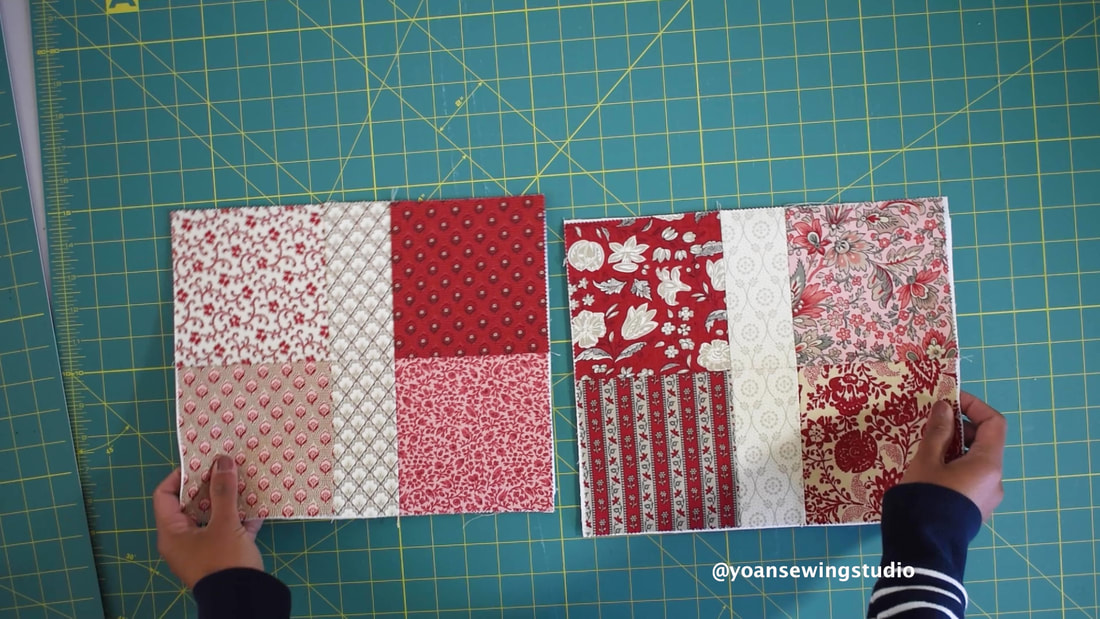 Apply the interfacing (I use the combo of fusible woven interfacing and fusible fleece), then quilt your fabrics (optional). Now prepare the lining pieces 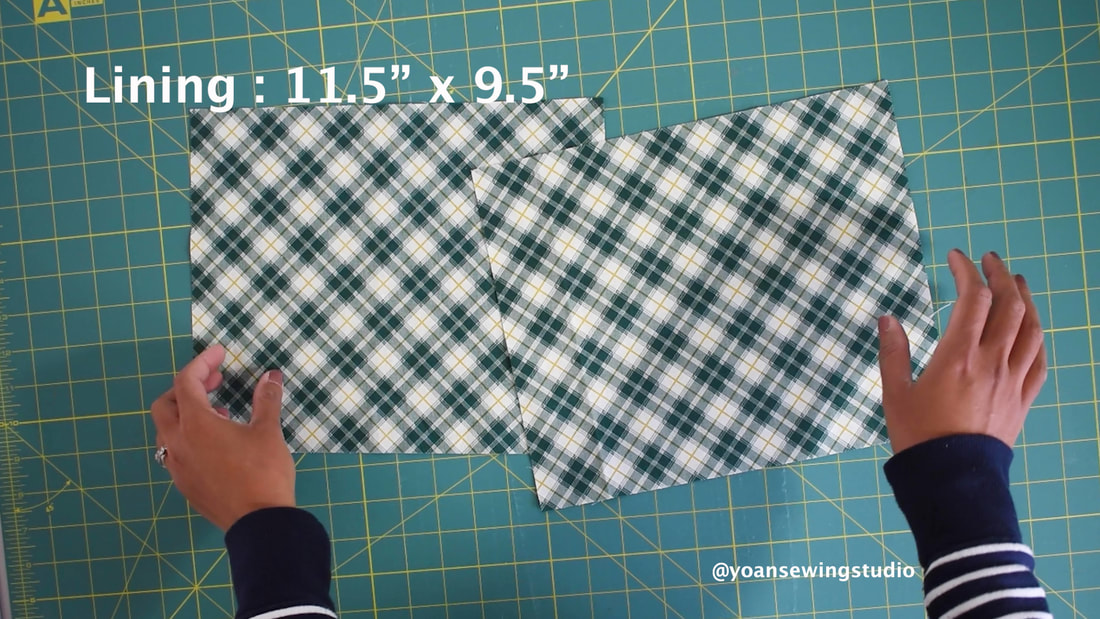 For the zipper you will need at least a 12" long zipper, mine is a bit too long, but it's okay since this is a nylon coil zipper, thus I can easily trim the excess zipper off. 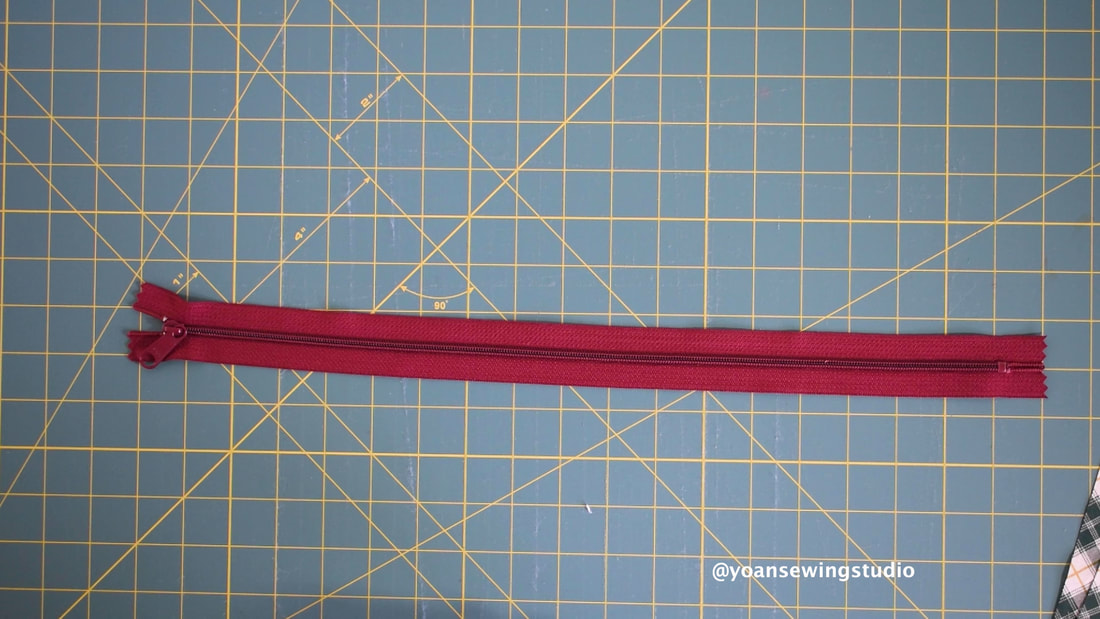 Now go ahead and assemble your pouch by attaching the zipper first. 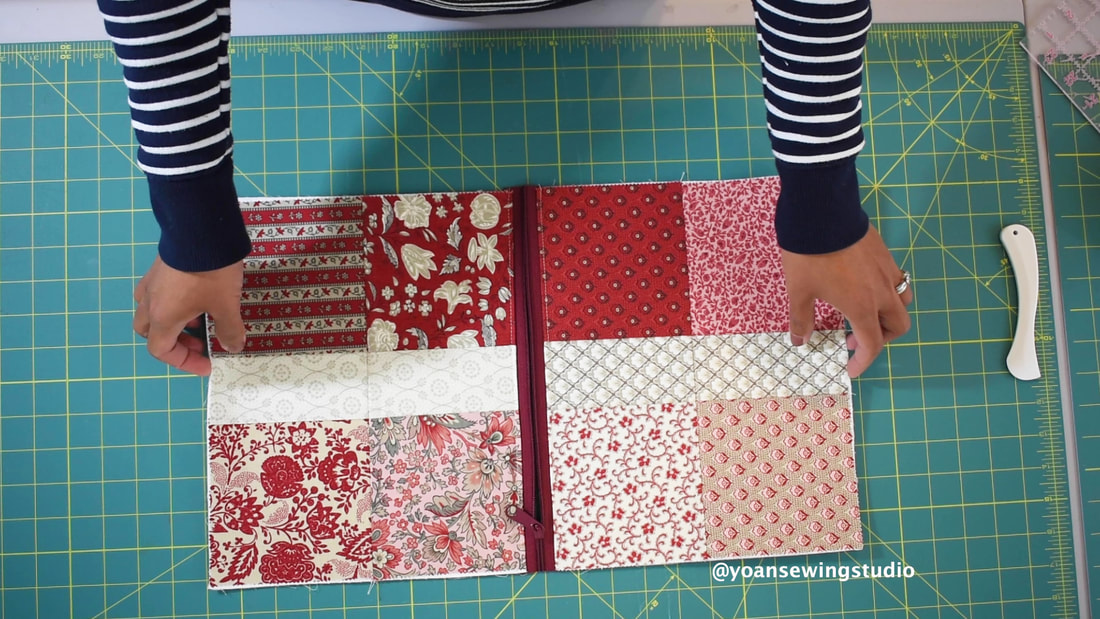 Watch the full video tutorial on my Youtube Channel Happy Sewing!
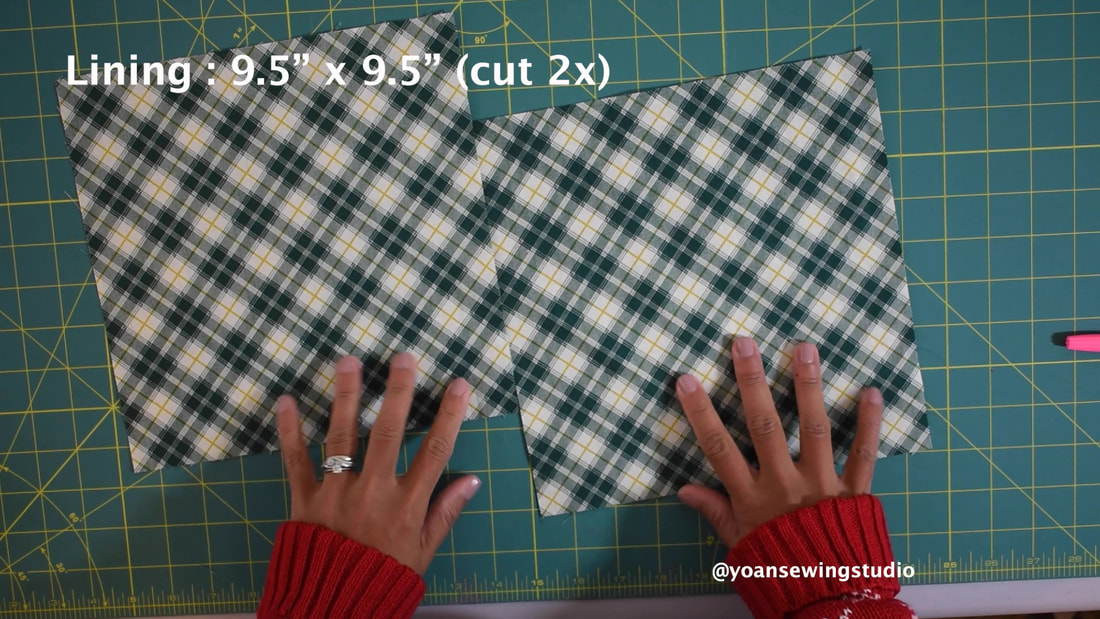
 4 Charming Projects with 1 Charm Pack In this festive season, I'm bringing you these four lovely projects that you can make for your gifting list, that are simple enough yet still so much fun to make. You will need one full pack of Charm Pack (5" squares) for this project, they are widely available at retail fabric/ quilting stores , and online as well. These are the projects that I am so excited to share with you 1. The Charming Crossbody Purse 2. The Charming Pouch 3. The Charming Tote (my favorite!) 4. The Charming Wristlet Clutch Let's start with this Charming Crossbody Purse  The finished measurement of this purse is about 7.5" x 7.5" The Supplies that you will need 10x pcs of Charm Pack 1/3 yard of fabric for the lining and pockets 1/6 yard of fabric for the straps Fusible woven interfacing (I use Pellon shape flex 101) Fusible fleece (I use thermolam Pellon TP971F) 1" d rings (2x) 1" adjuster slider 1 set of magnetic snap closure *Disclaimer : This post contains affiliate links, thank you for your support! Cutting Lining 9.5" x 9.5" (cut 2x) Strap 60" x 4" Strap interfacing 59" x 2" (from the fusible woven interfacing) Strap anchor 5" x 4" Fusible woven interfacing 9.5" x 9.5" (cut 2x for the front and back exterior) Fusible fleece 9.5" x 9" (cut 2x for the front and back exterior) Slip Pocket 7.5" x 5.5" (cut 2x) To make the patchwork you will need to layout 4 charm packs for both for both front and back exterior as shown below 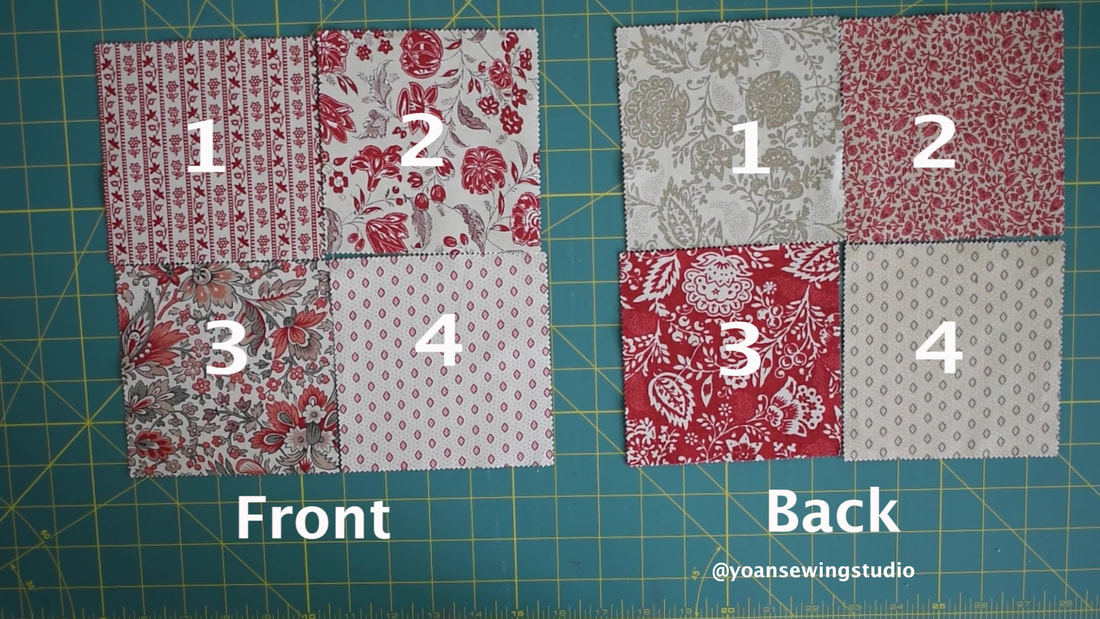 Piece them together with 1/4" of seam allowance 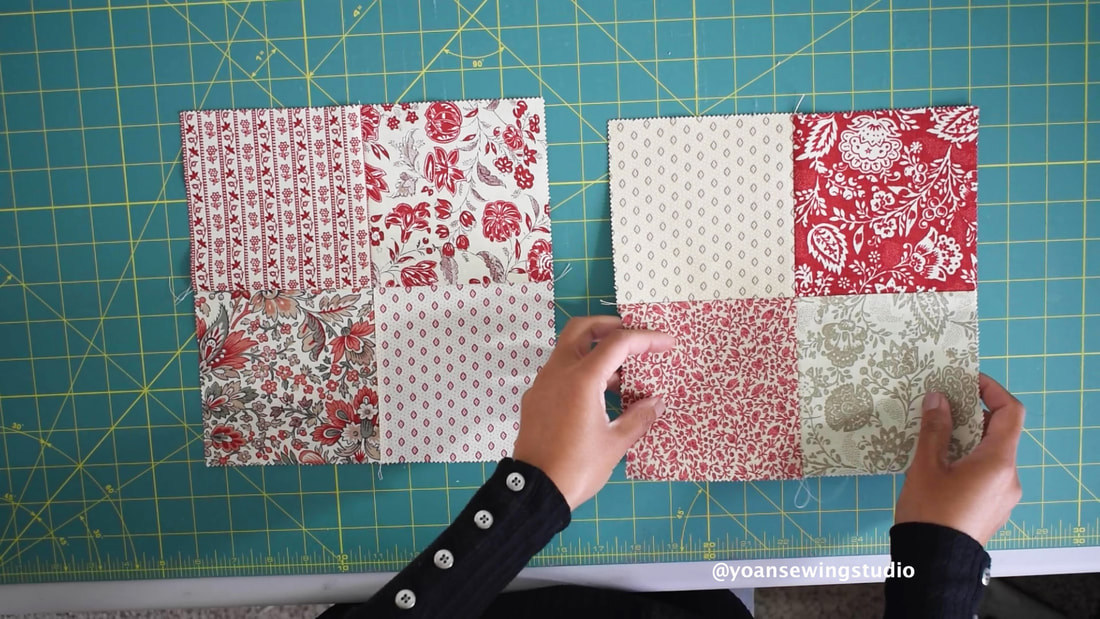 Now apply the interfacing 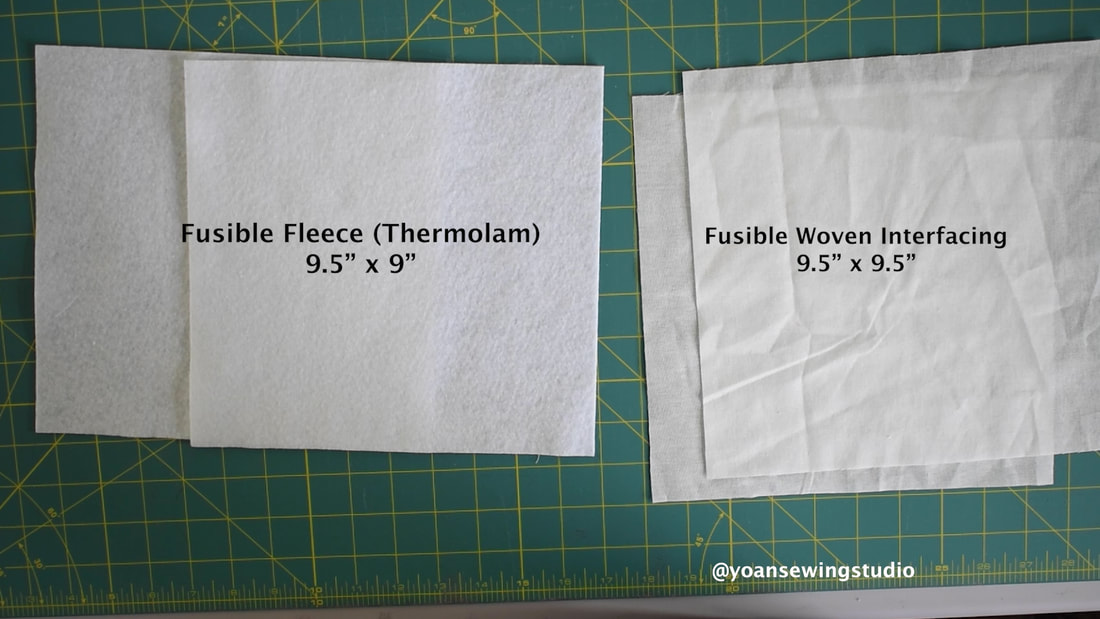 Use 2x pcs of charm pack for the flap (each for the exterior and the lining as well)
Attach the flap to the back exterior piece 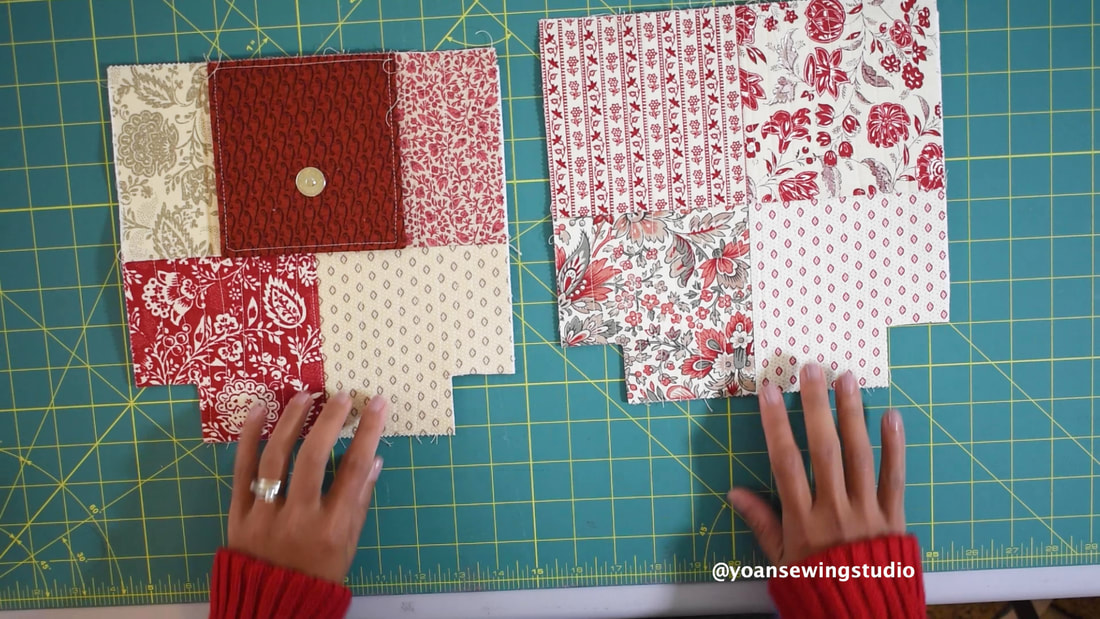 Here is the measurements for the lining and the pockets
Check out the full tutorial on my Youtube channel For the next project we will make this Charming Pouch.
Happy Sewing! 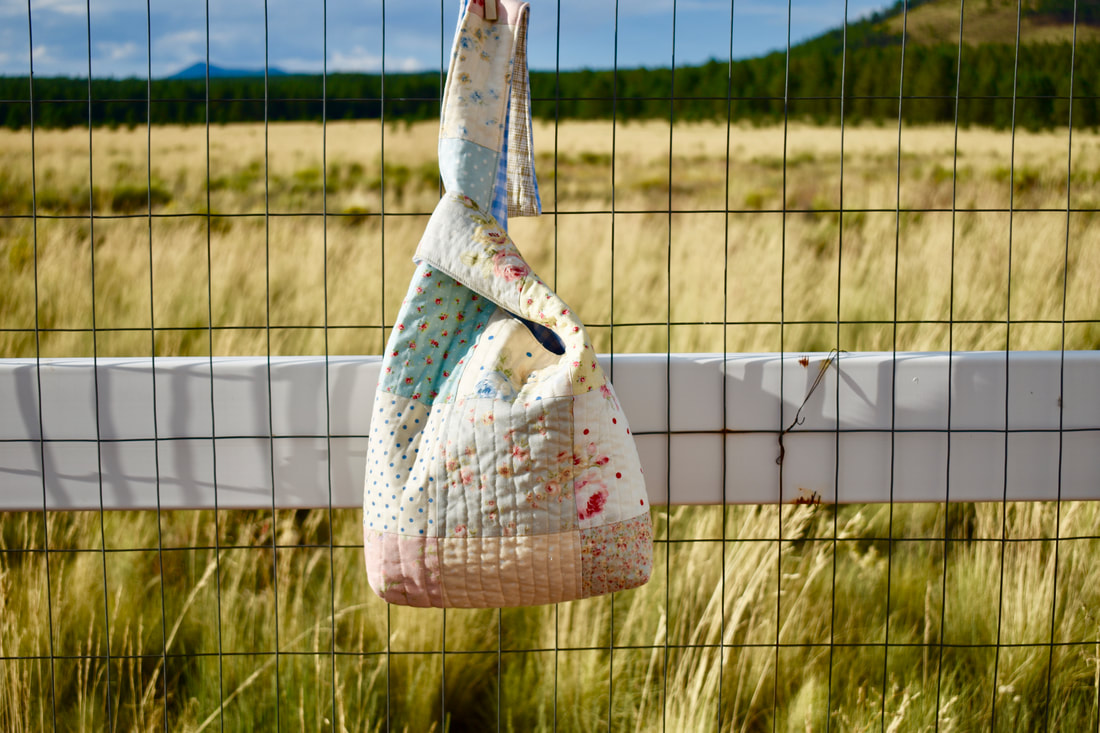
Japanese knot bag - Quilted version
This adorable Japanese knot bag will surely brighten up your day. Great for daily errands, coffee date, walk at the park, although this type of bag is pretty well known as the project bag.
The front exterior is made out of 14 pcs of charm packs (5" squares). Below is the diagram 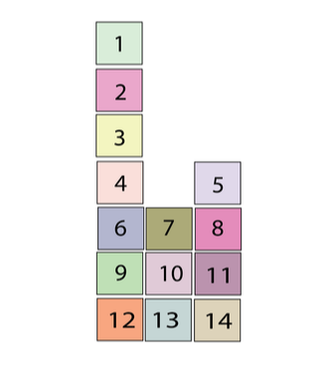
The Japanese knot bag patchwork diagram for the front exterior
I quilted this bag with left over quilt batting, and pretty pleased with the result, it gave enough body so my bag isn't too flimsy, yet still light weight to allow it to drape nicely.
You may watch the full tutorial on my Youtube channel (consider subscribing so you won't miss any upload ;)
Supplies and tools
14 x Charm Packs 5" squares 1/2 yard cotton fabric for the back exterior 5/6 yard cotton fabric for the lining Quilt Batting or lightweight interfacing or fusible fleece Basic sewing/quilting notions Curve Ruller (optional) Disclaimer : This Post contains affiliate links Happy sewing!!
The Olivia quilted patchwork tote bag is such a darling bag that will surely brighten up your day. This bag comes with 2 exterior pockets, and four interior pockets.
The patchwork of this bag is made out of charm packs (5" squares), and you will need 16 pcs only. If you have some charm packs perhaps leftover from previous project, you can pull them out, or simply purchase a fresh new one from your favorite fabric line. Check out the fulll tutorial on my YouTube channel and consider subscribing so you won't miss any future upload.
Finished tote bag measurements :
Approx : 15" x 14" x 4" Supplies 16 charm packs (5" squares) 7/8 yard accent fabric (fabric C) 1/2 yard lining fabric Quilt batting (or interfacing of your choice) 1/4 yard backing fabric if using quilt batting(use cheap fabric, muslin, or scraps) fusible woven interfacing (I used pellon SF101) nylon zipper (at least 8") 4 D rings (1") 1 set of magnetic snap
Cutting measurements
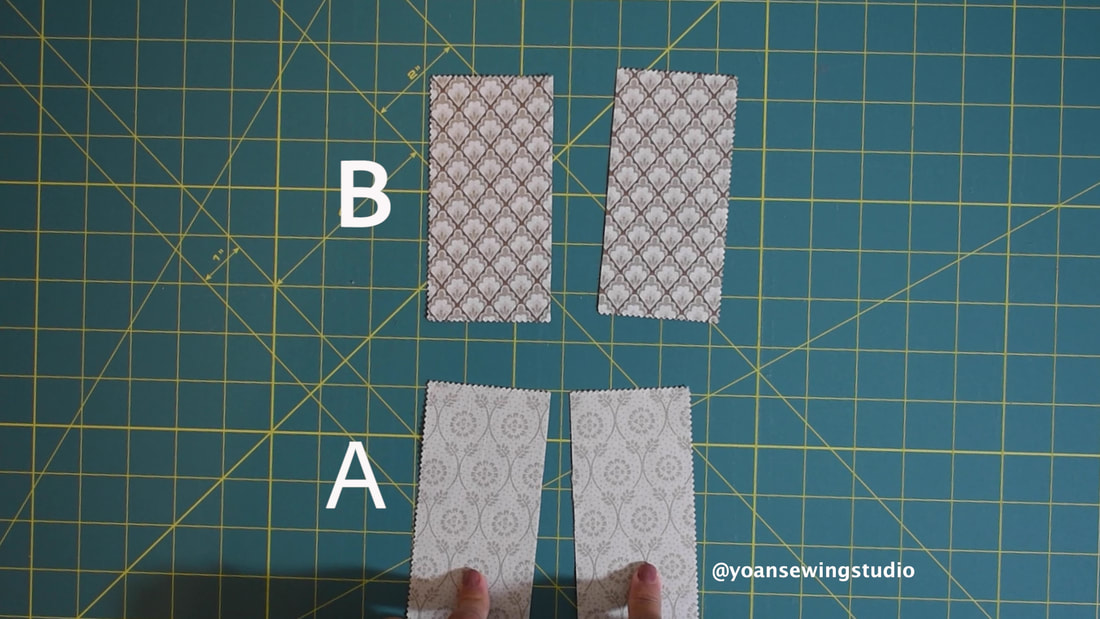
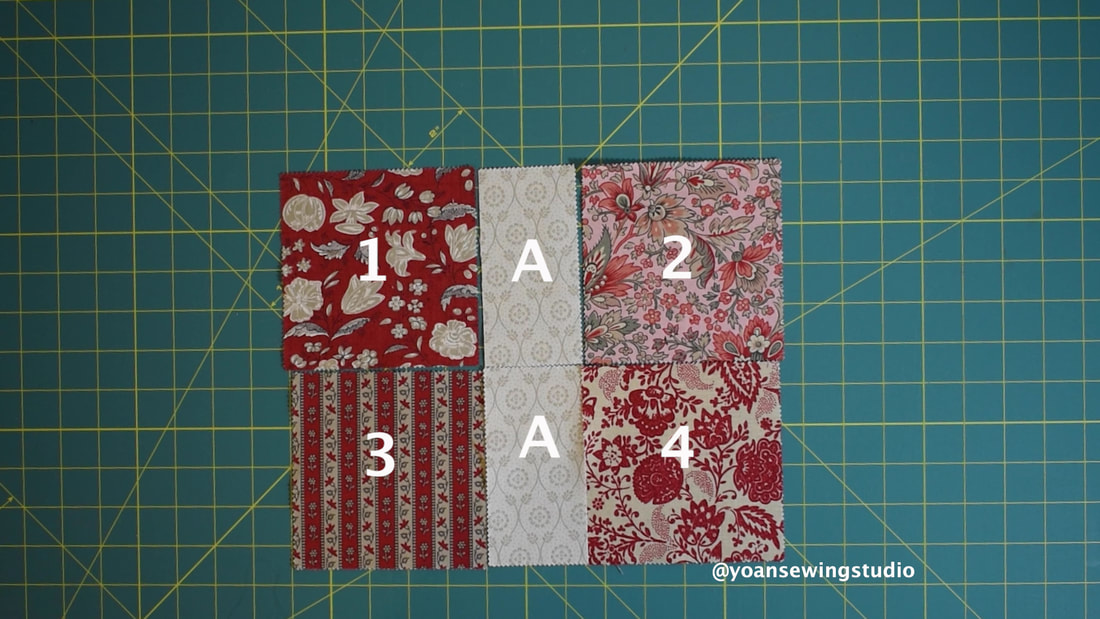
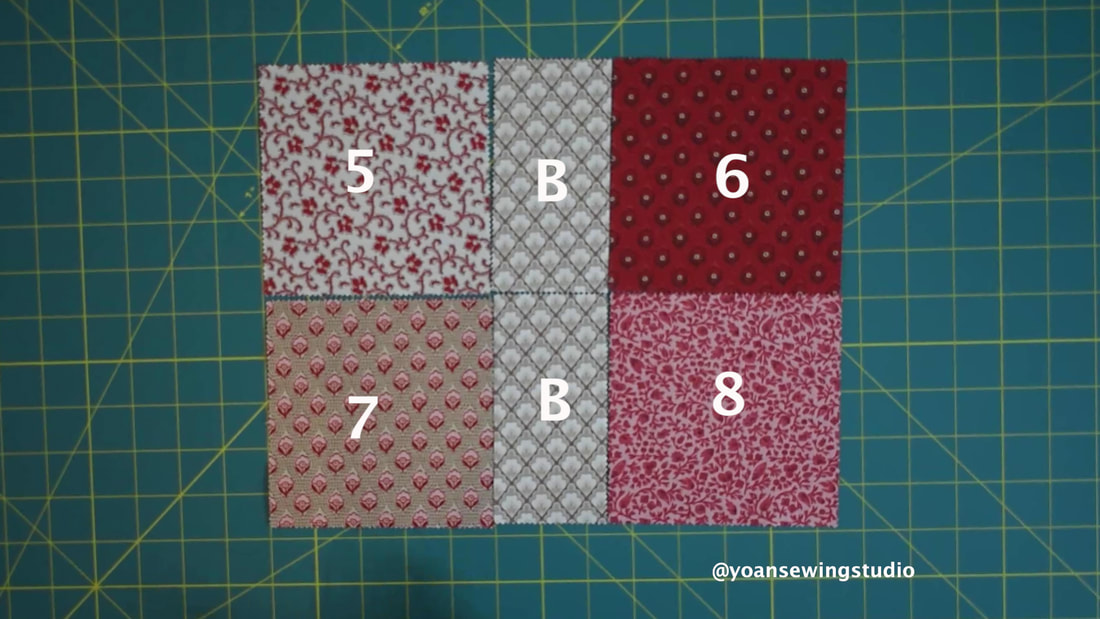
~Exterior~ To make the block : Cut the charm packs into 3 1/2" x 5" (fabric A) and 1 1/2" x 5" (Fabric B) Exterior Top From Fabric C cut two 16 1/2" x 2 1/2" Exterior bottom From Fabric C cut two 16 1/2" x 9 1/2" Pocket Binding : Cut 2 1/2" wide strip for the binding
~Interior~
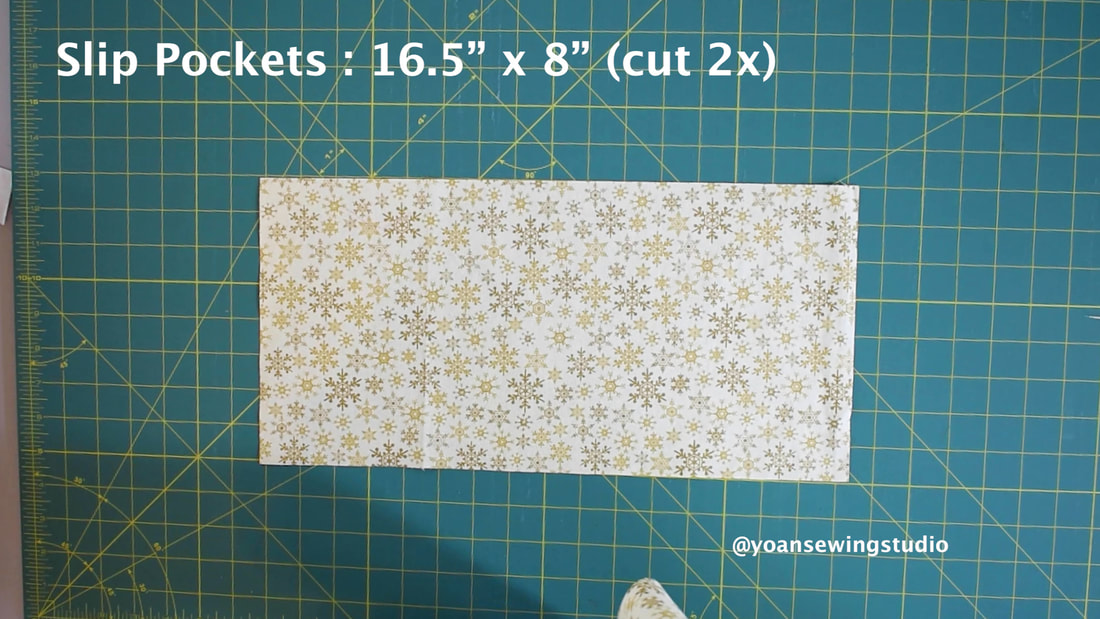
Facing From fabric C cut two 16 1/2" x 3" Lining From lining fabric cut two 16 1/2" x 13 1/2" Zipper pocket : From the lining fabric cut two 11" x 9" Slip Pocket From the lining fabric cut two 16 1/2" x 8" Straps From Fabric C cut two 22" x 4" Straps interfacing From the fusible interfacing cut two 21" x 2" Strap anchors From fabric C cut four 4" x 4" Disclaimer : This post contains affiliate links
Happy sewing!!
 Hello Friends, The Elena Bag sewing tutorial is now available for you to make. this bag is just so adorable, and will definitely brighten your day. We are going to use some charm packs to create that scrappy patchwork look and I promise you, it won't be complicated at all. There are 3 slip pockets, a lipstick pocket, and a zipper pocket inside. So not only pretty, this bag will function as well for your day to day activities. Lets get started by downloading the cutting diagrams for this bag :
Now, go ahead and enjoy the full video tutorial. Hope your project turns out great!! XOXO
|
Categories
All
©
Yoan Sewing Studio | All Rights Reserved
|
||||||||||||||
 RSS Feed