 This new (enlarged) version of the beloved Dainty wallet project offers extra card slots (6 slots), larger compartments, and faux leather/cork accent (flap & d-ring tab). Finished wallet measurements : 4 3/4" x 5 1/4" (12 x 13.3 cm) Features : 6x card slots 2x compartments (great for folded notes or extra cards) Button flap closure D-ring tab Compact and slim Get the PDF cutting instructions by clicking the above black button or here. This post may contain affiliate links. Commission earned when you make a purchase through any of these links with no additional charge. Thank you for your support. After you download the pattern, watch the full video tutorial of the Dainty wallet 2 and sew along with me. Don't forget to subscribe to my Youtube channel so you won't miss any future upload. Happy sewing!
0 Comments
 Today I am very pleased to share with you the Bitsy Bag Project. These bags may be small and compact in size, yet they have enough room to keep all of your essentials, great for everyday errands, or take one with you when traveling for a sightseeing tour.
Finished bag measurements : 5 1/2" wide x 8" tall x 2" deep (14 x 20.3 x 5cm) Before you get started, make sure to download the PDF pattern here or by clicking the below buttons. Note : If an ad pops when you click the button, please close it first to proceed. 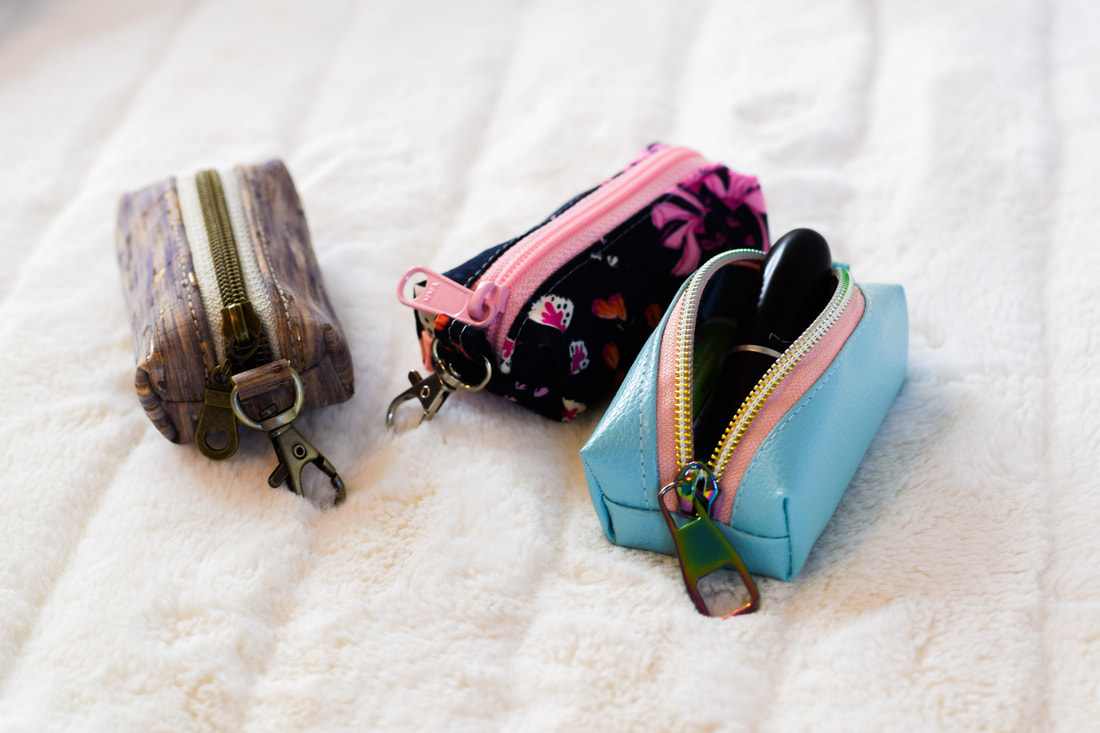 Lipstick/Chapstick pouches by YoanSewingStudio These adorable pouches are perfect to store your lip essentials from chapstick, lipstick, lip balm, etc.
Although this project is labeled as the "lipstick pouch", you may also use these pouches to keep other little items such as USB charger, headset, medicine, coins, money, anything that may fit in them. Finished pouch measurements : approximately 4" x 2" x 1" (10 x 5 x 1 cm). Features include : • Zipper closure • Swivel Hook 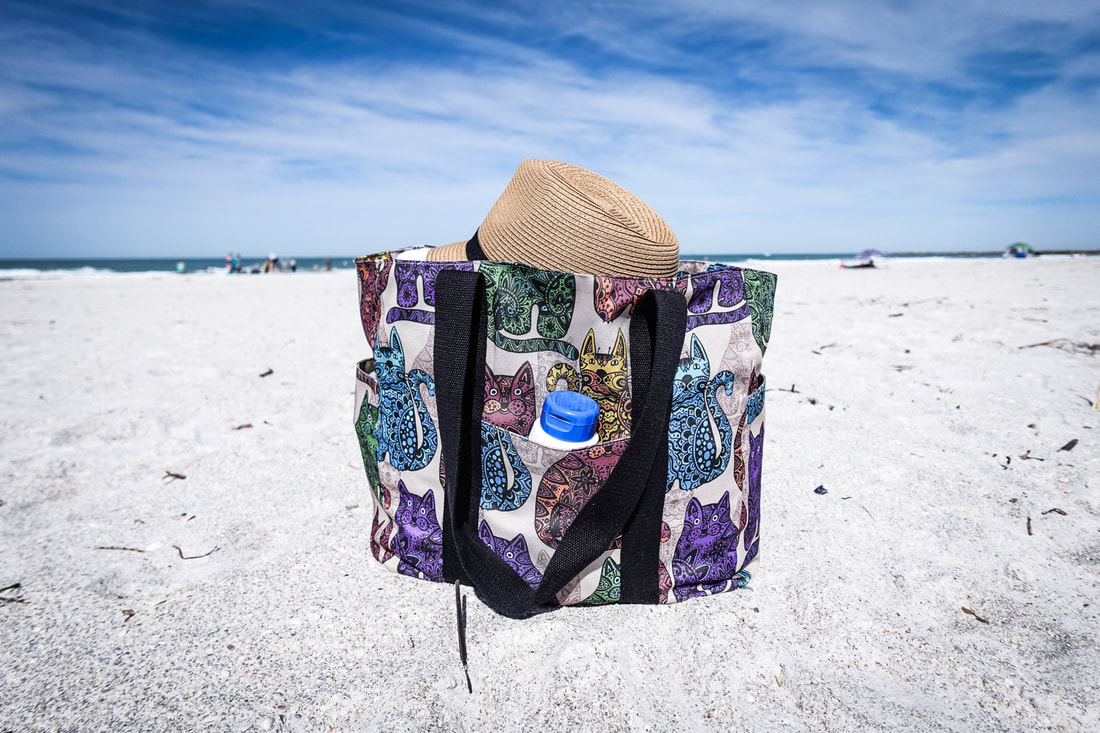 Waterfront Beach Bag by YoanSewingStudio The Waterfront Beach Bag is the perfect bag for your beach/lake/pool adventures this summer (or anytime of the year you book your vacation for).
This is a large tote bag that will fit all of your beach/ water activity essentials. I designed this bag to be light and packable thus it will take a little space in your luggage. Finished bag measurements : approx. 15" w x 13 1/2" t x 6 1/2" d (28 x 34.3 x 16.5 cm). 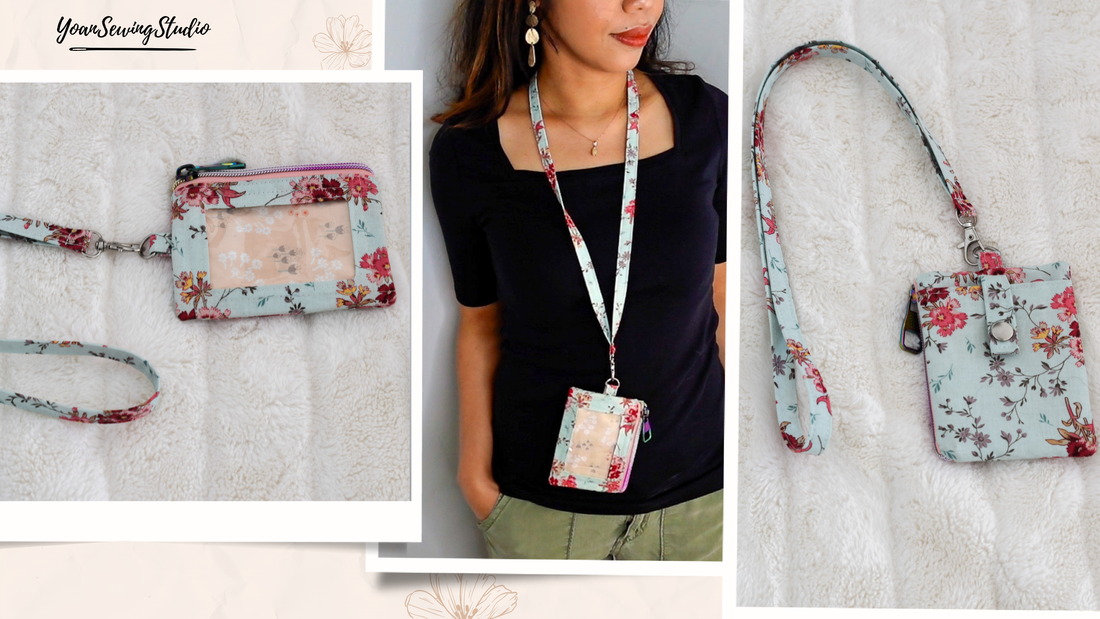 You will love this zippered ID wallet for everyday use. This minimalist yet charming little wallet will not only fit your ID, it can also accommodate few extra cards, cash, chap stick, coupon, receipt, etc.
Finished wallet measurements : 4 3/4" x 3 1/2" (12 x 9 cm). 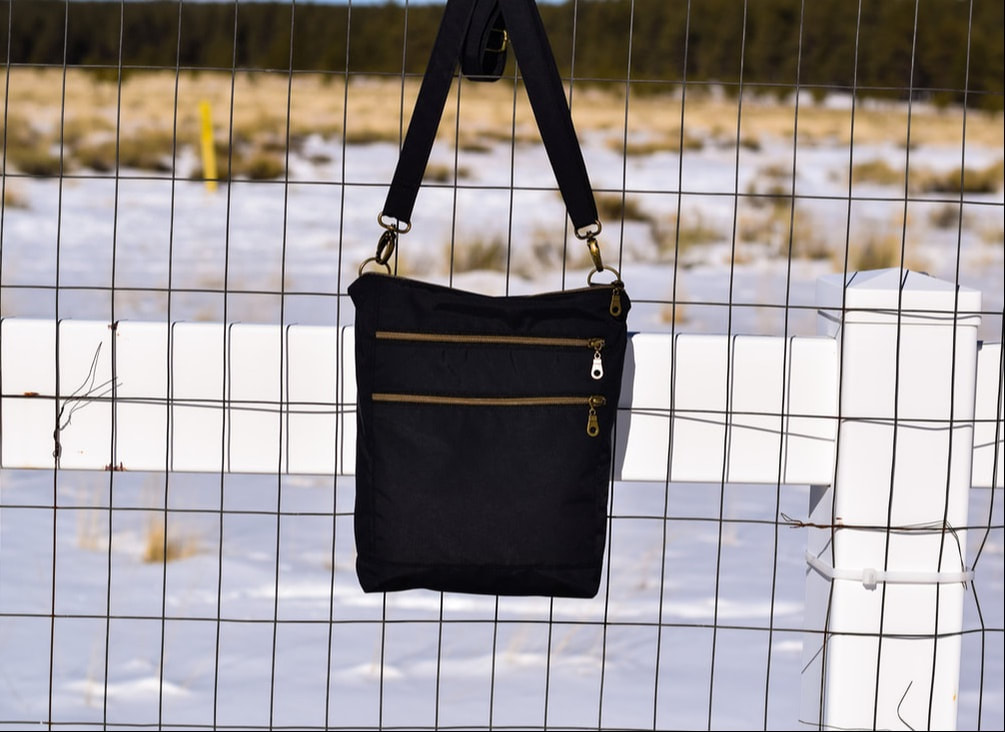 Upcycled three-zip crossbody bag by YoanSewingStudio In this new upcycling project, I am very excited to share with you the three-zip crossbody bag pattern that is made from an old winter jacket. Taking full advantage of the sturdiness and waterproofness of a jacket material, plus the functionality of its design, this bag will surely become one of your favorite.
If you happen to have an old, slightly worn out, or outdated jacket, you may use that for this project, otherwise feel free to use fabric that you have in your stash (canvas, linen, denim, or cordura fabric will work great). 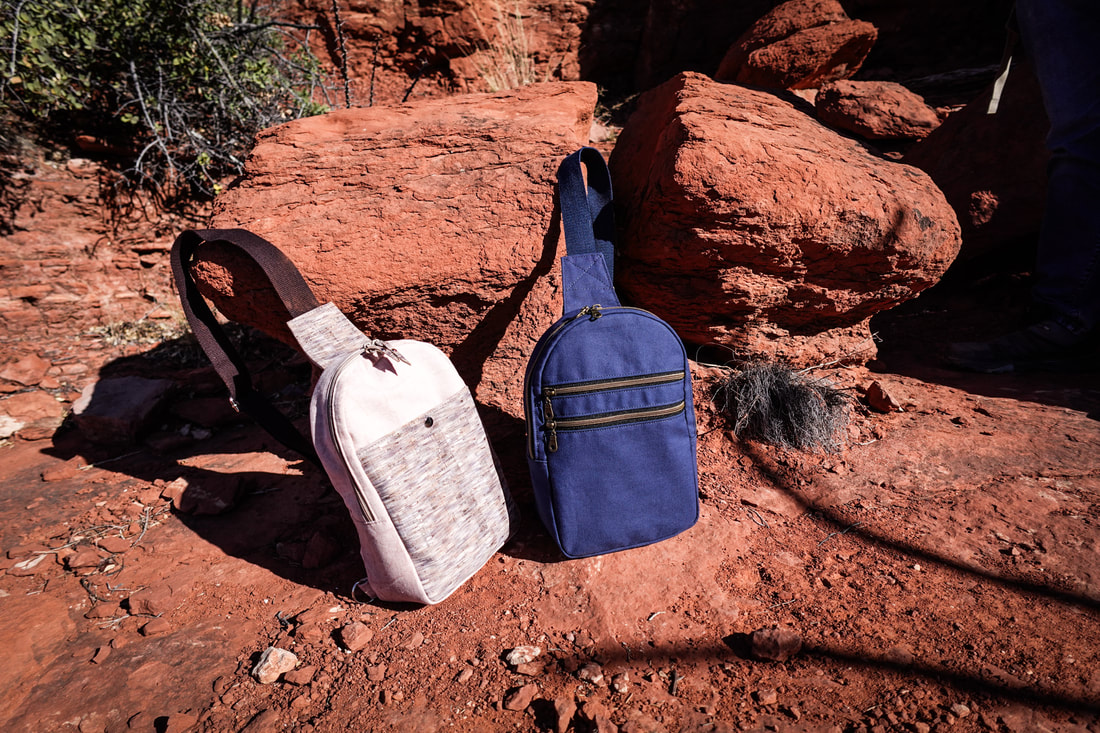 Serene Sling Bag Design 1&2 by YoanSewingStudio Need to make a fun, practical, yet adorable bag for your next adventure? Check out the Serene Sling Bags project.
Finished Bag Measurements : 7 1/2" wide x 11" tall x 3 1/2" deep (bottom). Click the below rectangle buttons to get the patterns ⬇️ 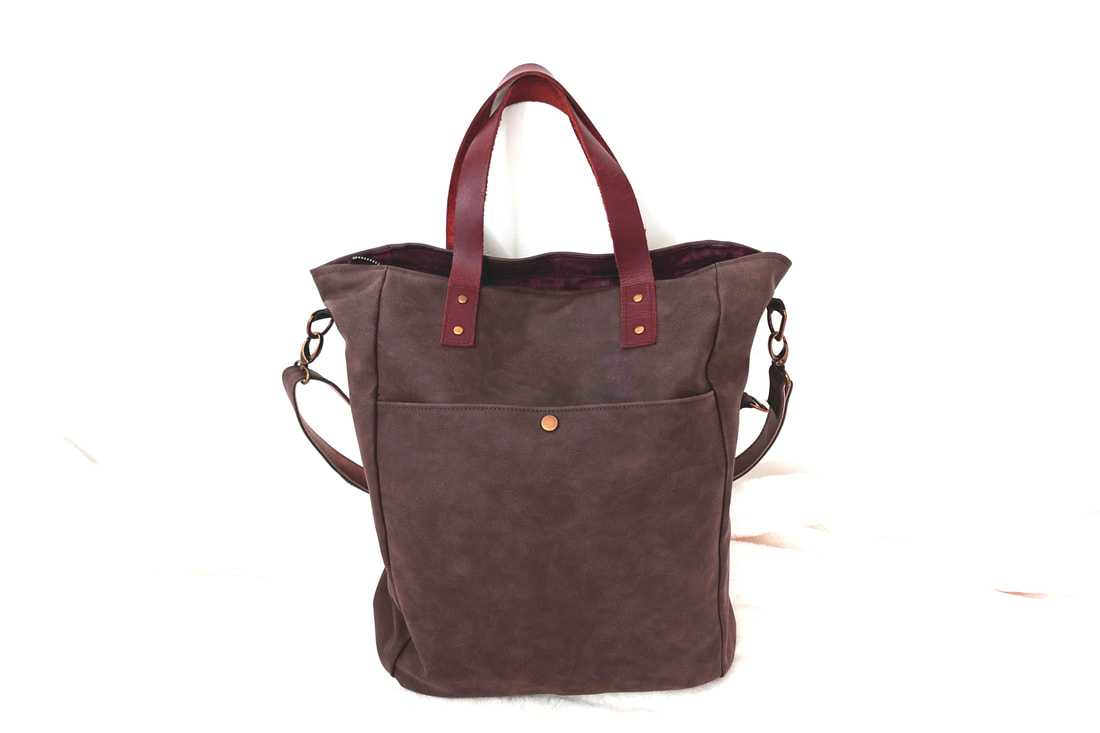
PATTERN UPDATE 9/26/23 at 8:38am MST - Please redownload your pattern if you got yours before the stated.
The Roaming Tote is designed for you to travel in style. This crossbody style tote bag comes with enough room and pockets to carry your essentials, a luggage sleeve (for carry on suitcase) to keep you at ease, yet looking very chic. Finished bag measurements (lay flat): 15" wide (top) x 14 1/2" tall x 5 3/4" deep (bottom center). Features include Exterior slip pocket Luggage sleeve (for carry on suitcase + zipper pocket) Interior zipper pockets (2x slots) Tablet/ Laptop (13") compartment Adjustable Strap
Continue reading below to see the link of the materials used in this project.
This post may contain affiliate links. Commission earned when you make a purchase through any of these links with no additional charge. Thank you for your support. 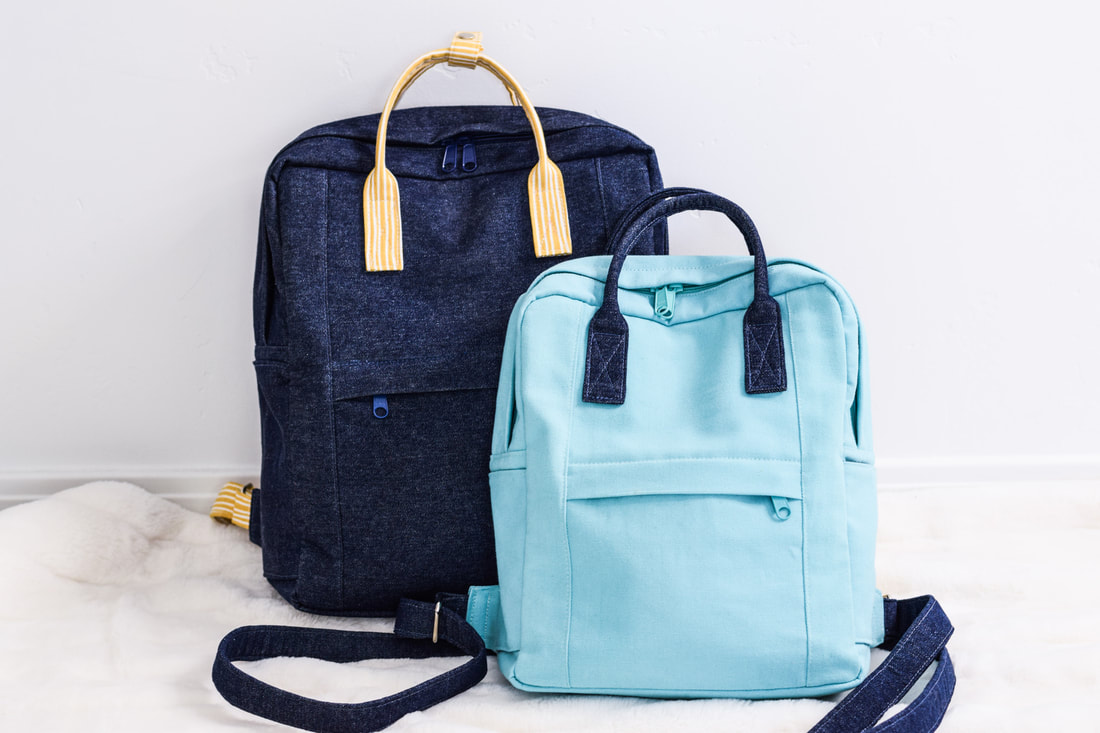 Biru Backpack by YoanSewingStudio These adorable Biru backpacks are perfect for your everyday adventures, travel, day trip, etc.
Finished backpack measurements Small : Approx. 9 1/2" w x 12" h x 3 3/4" d (24 x 30.5 x 9.5 cm). Large : Approx. 10 1/2" w x 13 1/2" h x 4 3/4" d (26.7 x 34.5 x 12 cm) 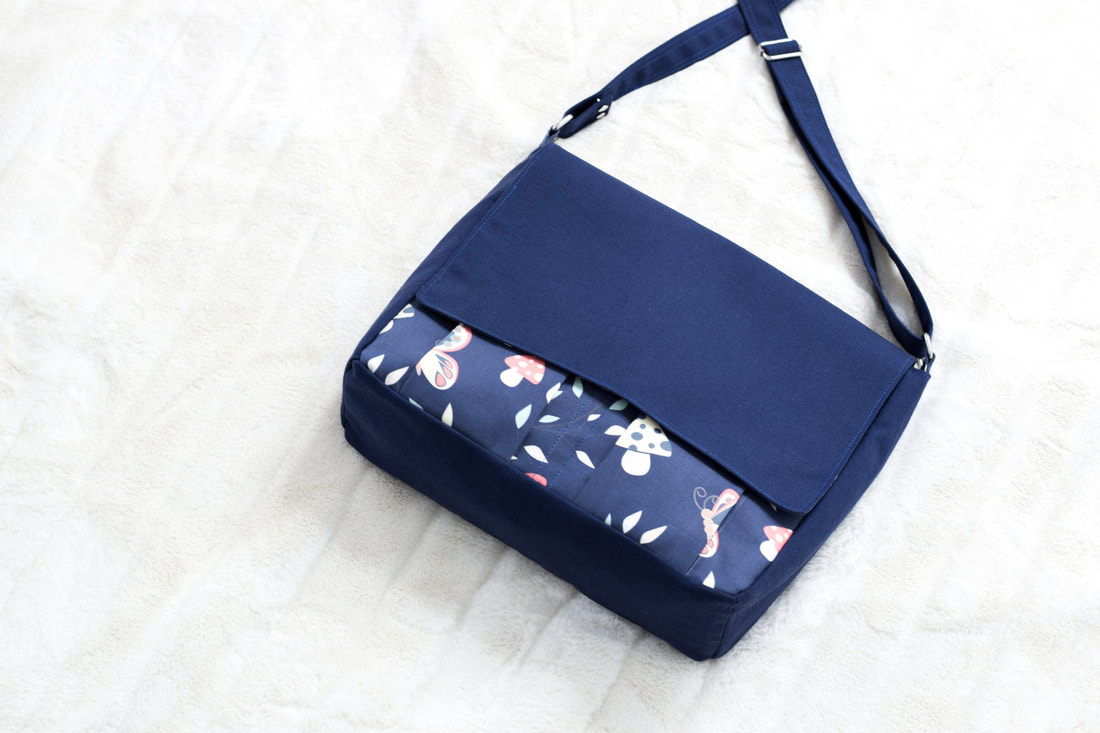 Mina Messenger Bag Design 1 by YoanSewingStudio The Mina Messenger Bag features two front pleated pockets, magnetic snap closures, adjustable strap, interior zipper pocket and interior slip pockets. You will love this bag for everyday use, work, school, etc. UPDATE : To make your life easier, the pattern pieces (of the flap, back, front also the stabilizers) are no longer overlapping, just print, assemble then cut (no more tracing) :). Finished Bag Measurements
Design 1 (Large) : 13 1/2" x 10 1/2" x 3 3/4" (34.5 x 26.5 x 9.5 cm) Design 2 (Small) : 10" x 7 1/2" x 2" (25.5 x 19 x 5cm) |
Categories
All
©
Yoan Sewing Studio | All Rights Reserved
|
 RSS Feed